Using the GitLab Platform in the Browser
This chapter introduces the GitLab environment through the browser. Note that the screen outputs may vary to that shown as the web interface is regularly updated, however the concepts should remain the same.
Accessing your Project(s)
Once you have an account on The Open Group GitLab server, you will need to access the project(s) in which you want to participate.
How you do this depends on whether you are connecting through your web browser, or working locally using a Git client. You may need to be explicitly added as a project member, and need to contact the project owner.
Accessing through the Web Browser
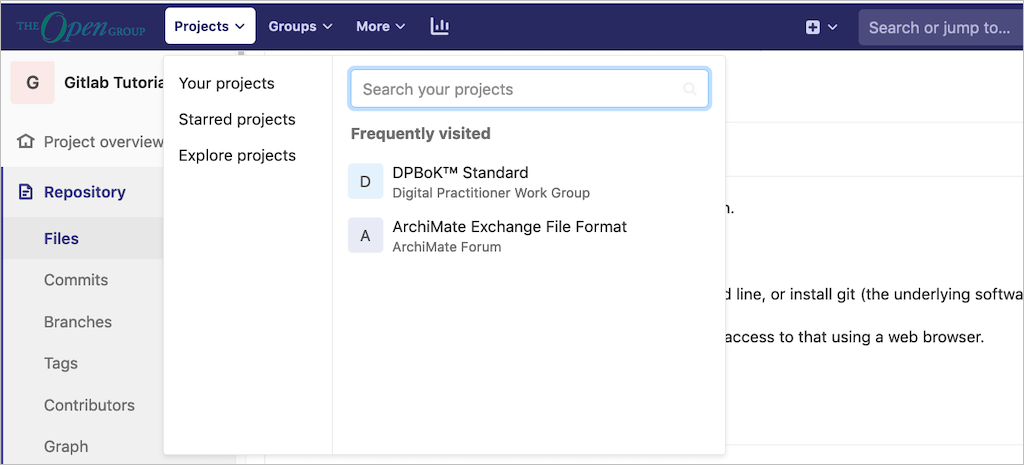
In the browser click The Open Group logo in the top left of the screen to go to your Home page, which will then show your “Projects”. This allows you to see the projects for which you are a member, and those you accessed recently.
Anatomy of a Project
Let us look at a very simple project, the Cats and Dogs project, one of a couple of playground projects set up to allow you to experiment.
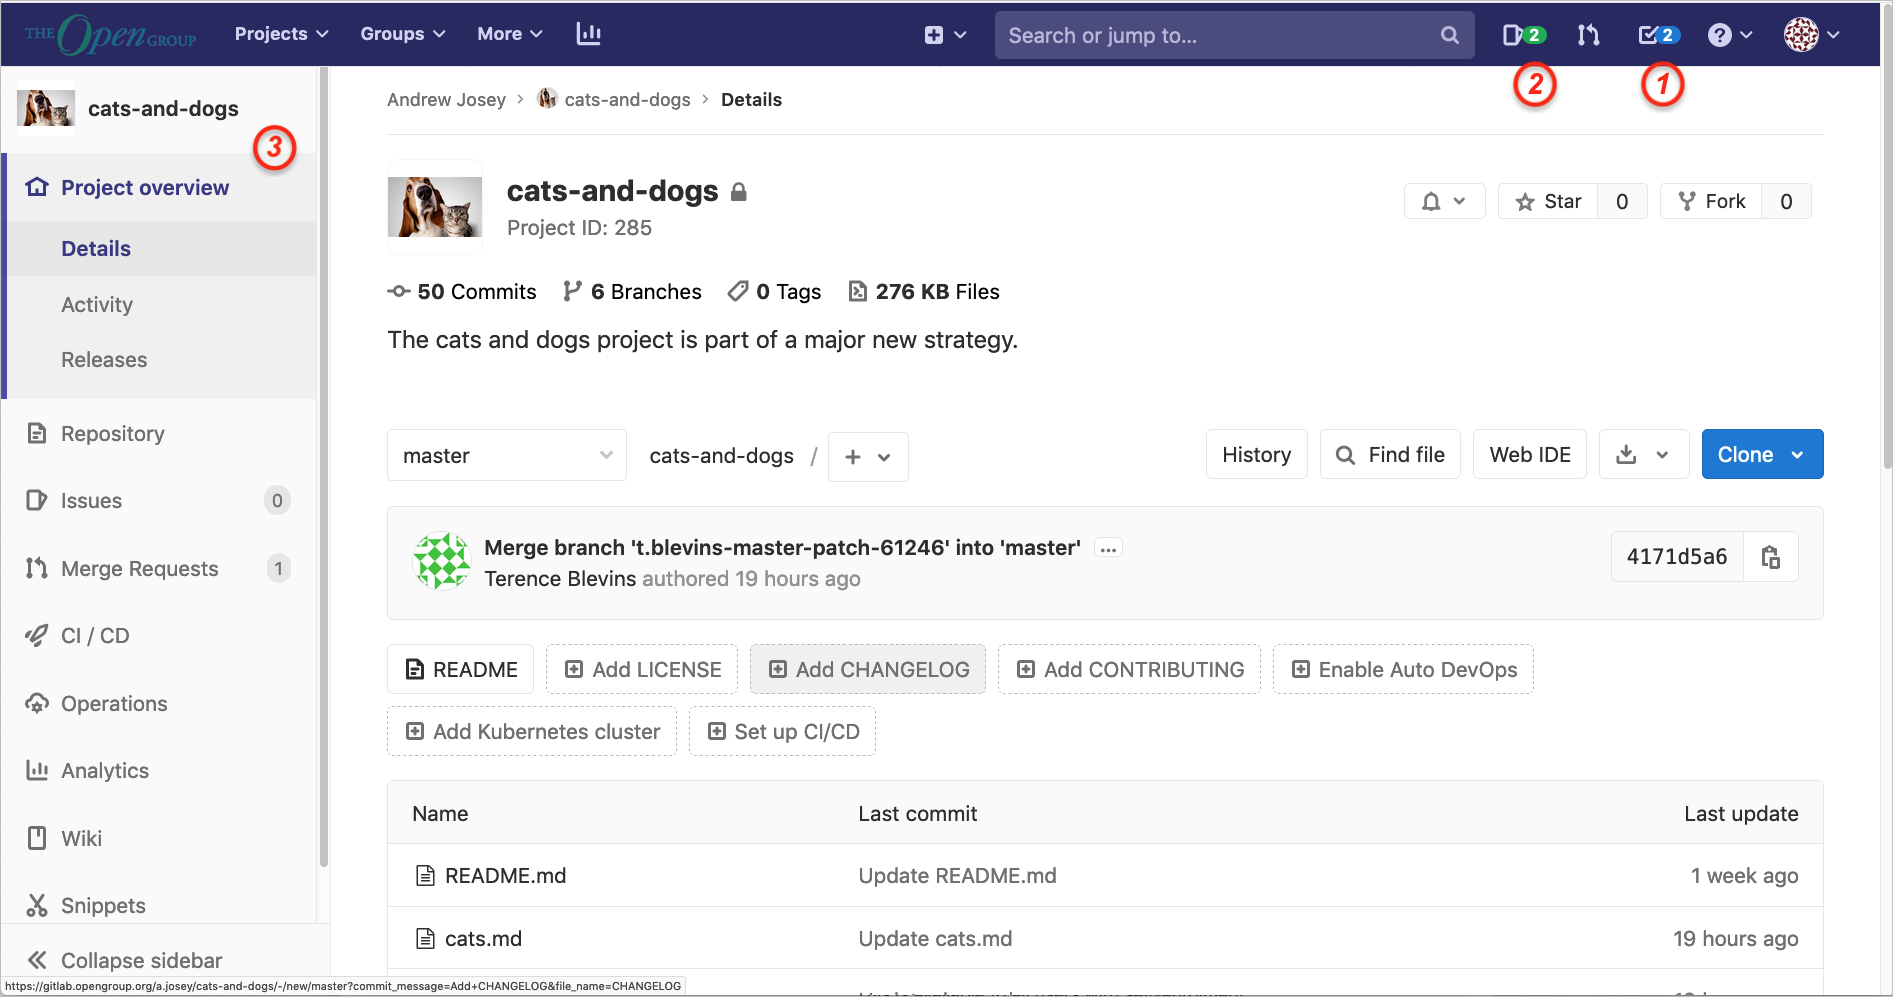
The top of the left panel has a number of buttons. This includes a list of Issues assigned to you, and your To-Do list.
The following are shown in Figure 2:
| 1 | The To-Do list
The To-Do list displays a chronological list of items that are waiting for your input, all in a simple dashboard. In the dashboard you are able to mark to-do items as done. |
| 2 | The Issues list
The Issues list shows all issues assigned to you across all projects. |
| 3 | The sidebar
The sidebar contains all the features available to a project. The main ones of immediate interest are:
|
My Hello World Example Part 1
This is a simple exercise to get you started.
-
Create a project, called "My Hello World", with a README file
-
Make changes to the README file
-
Preview the changes
-
Commit the changes
-
View the commit history and diffs
Creating a Project with a README File
You can select the “New project” button, or use the plus icon in the navigation panel. This gives a choice for a blank project, create from template, or import a project. Click on Create blank project. This will present a screen, as shown in Figure 3.
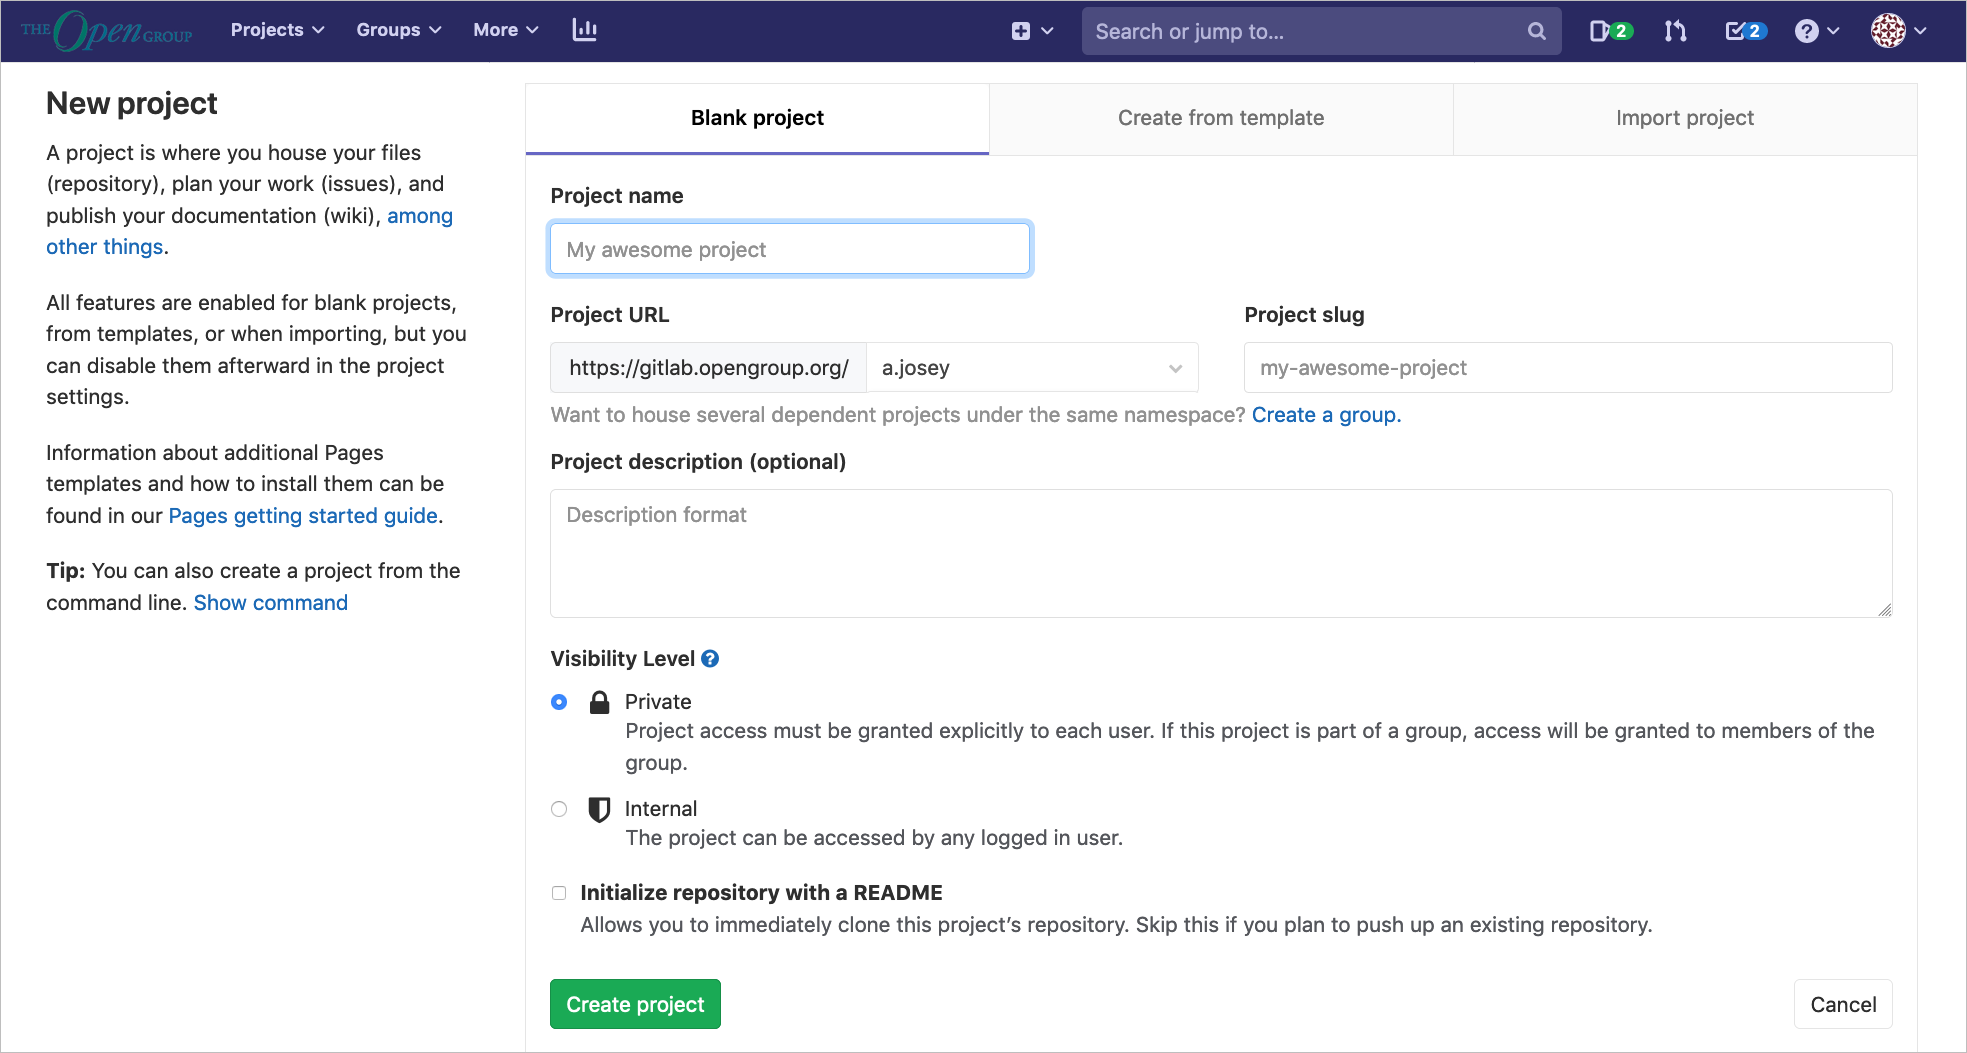
On the “Blank project” tab, enter the following information:
-
The name of your project in the “Project name” field. You cannot use special characters, but you can use spaces, hyphens, underscores, or even emoji. When adding the name, the “Project slug” will auto populate. The slug is what will be setup as the URL path to the project. If you want a different slug, input the project name first and then change the slug.
-
The path to your project in the “Project slug” field. This is the URL path for your project that the GitLab instance will use. If the “Project name” is blank, it will auto populate when you fill in the “Project slug”.
-
The “Project description (optional)” field enables you to enter a description for your project’s dashboard, which will help others understand what your project is about. Though it’s not required, it is a good idea to fill this in.
-
Changing the “Visibility Level” modifies the project’s viewing and access rights for users. If you are unsure, leave as “Private”.
-
Selecting the “Initialize repository with a README option” creates a README file so that the Git repository is initialized, has a default branch, and can be cloned (recommended)
-
Finally, click “Create project”.
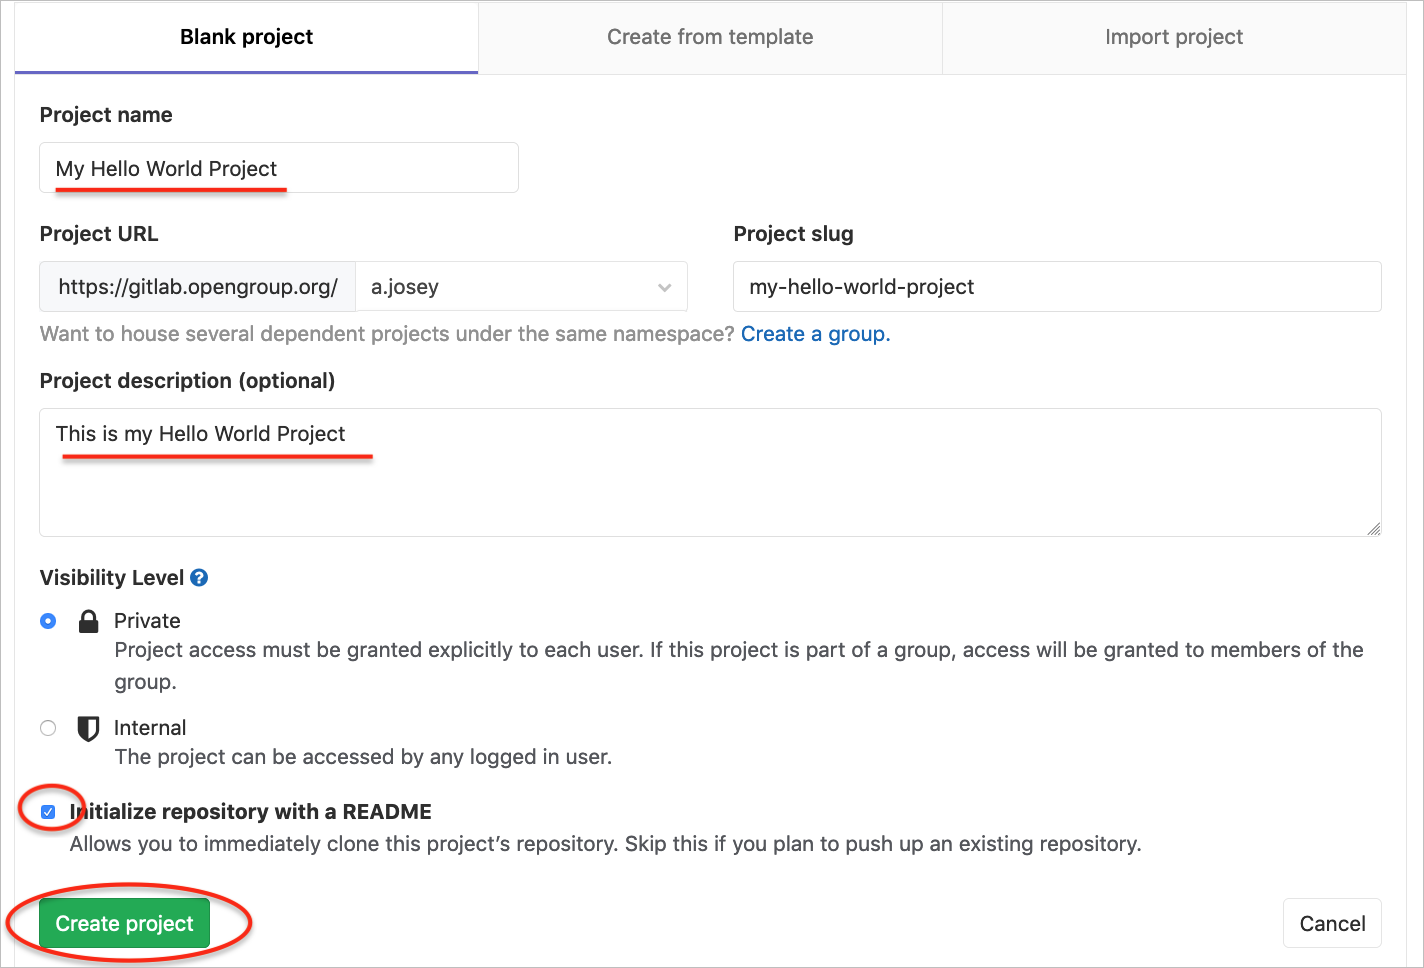
Figure 4 shows the setup for My Hello World project:
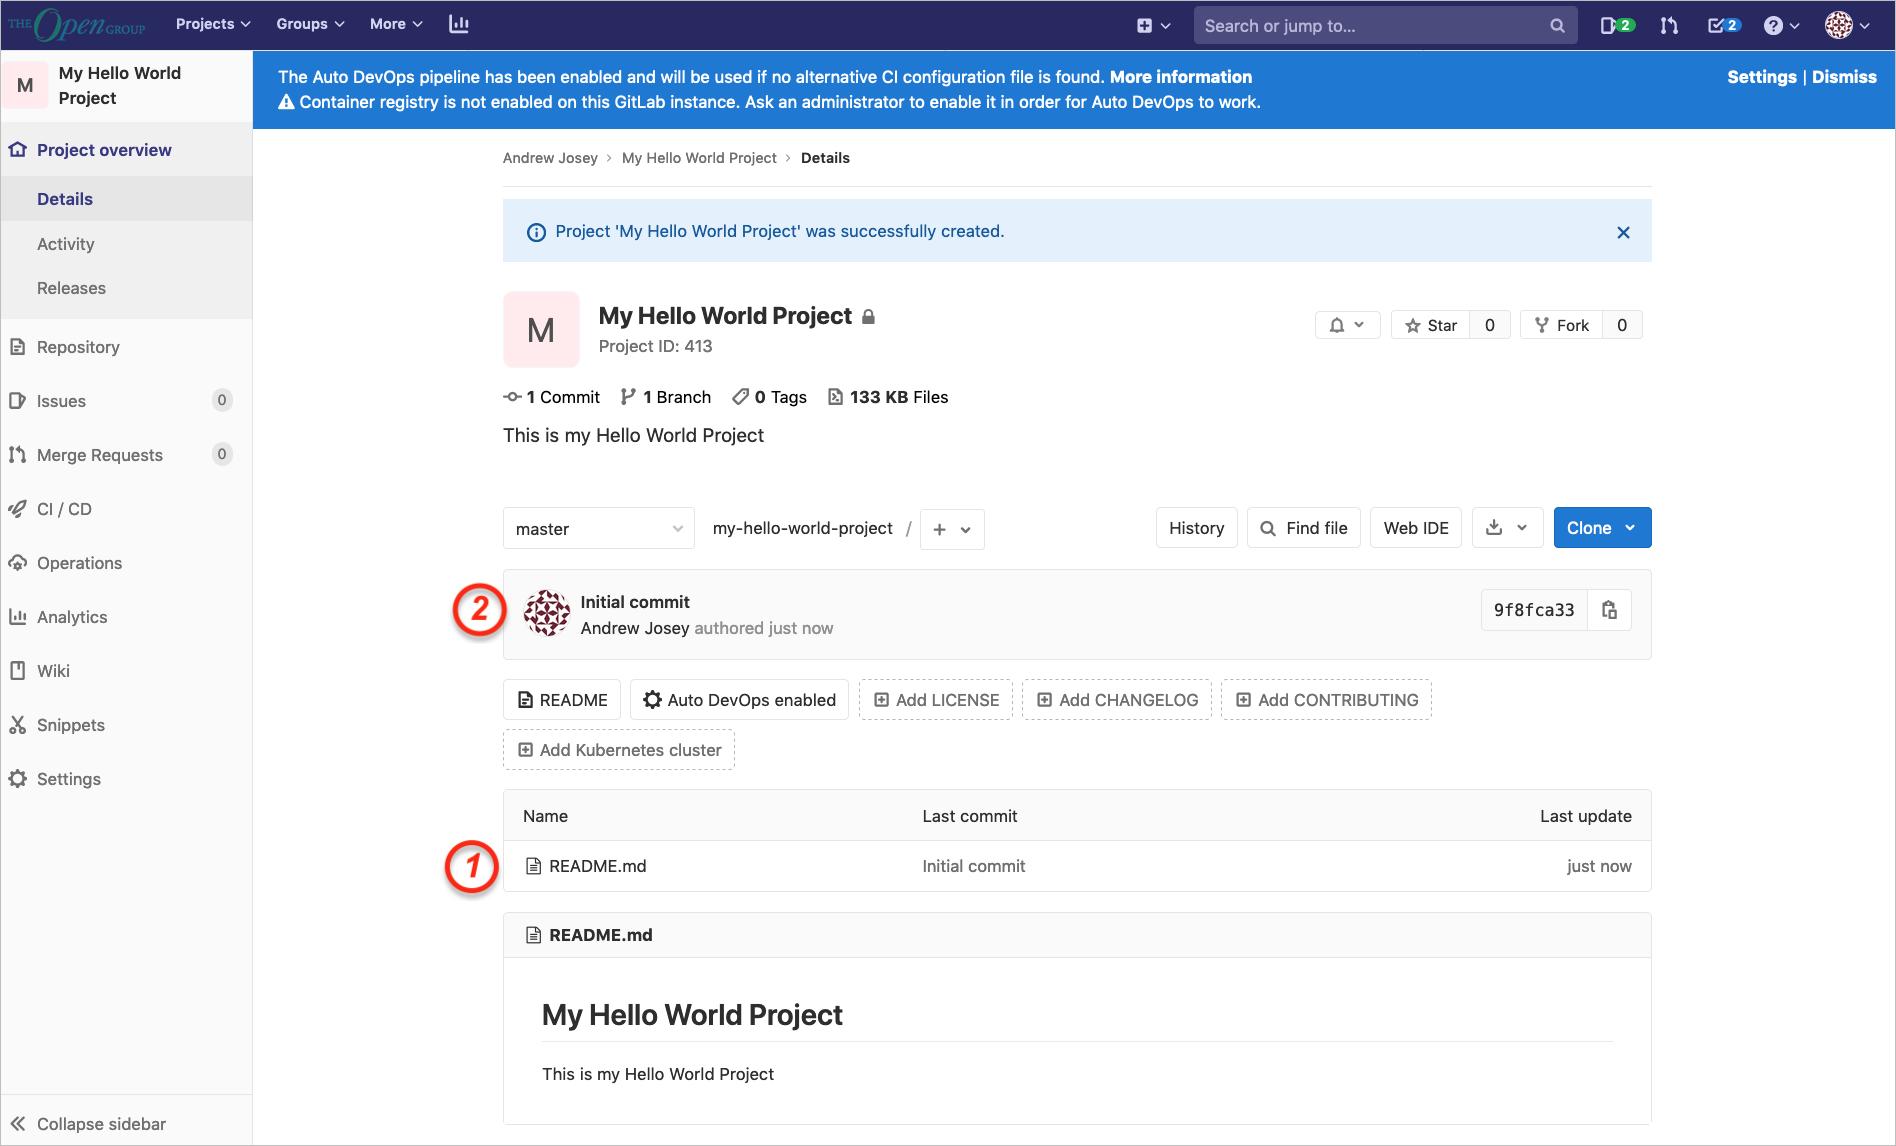
After you click on “Create project” this will then instance the project as shown in Figure 5:
| 1 | At this stage a single commit (save) has been made in the repository, which has created the README.md file |
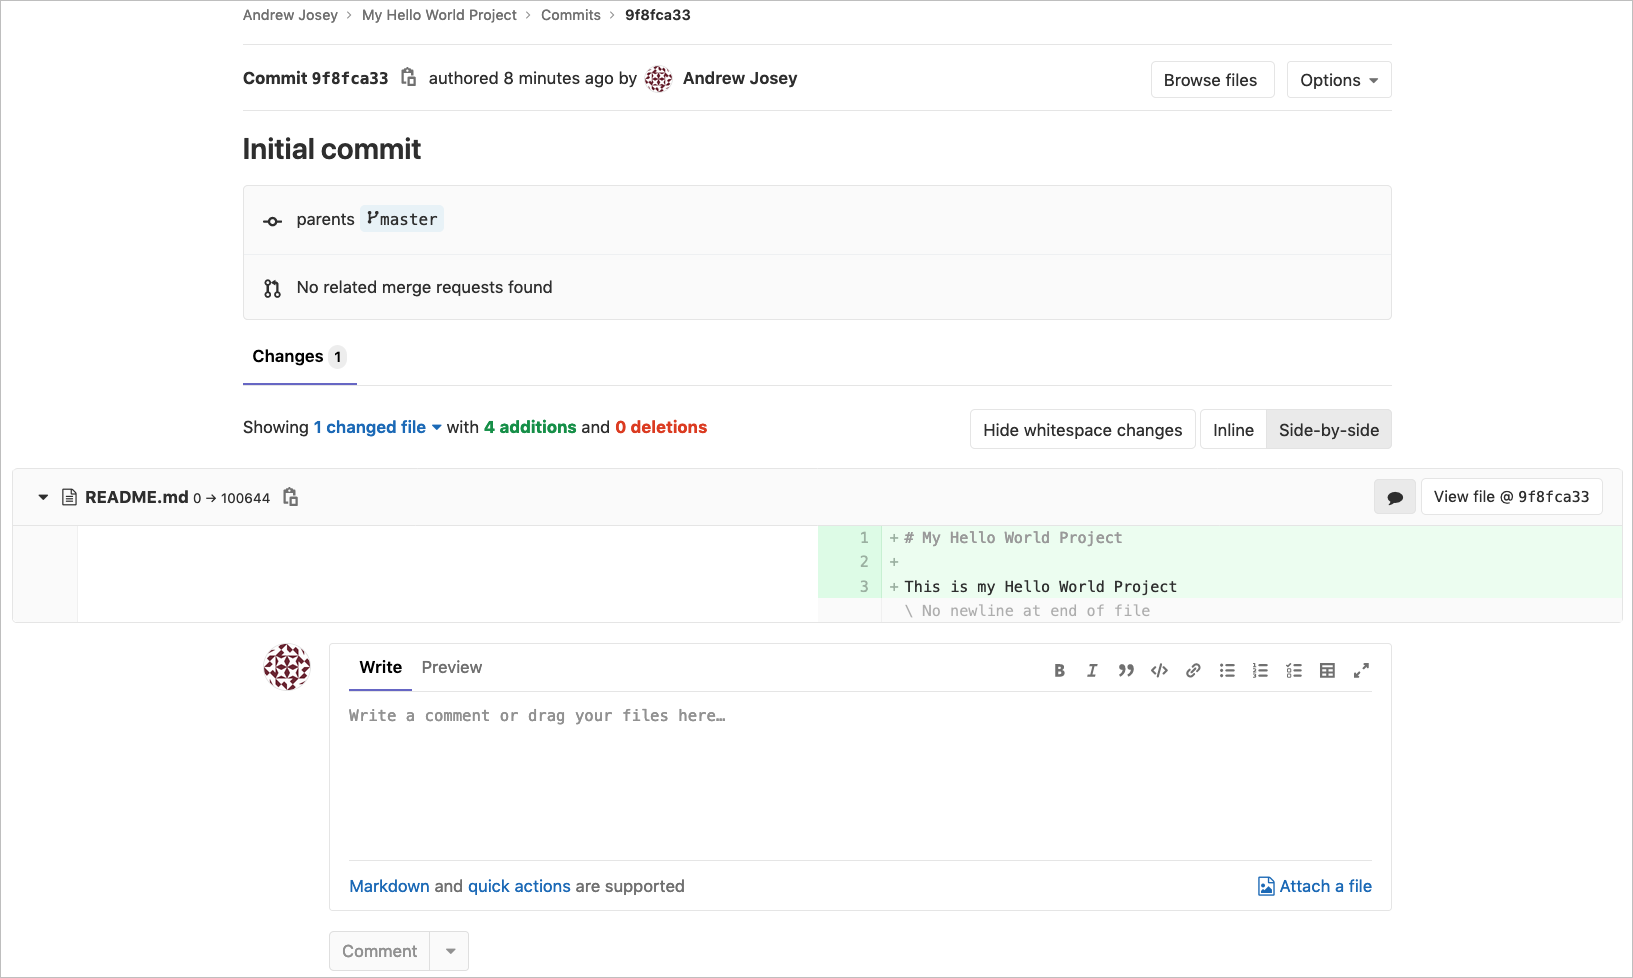
| 2 | Clicking on the “Initial commit” in the center of the dashboard will show the details, as in Figure 6 |
Making Changes to the README File
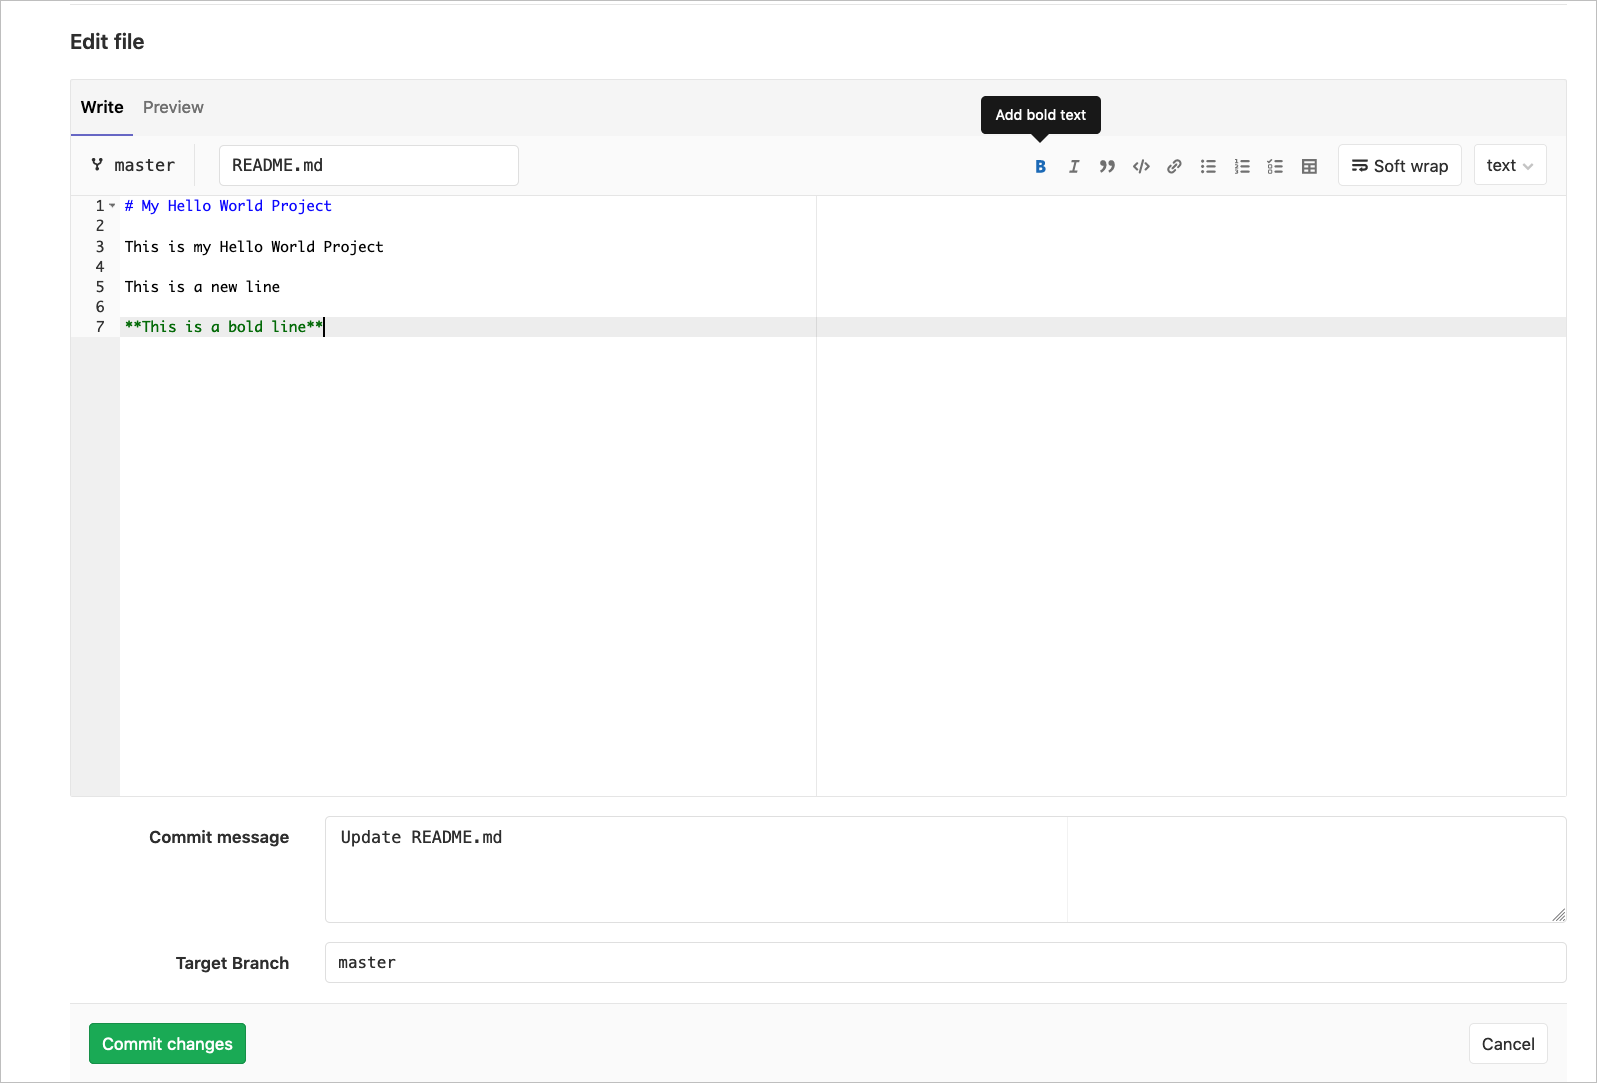
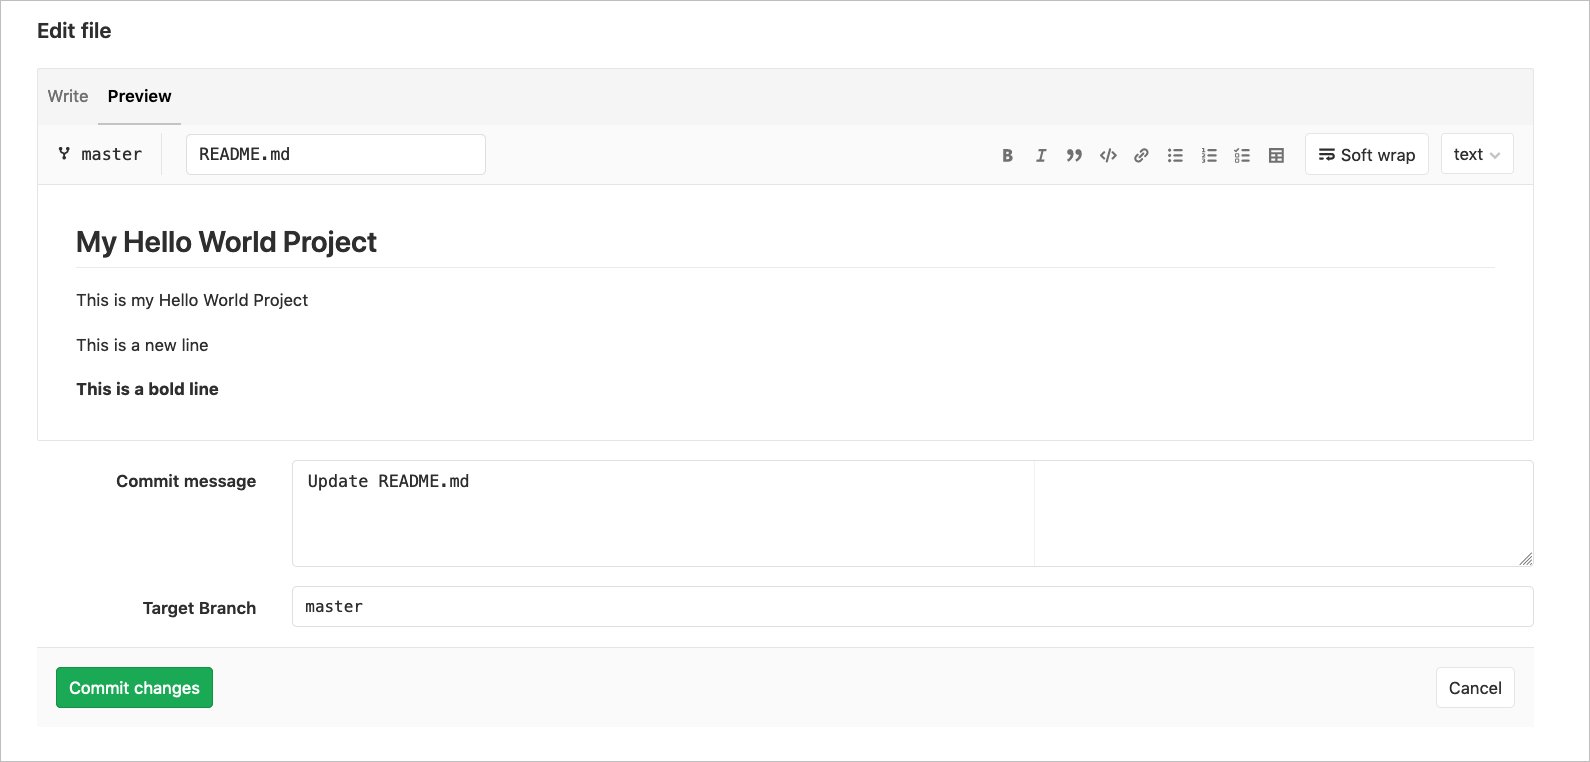
Clicking on the blue “Edit” button, takes you into a simple editor with buttons to set text attributes, as shown in Figure 9. There is also a “Preview” tab to check the output, as shown in Figure 10. There is some sample text to start with. We will remove most of it and add some lines at the top.
Committing the Changes
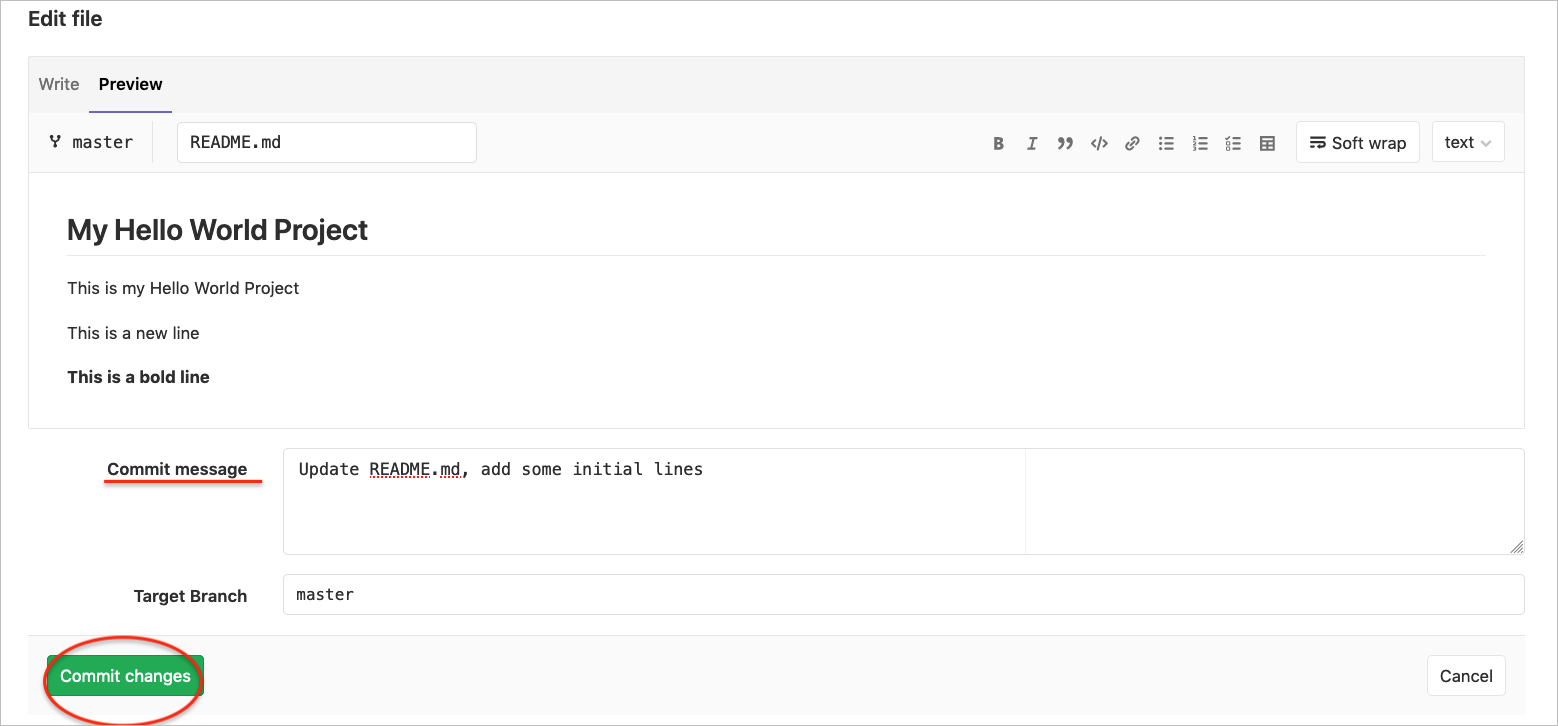
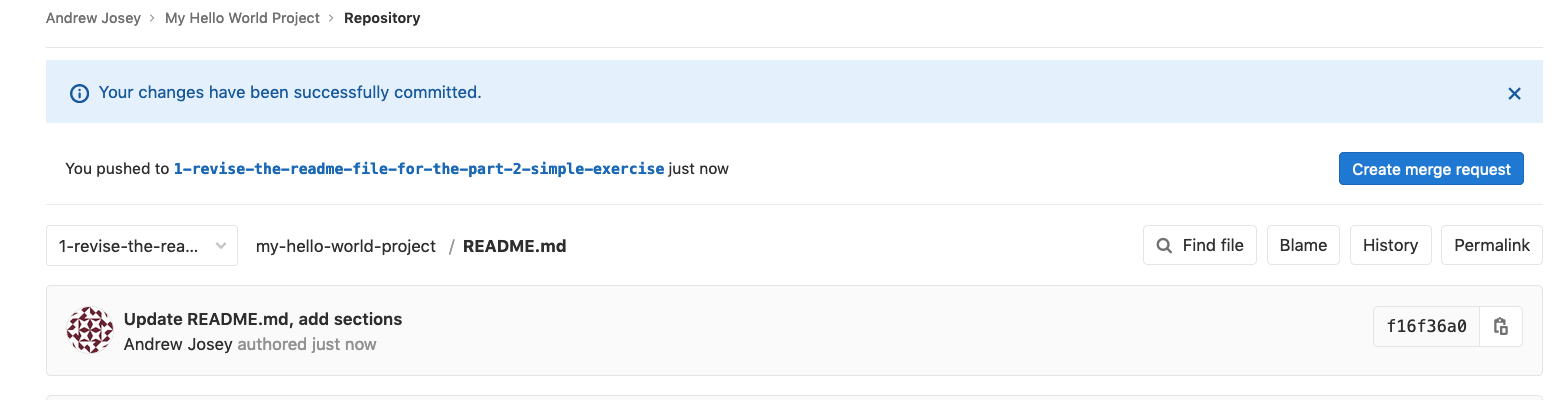
Once you are ready, you should enter some notes about the change in the “Commit message” box, and save the change by selecting the “Commit changes” button, as shown in Figure 11.
The screen will confirm the changes were committed, as in Figure 12.
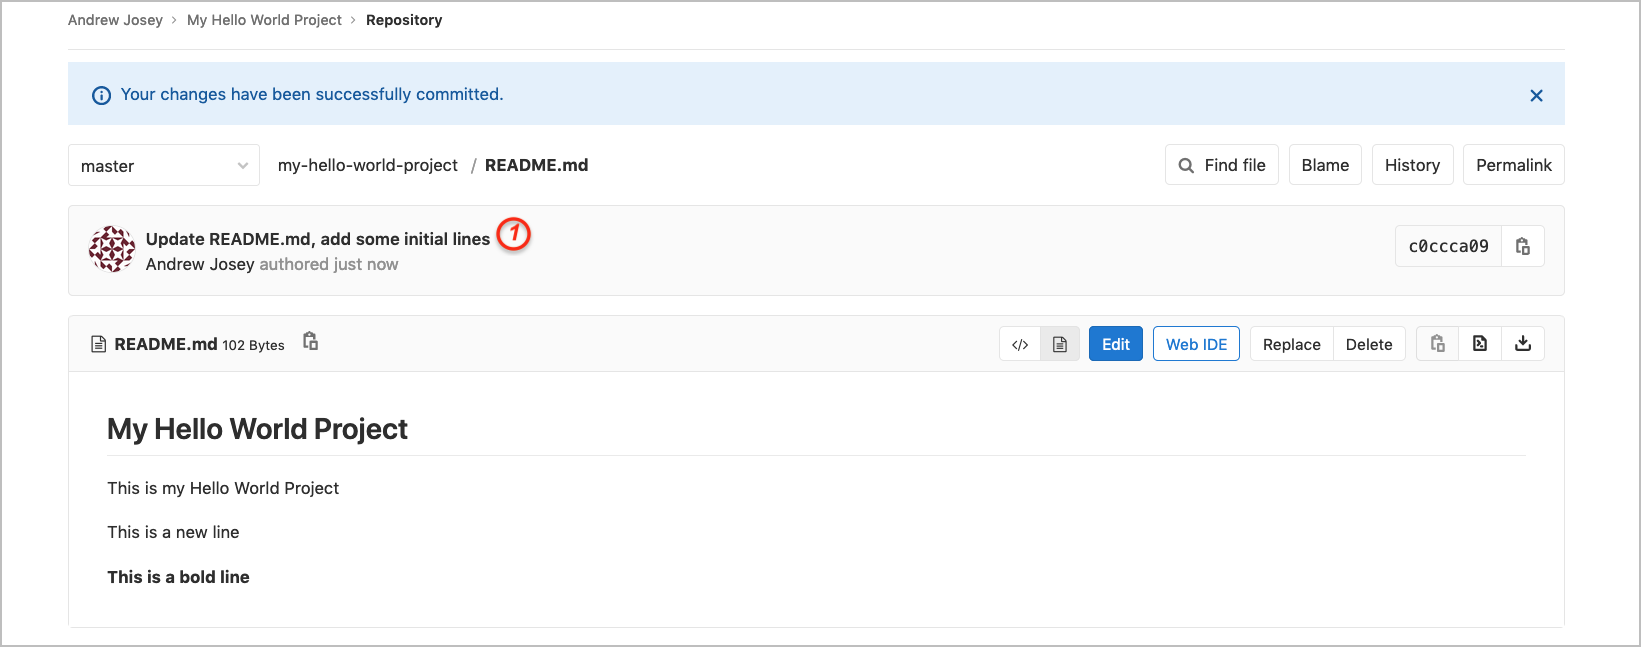
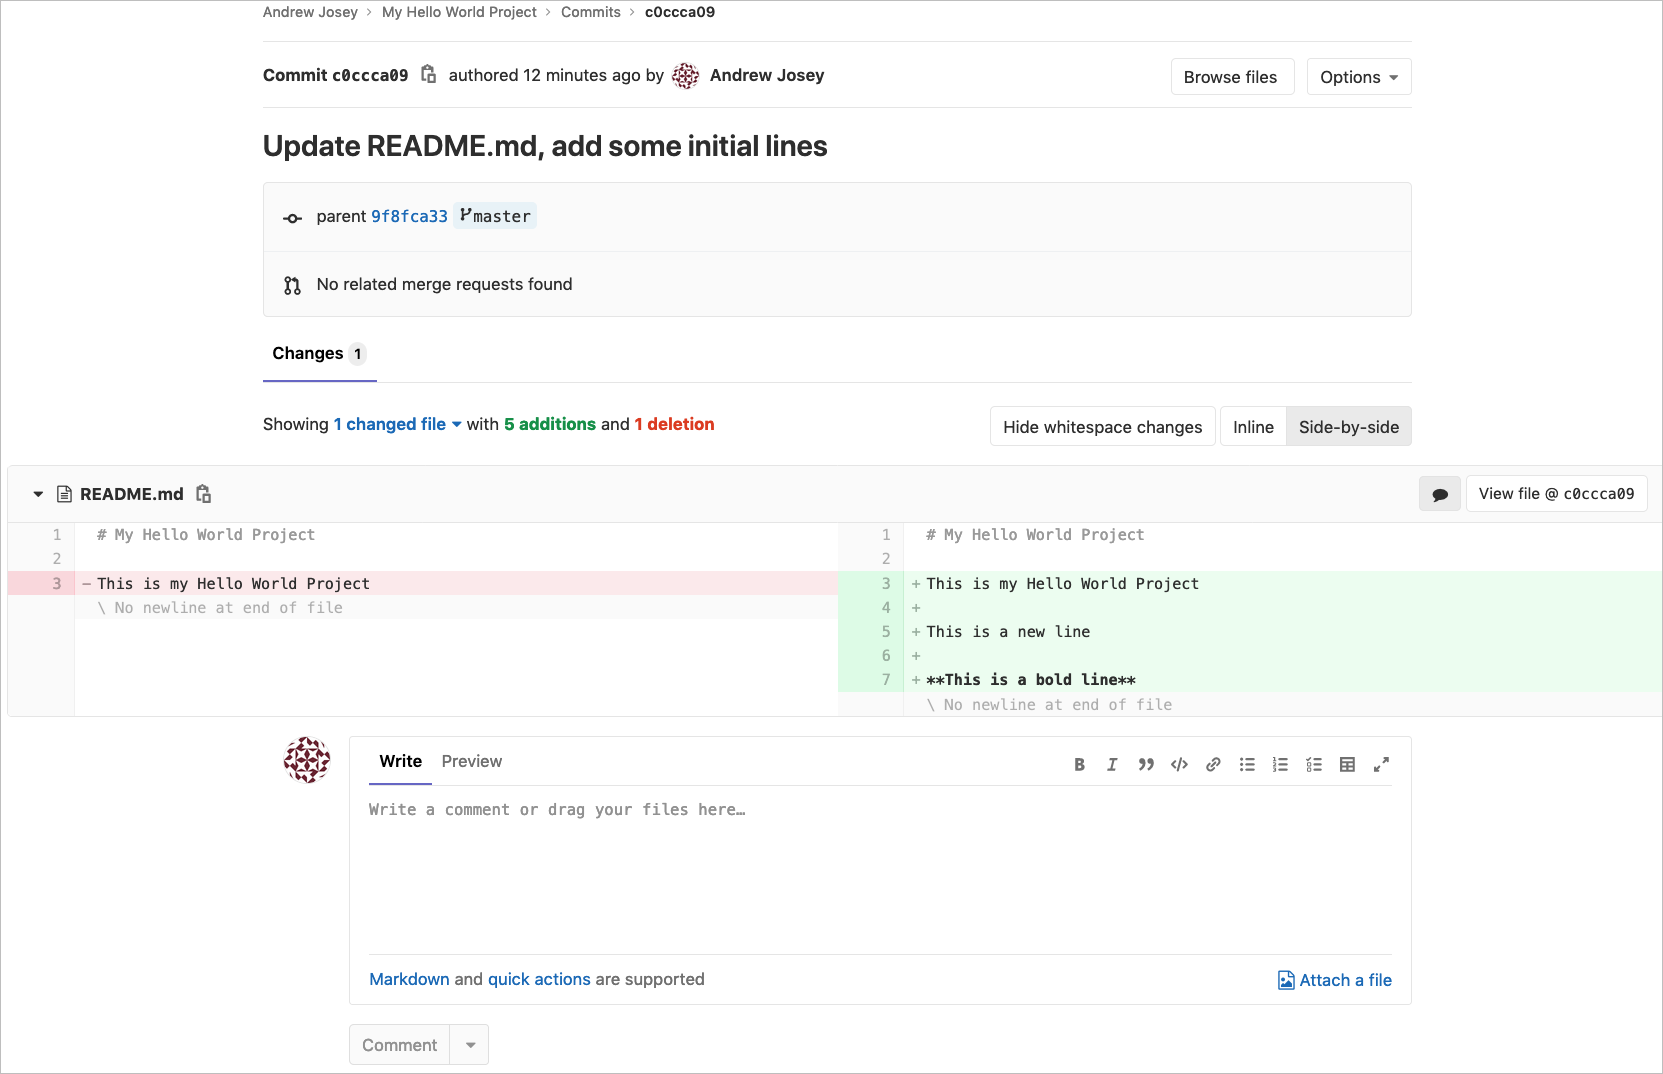
| 1 | Click on the commit summary text to view the detailed change, as shown in Figure 13. |
My Hello World Example Part 2
This is another simple exercise introducing the concepts of issues, branching, and merging.
-
Create an issue for the My Hello World Project requesting a change to the README file
-
Create a new branch for the My Hello World Project
This is a way to work on different versions of the project at the same time.
-
Make changes to the README file in the new branch and review the main branch
-
Create a merge request to merge your branch into the main branch
-
Review the merge request to merge your branch into main
-
Complete the merge and check the resulting README file
Creating an Issue
When working collaboratively it is good practice to create an issue for the change you plan to propose to make to a document. Issues can allow sharing and discussion of proposals before, and during their implementation. Issues contain a variety of content and metadata, allowing flexibility in how they are used.
To submit a new issue, use the plus icon in the navigation panel, and select “New issue”.
In Figure 14 the following is shown:
| 1 | The issue has been assigned |
| 2 | The “Description” of the issue includes a simple checklist that is used to track the progress of the issue, including development and review |
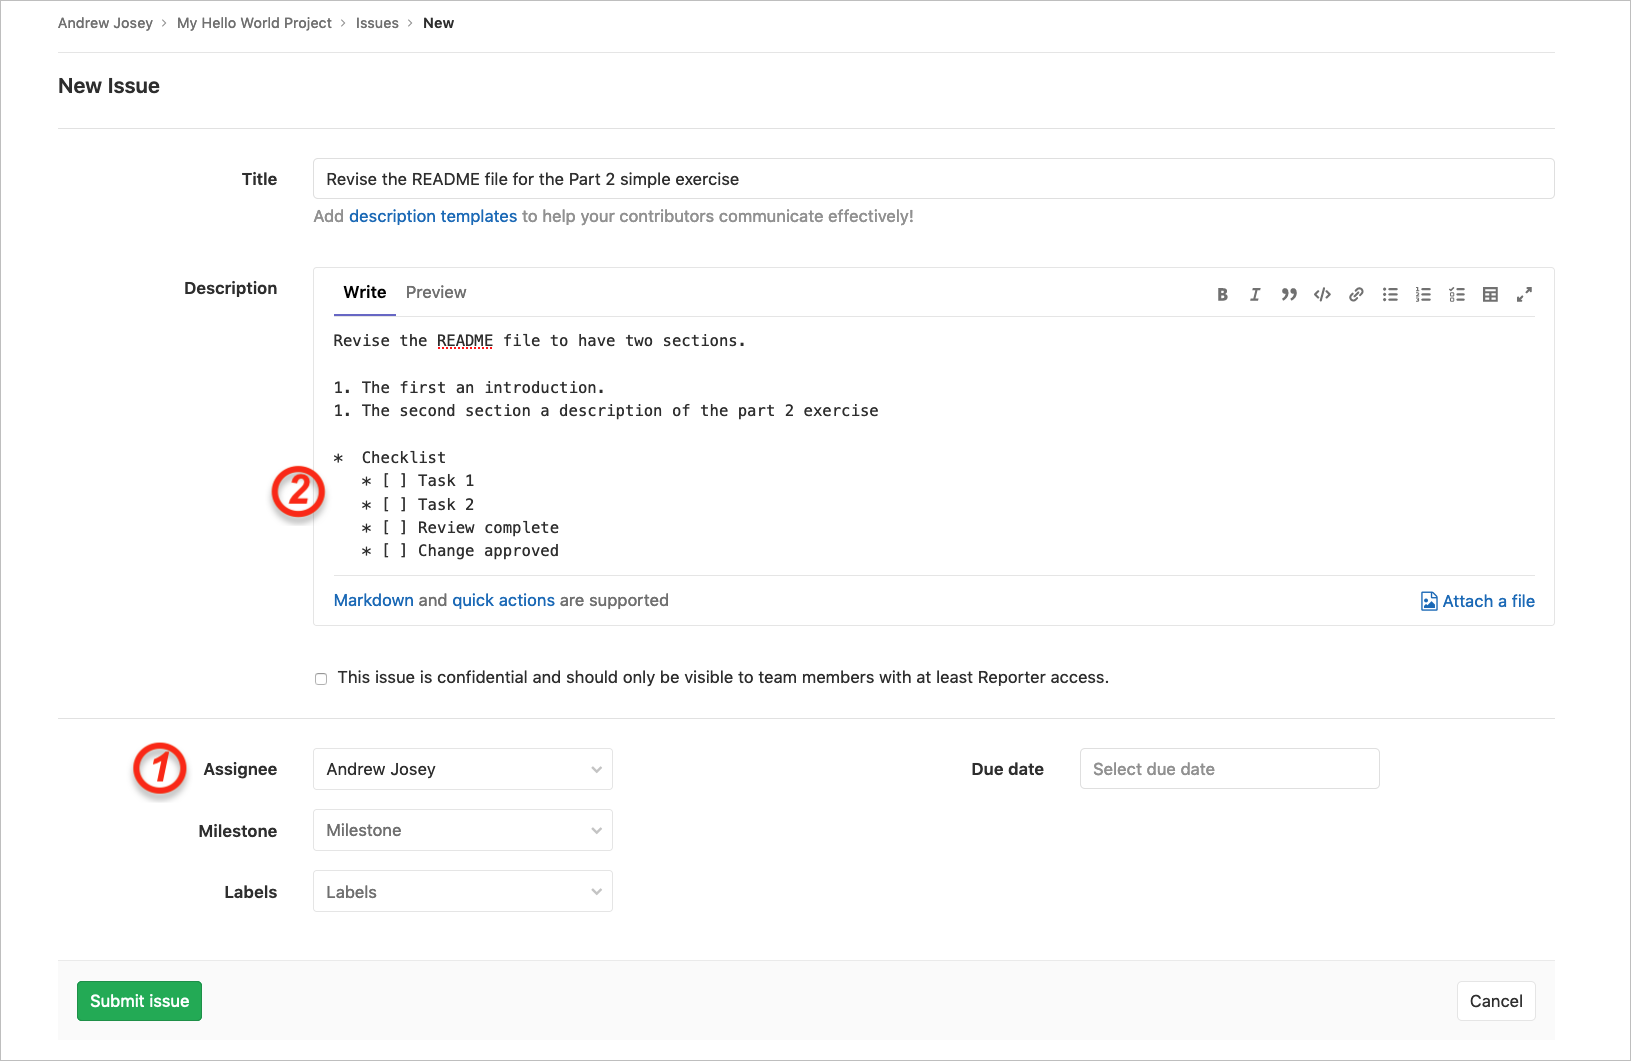
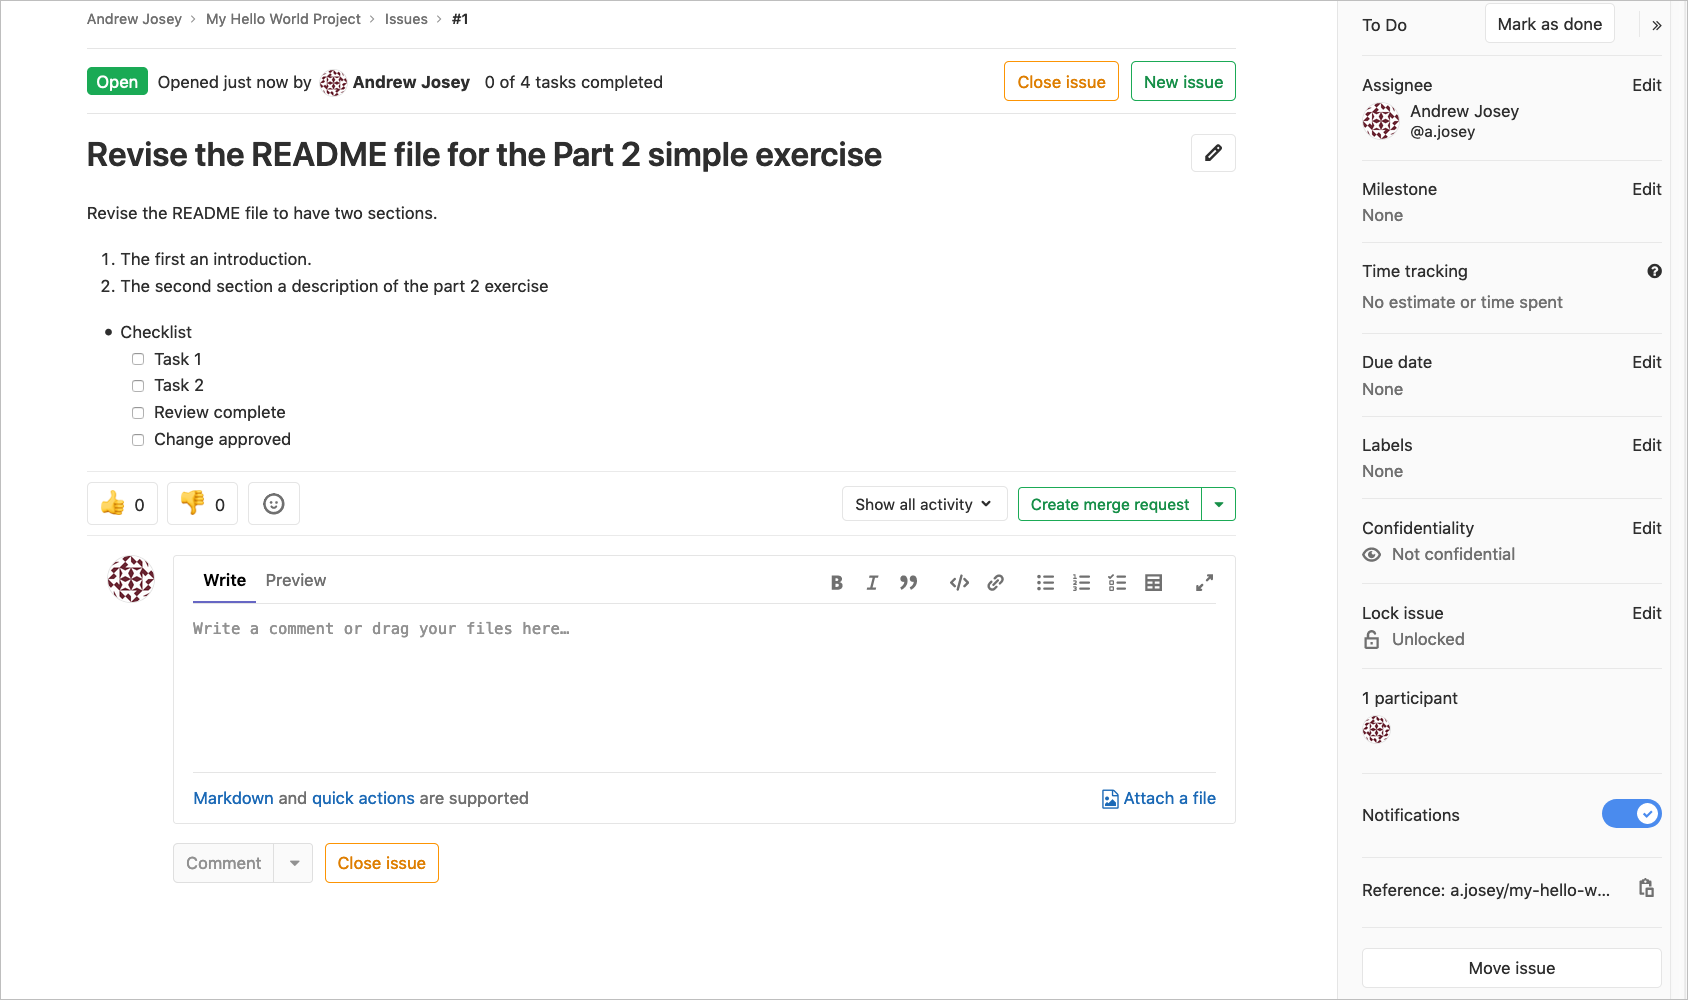
Scroll down and click on Create Issue. After creating an issue, the issue is displayed again, as in Figure 15.
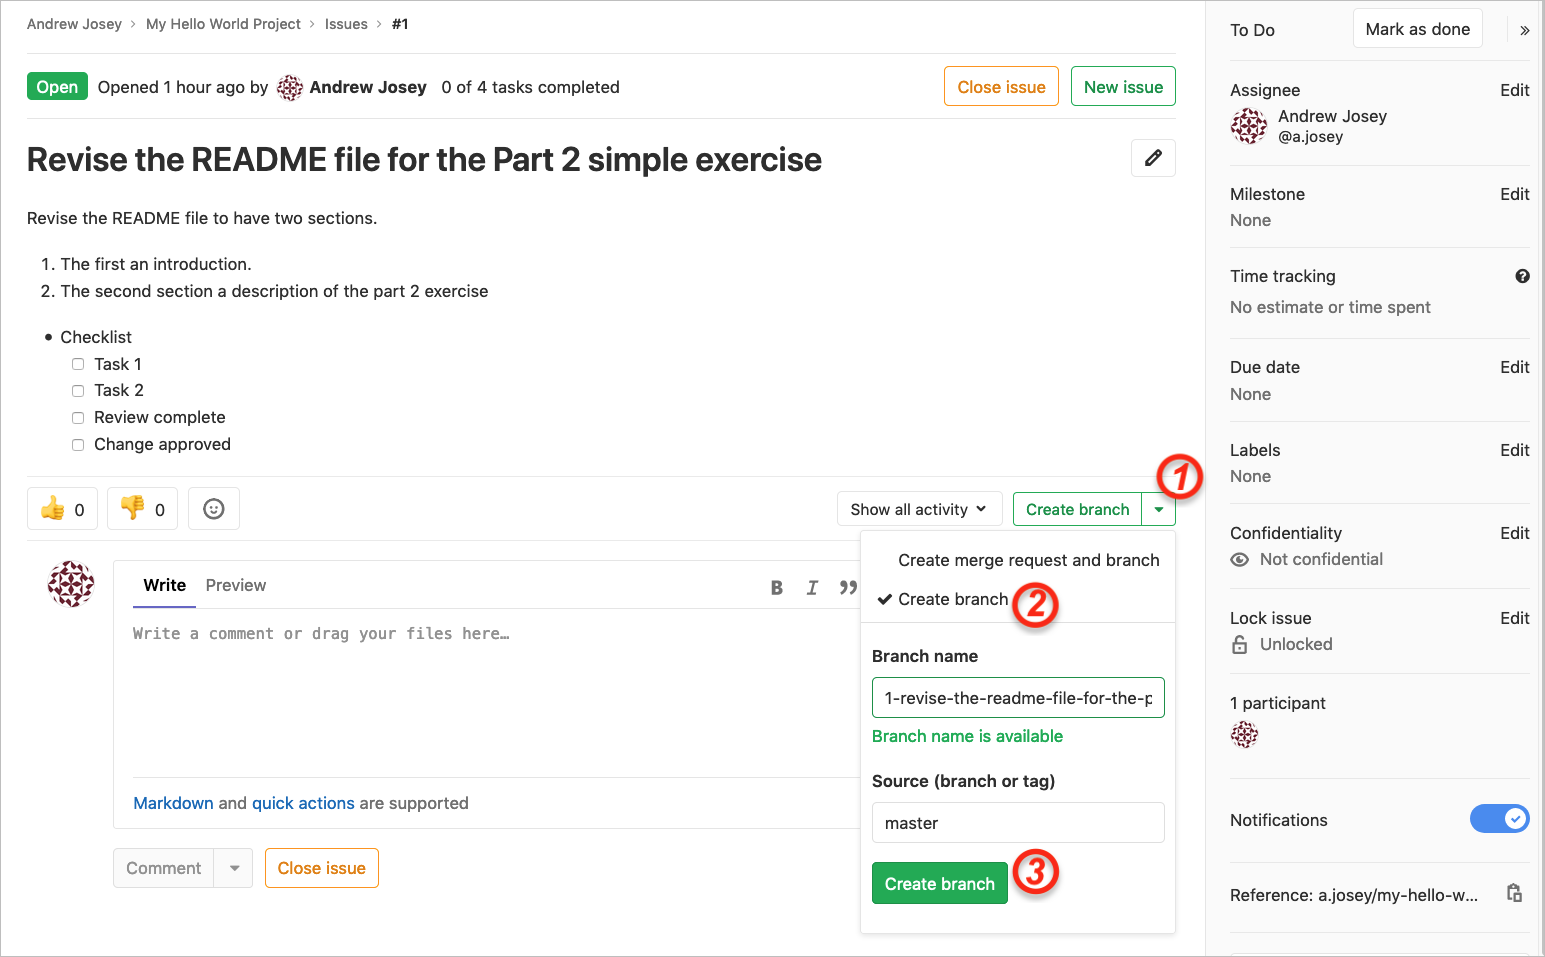
Creating a New Branch
To create a new branch, from the issue itself, select the pulldown “Create merge request”; this will reveal the option to “Create branch”.
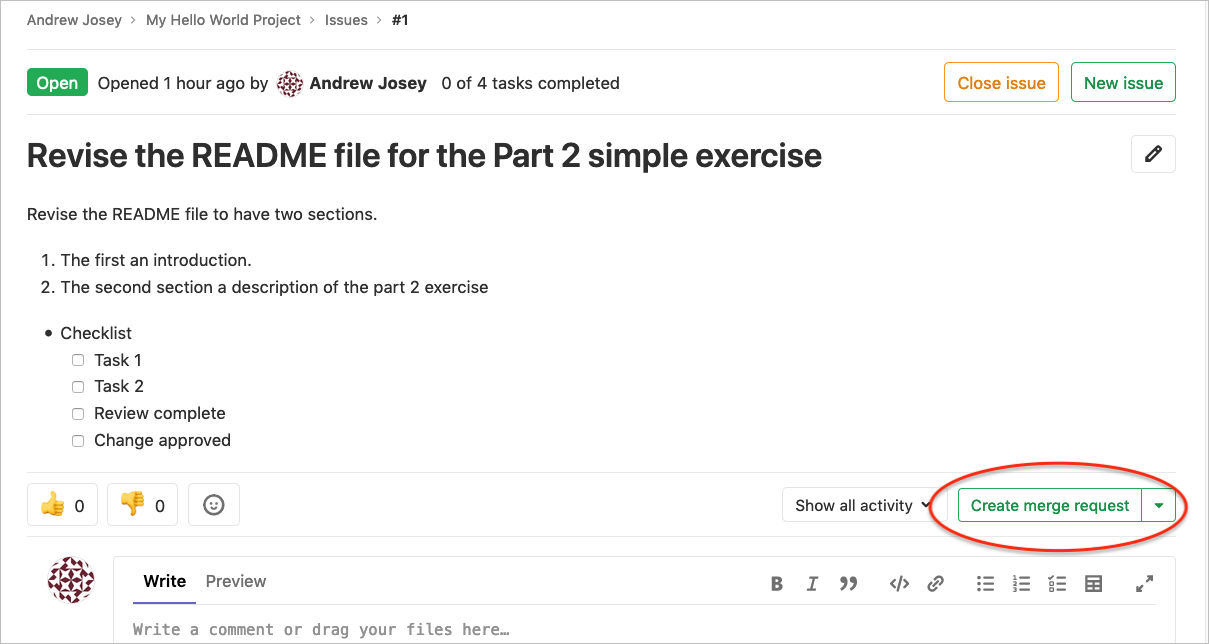
See Figure 17:
| 1 | Select Create branch on the pulldown |
| 2 | Select the Create branch option on the pulldown |
| 3 | Click on the Create branch button |
The default branch name is automatically created from the issue.
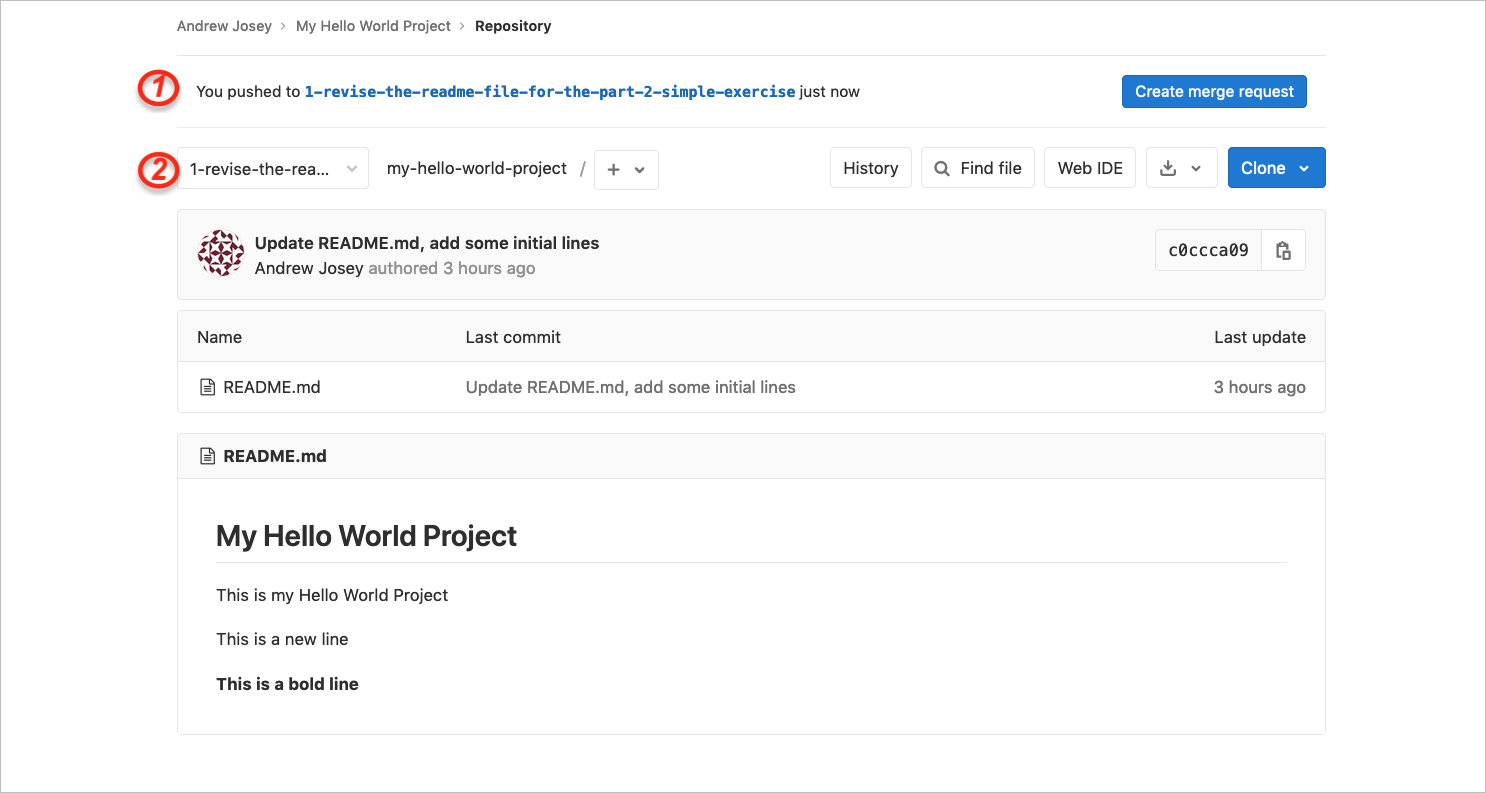
You will then be returned to the dashboard, but notice:
| 1 | The confirmation that you pushed to the new branch |
| 2 | The branch indicator now shows that you are viewing the new branch |
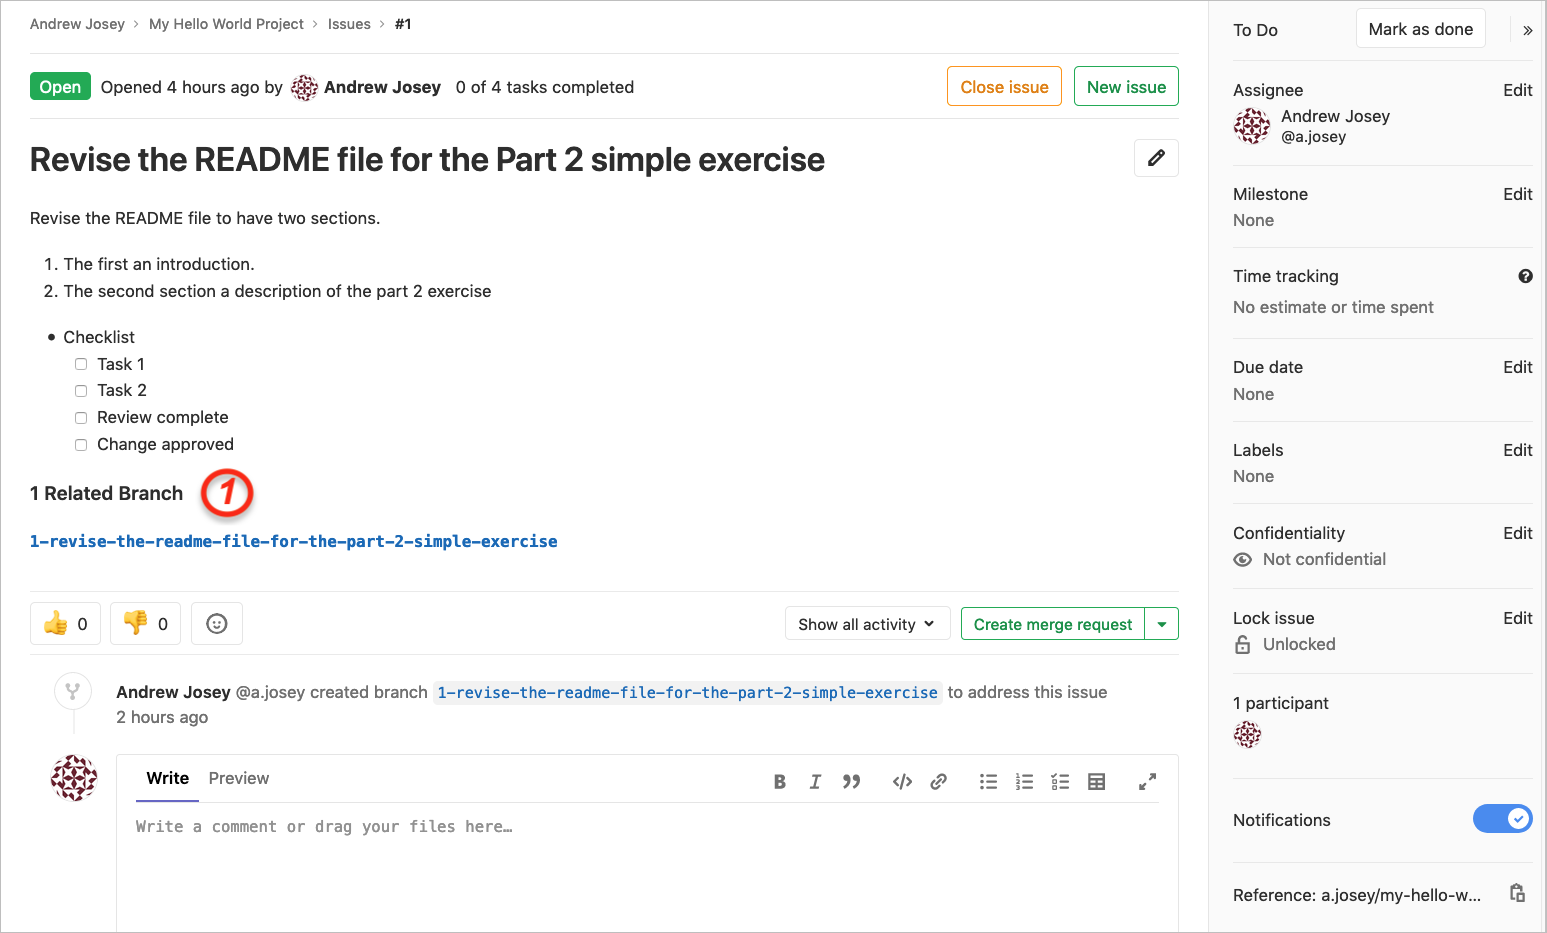
If we revisit the issue that was originally opened, and scroll down through the issue we can now see, in Figure 19:
| 1 | The new branch is recorded under “Related branches”, along with the issue, also under Activity |
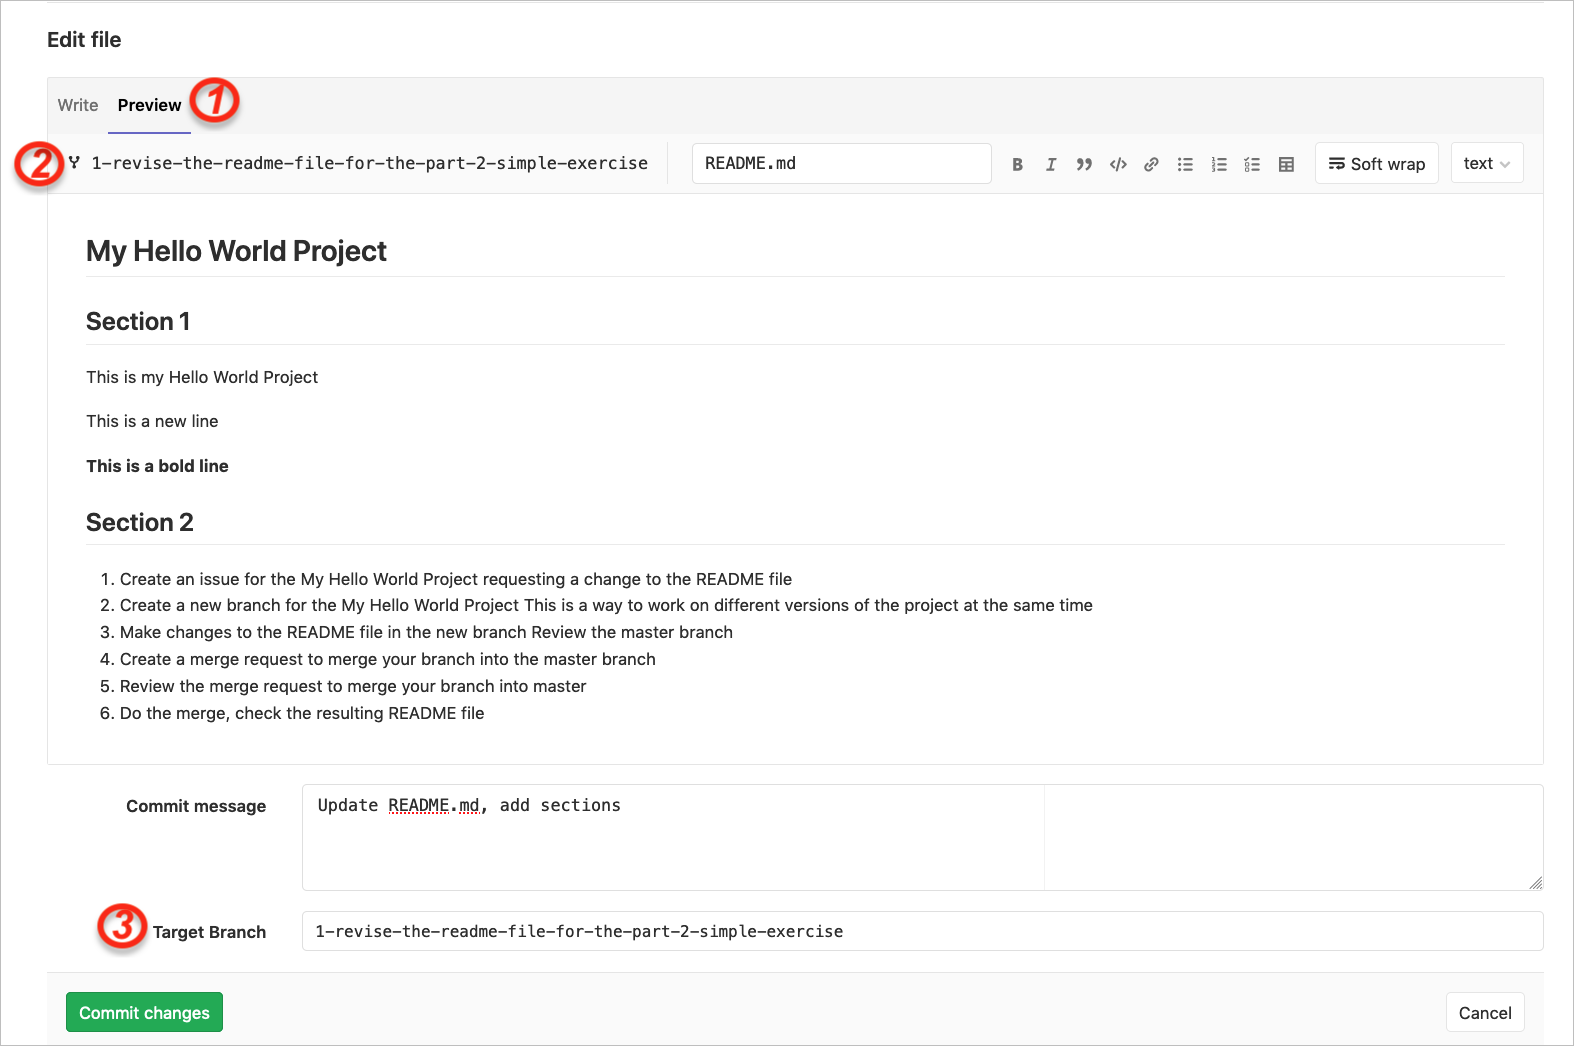
Making Changes to the README File in the New Branch
In branch 1-revise-the-readme-file-for-the-part-2-simple-exercise, edit the README file (via Code → Repository, check the branch selector, then click on the README.md file and Edit → Edit Single File)
See Figure 20:
| 1 | The “Preview” view is shown |
| 2 | Confirms the branch that is being worked on |
| 3 | The “Target Branch” also confirms the branch that is being worked on |
Click on “Commit changes” to save the changes, confirmation of which can be seen in Figure 21.
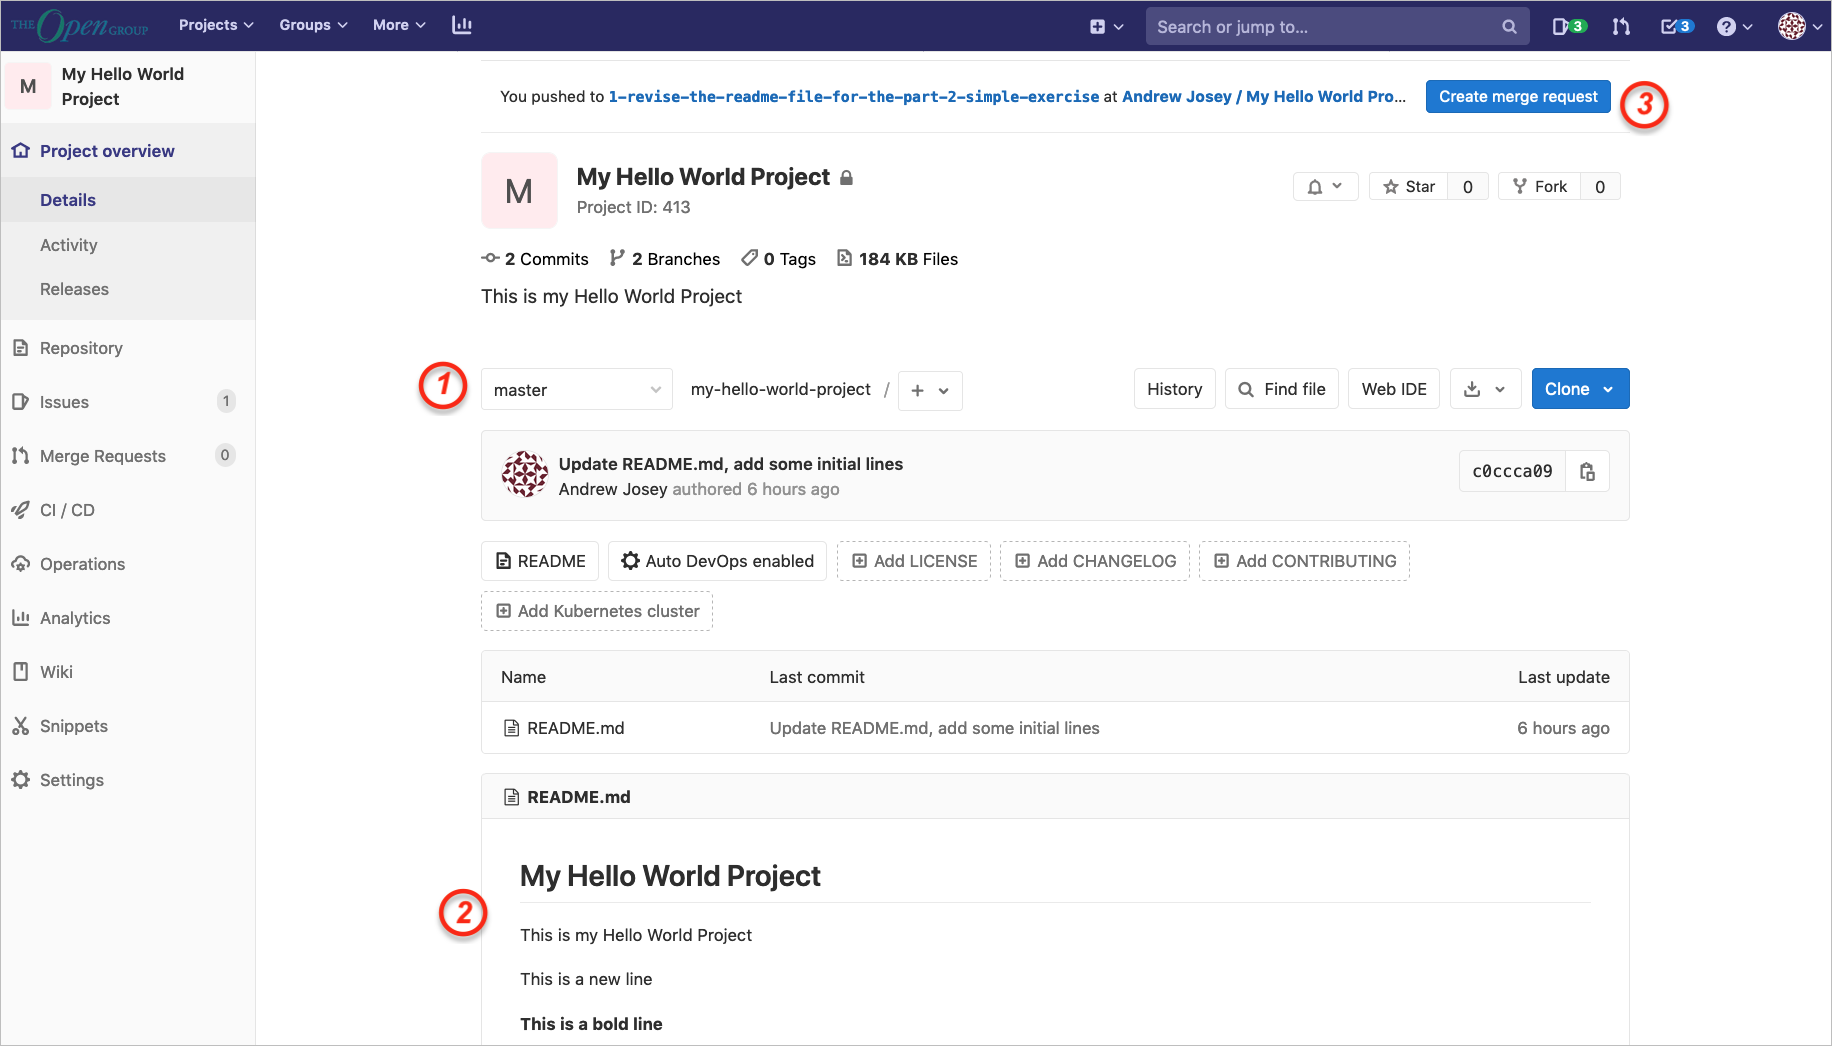
Review the Main Branch
Click on the project name in the top left of the sidebar, which returns you to the start page in the project on the “main” branch, as shown in Figure 22.
| 1 | Shows the branch that is being displayed |
| 2 | Shows that the README file does not contain the changes being proposed |
| 3 | Is a shortcut to “Create merge request” |
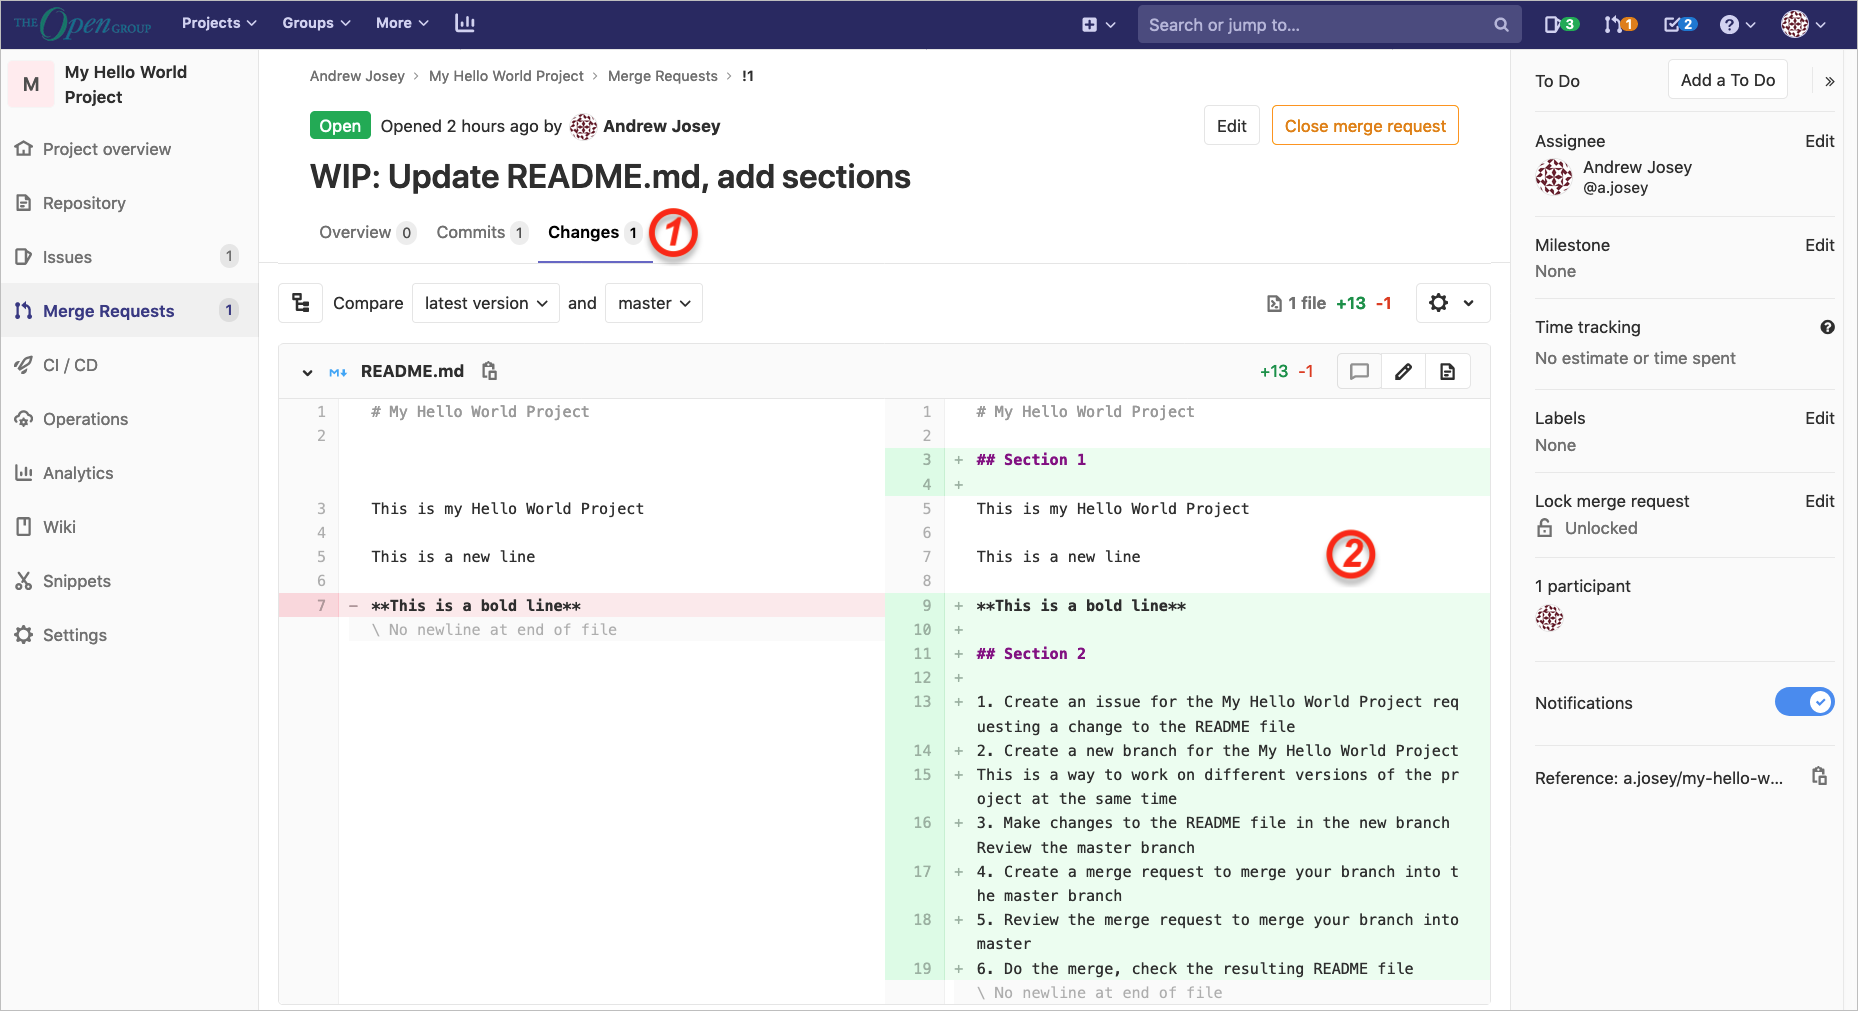
Creating a Merge Request to Merge your Branch into the Main Branch
Click on “Create merge request”.
The result is shown in Figure 23:
| 1 | Is the “Title” for the request
If you are planning on making further changes, you can select the checkbox to mark as draft; this will prevent the change from being merged until the merge request is marked as ready. |
| 2 | Is the “Description”; using the phrase Closes #<issue number> will automatically close the issue referenced when the merge is completed |
| 3 | Lets you assign the merge request to another person, or to yourself |
| 4 | Lets you decide whether or not to delete the branch after the merge is completed; this is useful since otherwise many stale branches can be left in the repository |
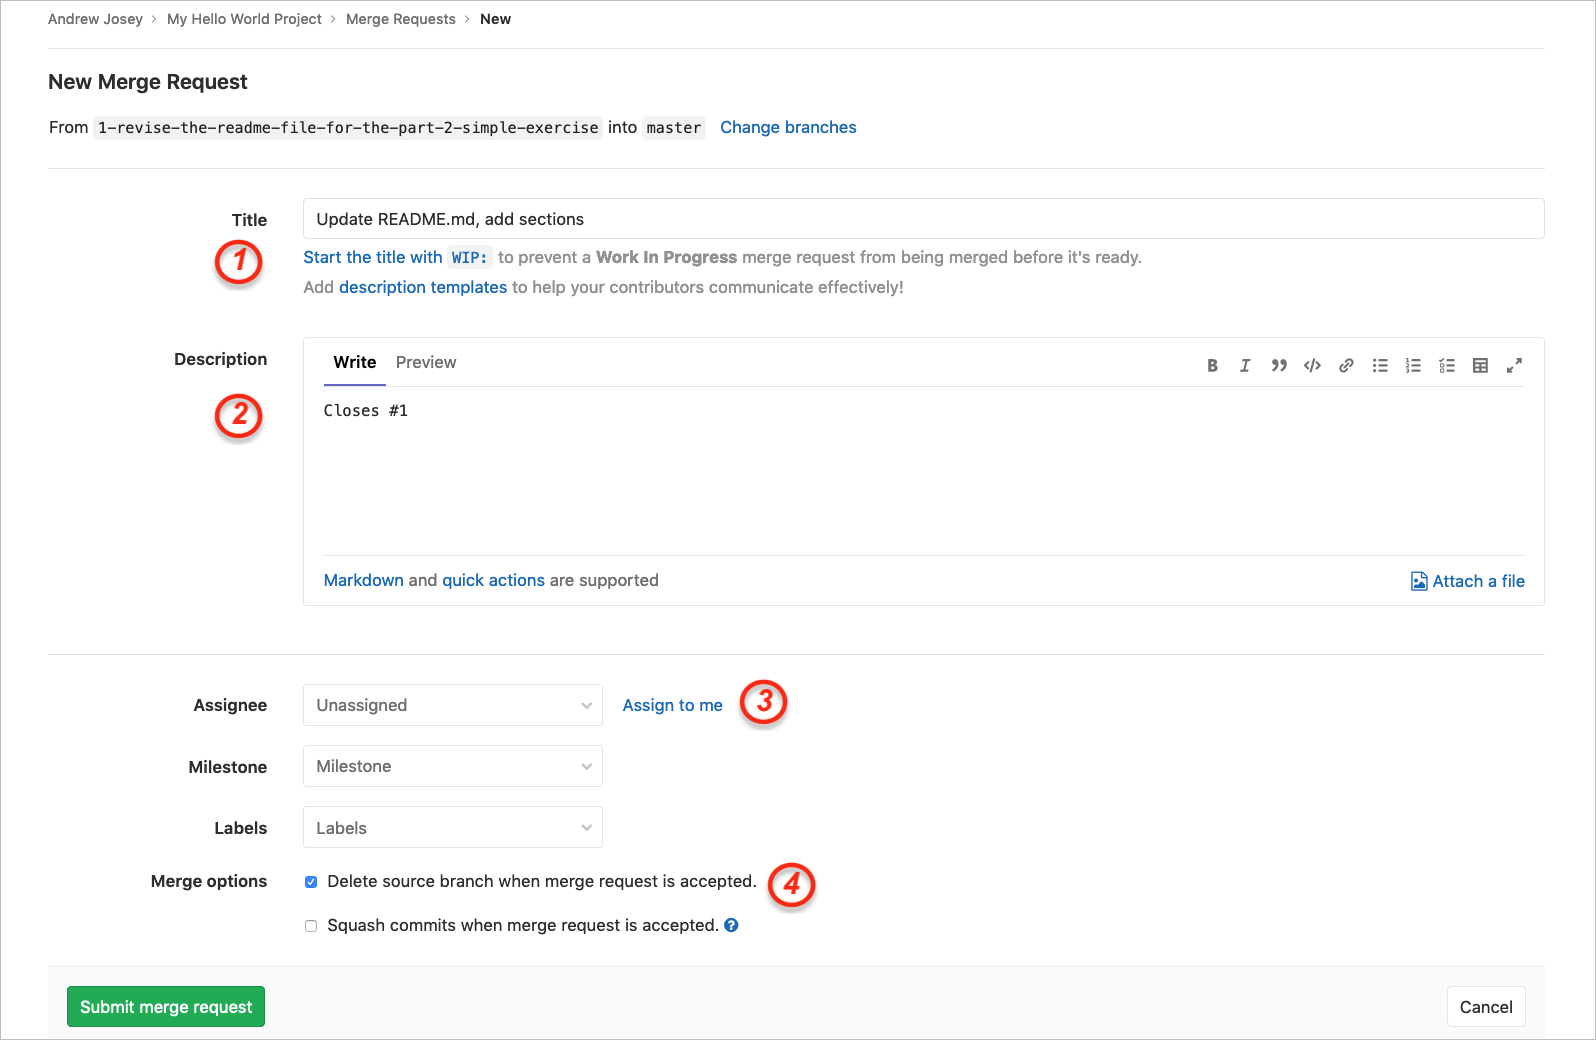
In this example we click to show this is a draft and submit the merge request. In this case the subject will have the word "Draft:" added to it automatically, and the Merge will be blocked as shown in Figure 24. Marking a merge request as a draft can be used if you want the merge request to be reviewed. You can mention the reviewers in the comments below using the @ notation, and ask them to review and comment.
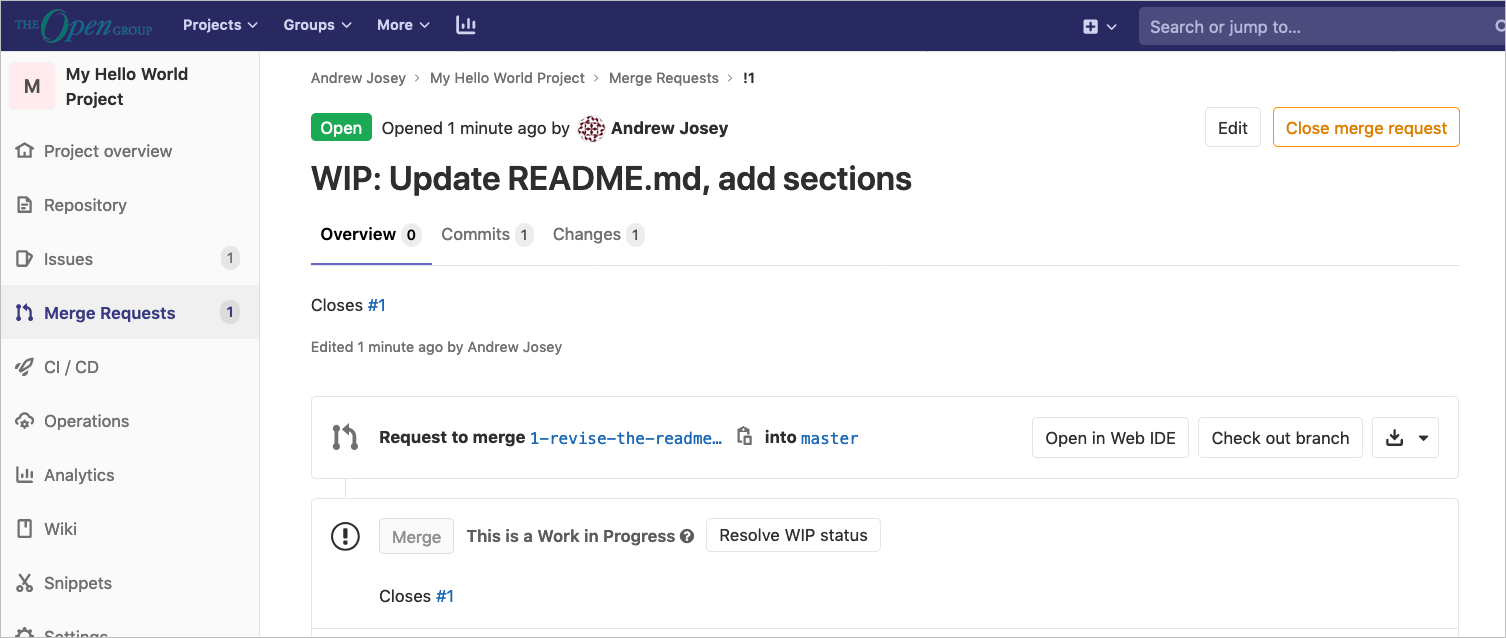
Reviewing the Merge Request to Merge your Branch into Main
Click on “Merge Requests” in the sidebar, then click on the merge request. Then, as shown on the Merge Request page in Figure 25:
| 1 | Click on the “Changes” tab |
| 2 | Review the diffs listing |
If you have a comment for a specific line, you can click on the line number and a dialog will allow you to insert a comment in this view.
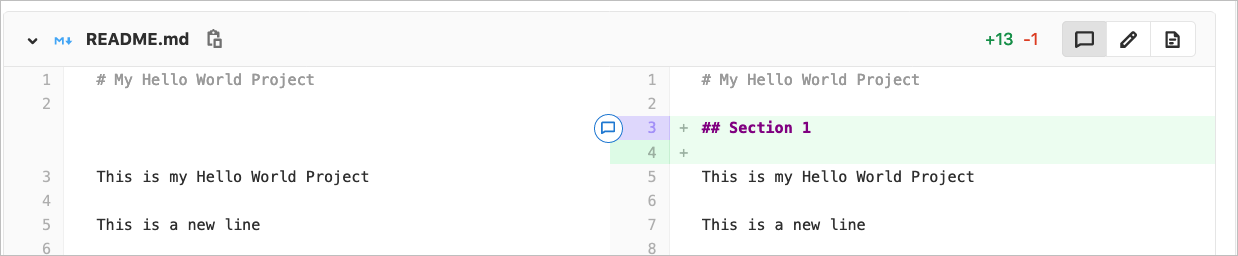
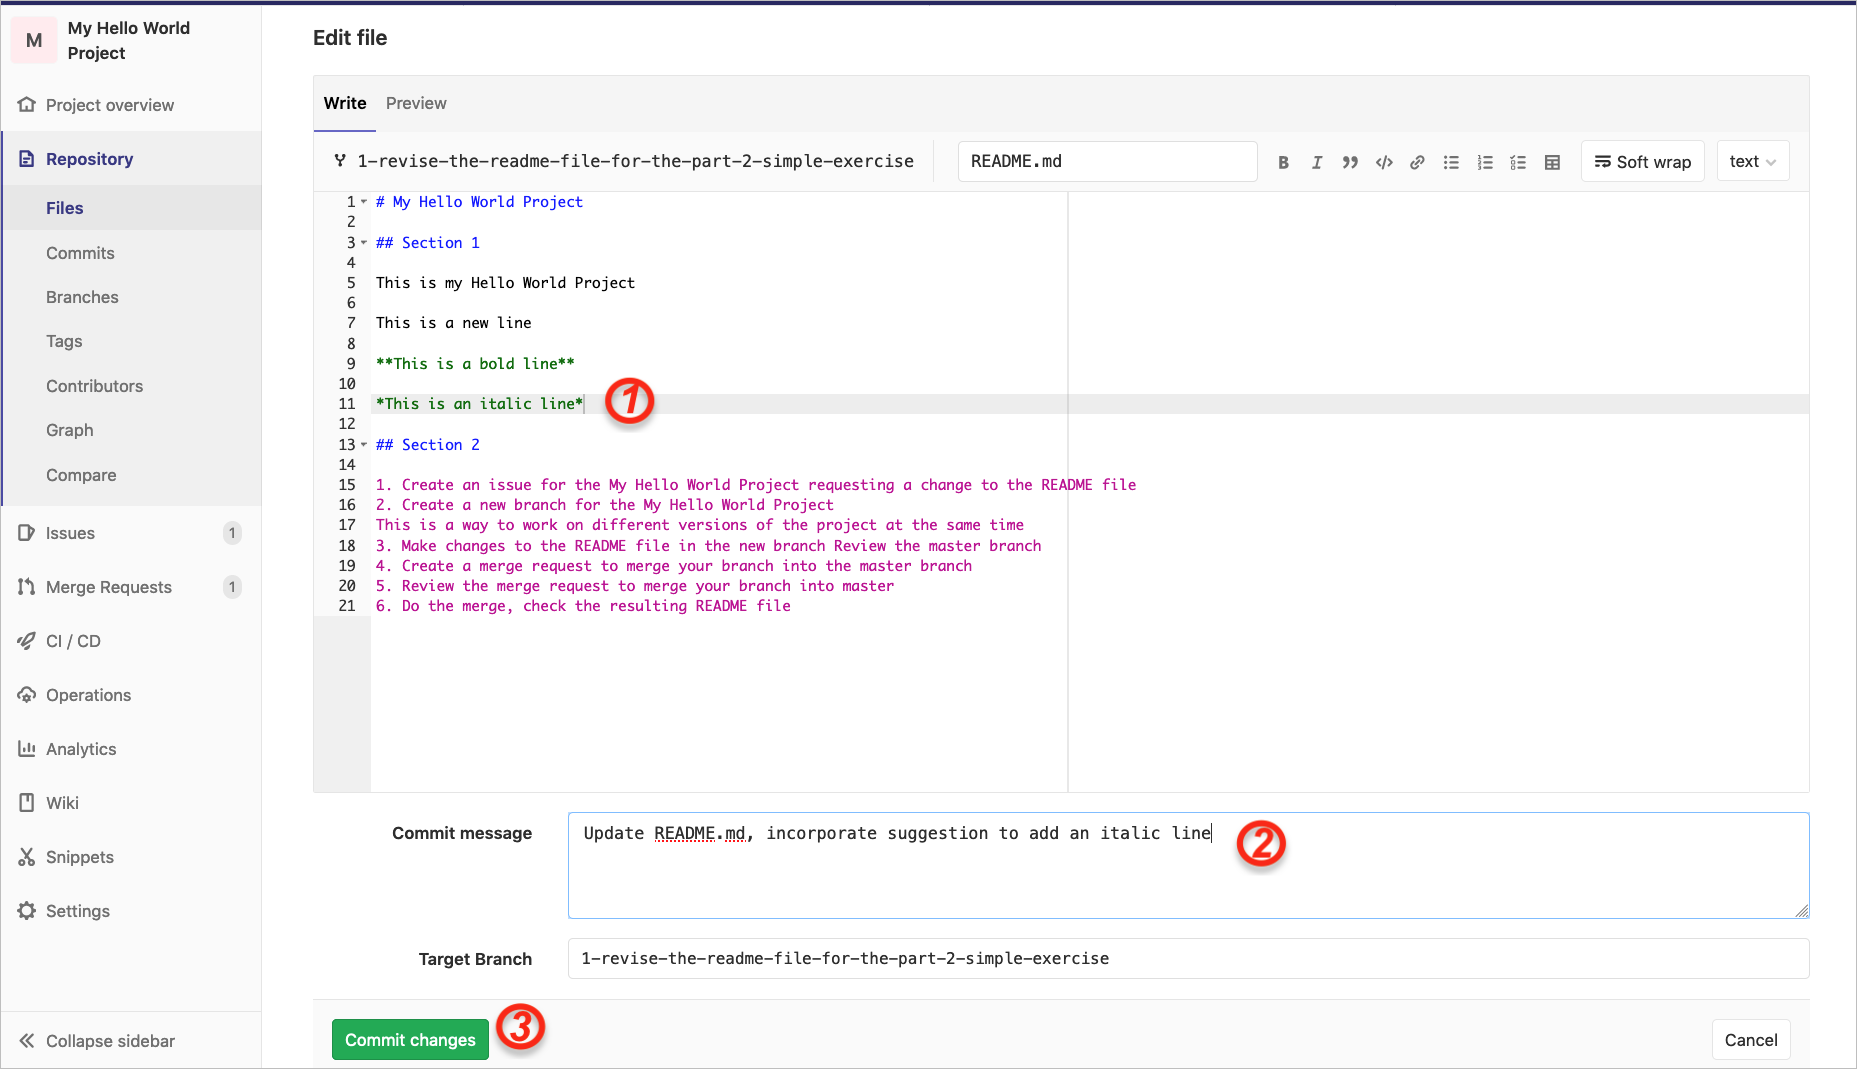
In Figure 27 we have inserted a comment on Line 9.
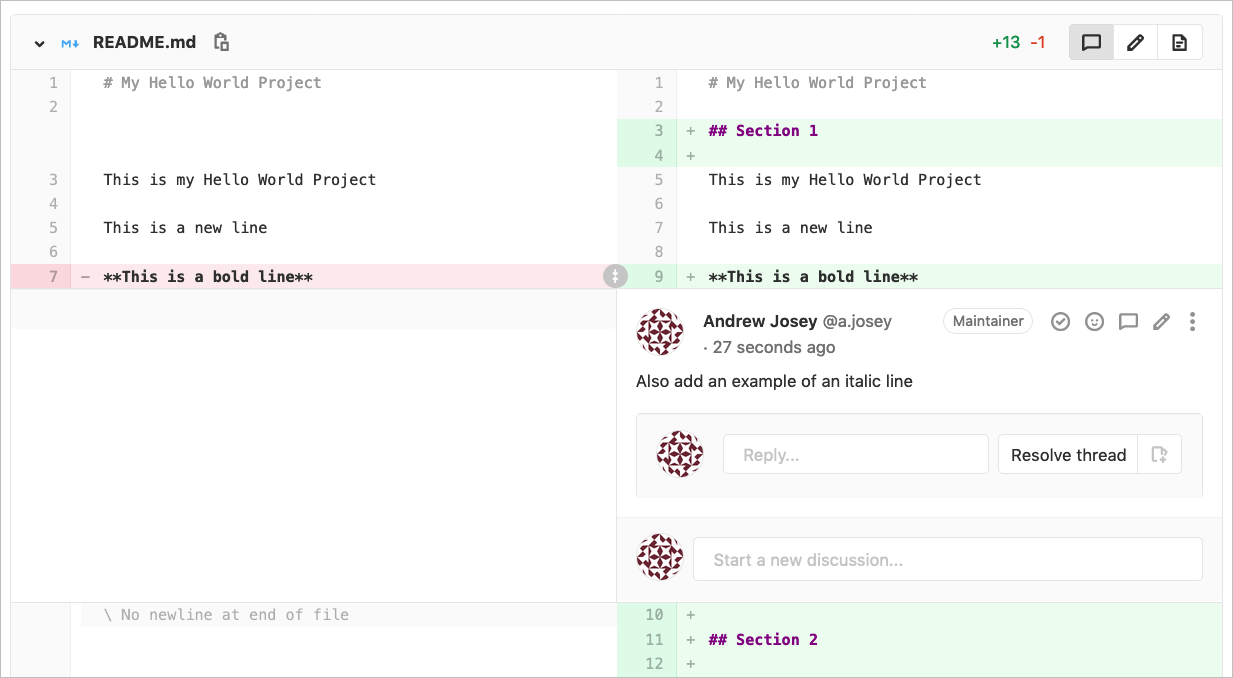
You can then add the comment, and then others, or start a review. In Figure 28 we show the review options.
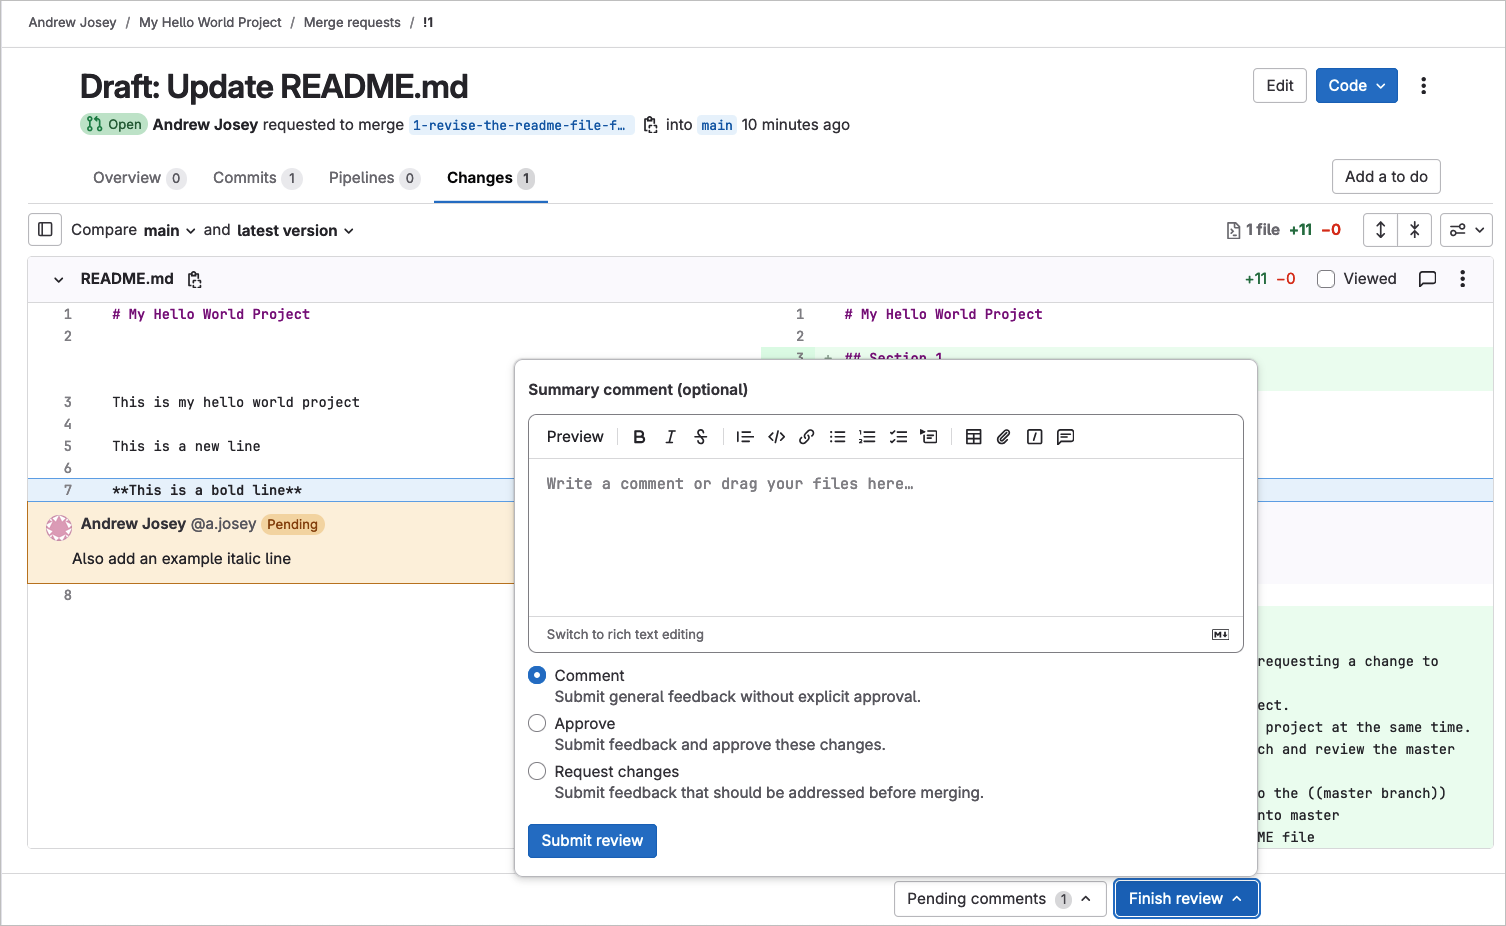
In this example, we agree to the proposed change, and in Figure 29:
| 1 | We add the italic line example as proposed |
| 2 | The commit message has a default, which can be changed |
| 3 | We can confirm the branch where the file is changed |
| 4 | We commit the change |
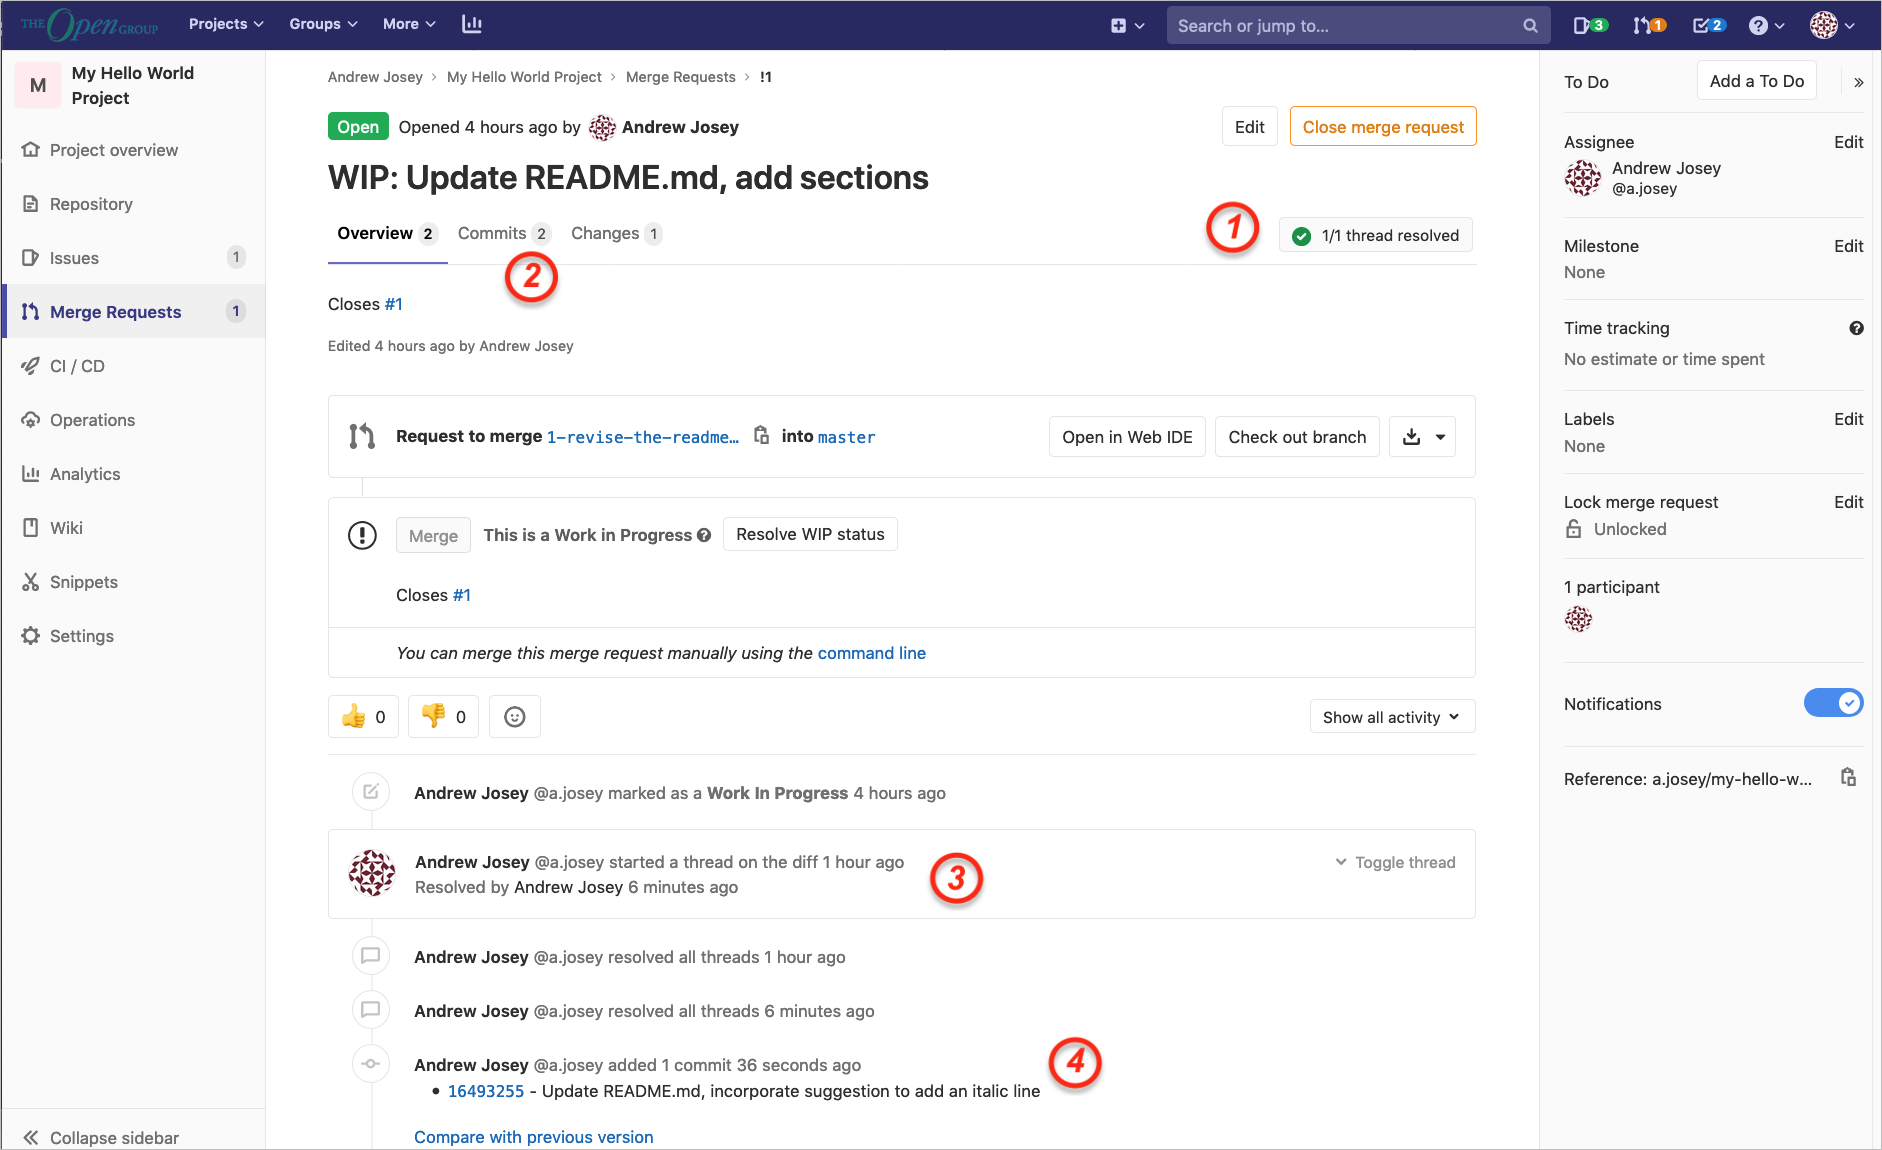
Returning to the Merge Request page, we see in Figure 30:
| 1 | The comment thread has been resolved |
| 2 | There are now two commits in the branch to be merged |
| 3 | There is a record of the comment thread |
| 4 | The additional commit is also recorded |
We can now click on Mark as Ready which will remove the "Draft:" prefix from the merge request, and show its ready to merge. In our example we will return to the Issues page, and tick the checkboxes to denote the review is completed and changes have been finalized.
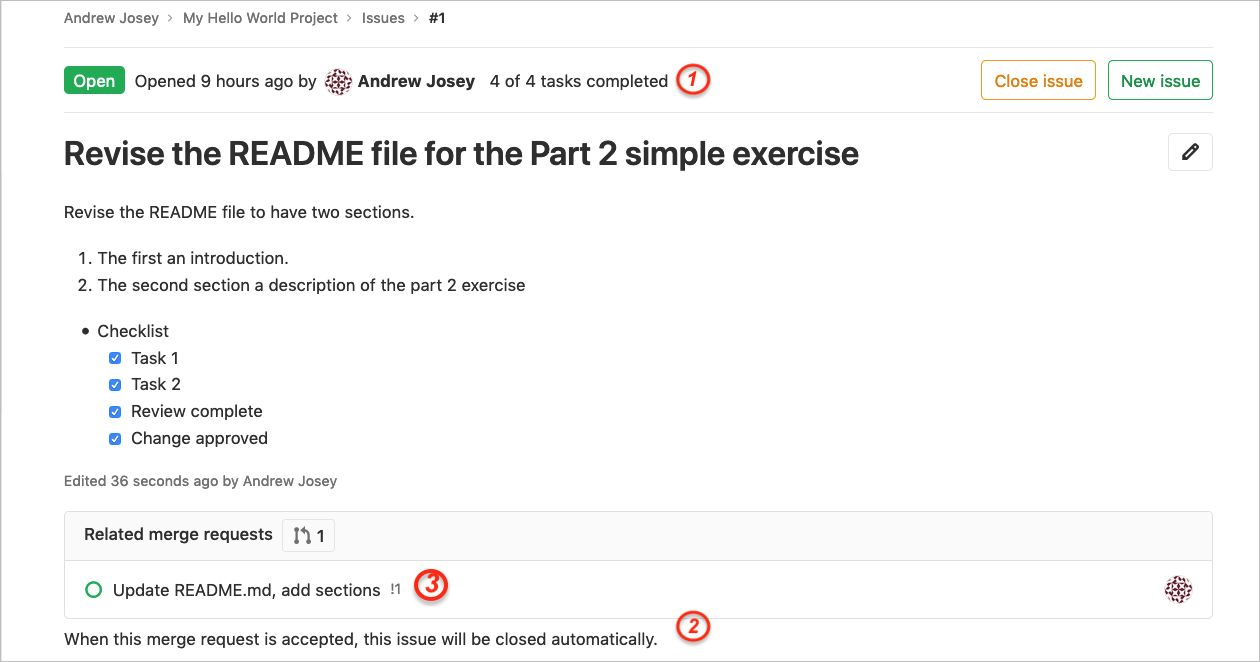
Figure 31 shows:
| 1 | All tasks on the checklist have been completed |
| 2 | The issue will be automatically closed when the merge request completes |
| 3 | Click on the related merge request (see Figure 32) |
Completing the Merge and Checking the Resulting README File
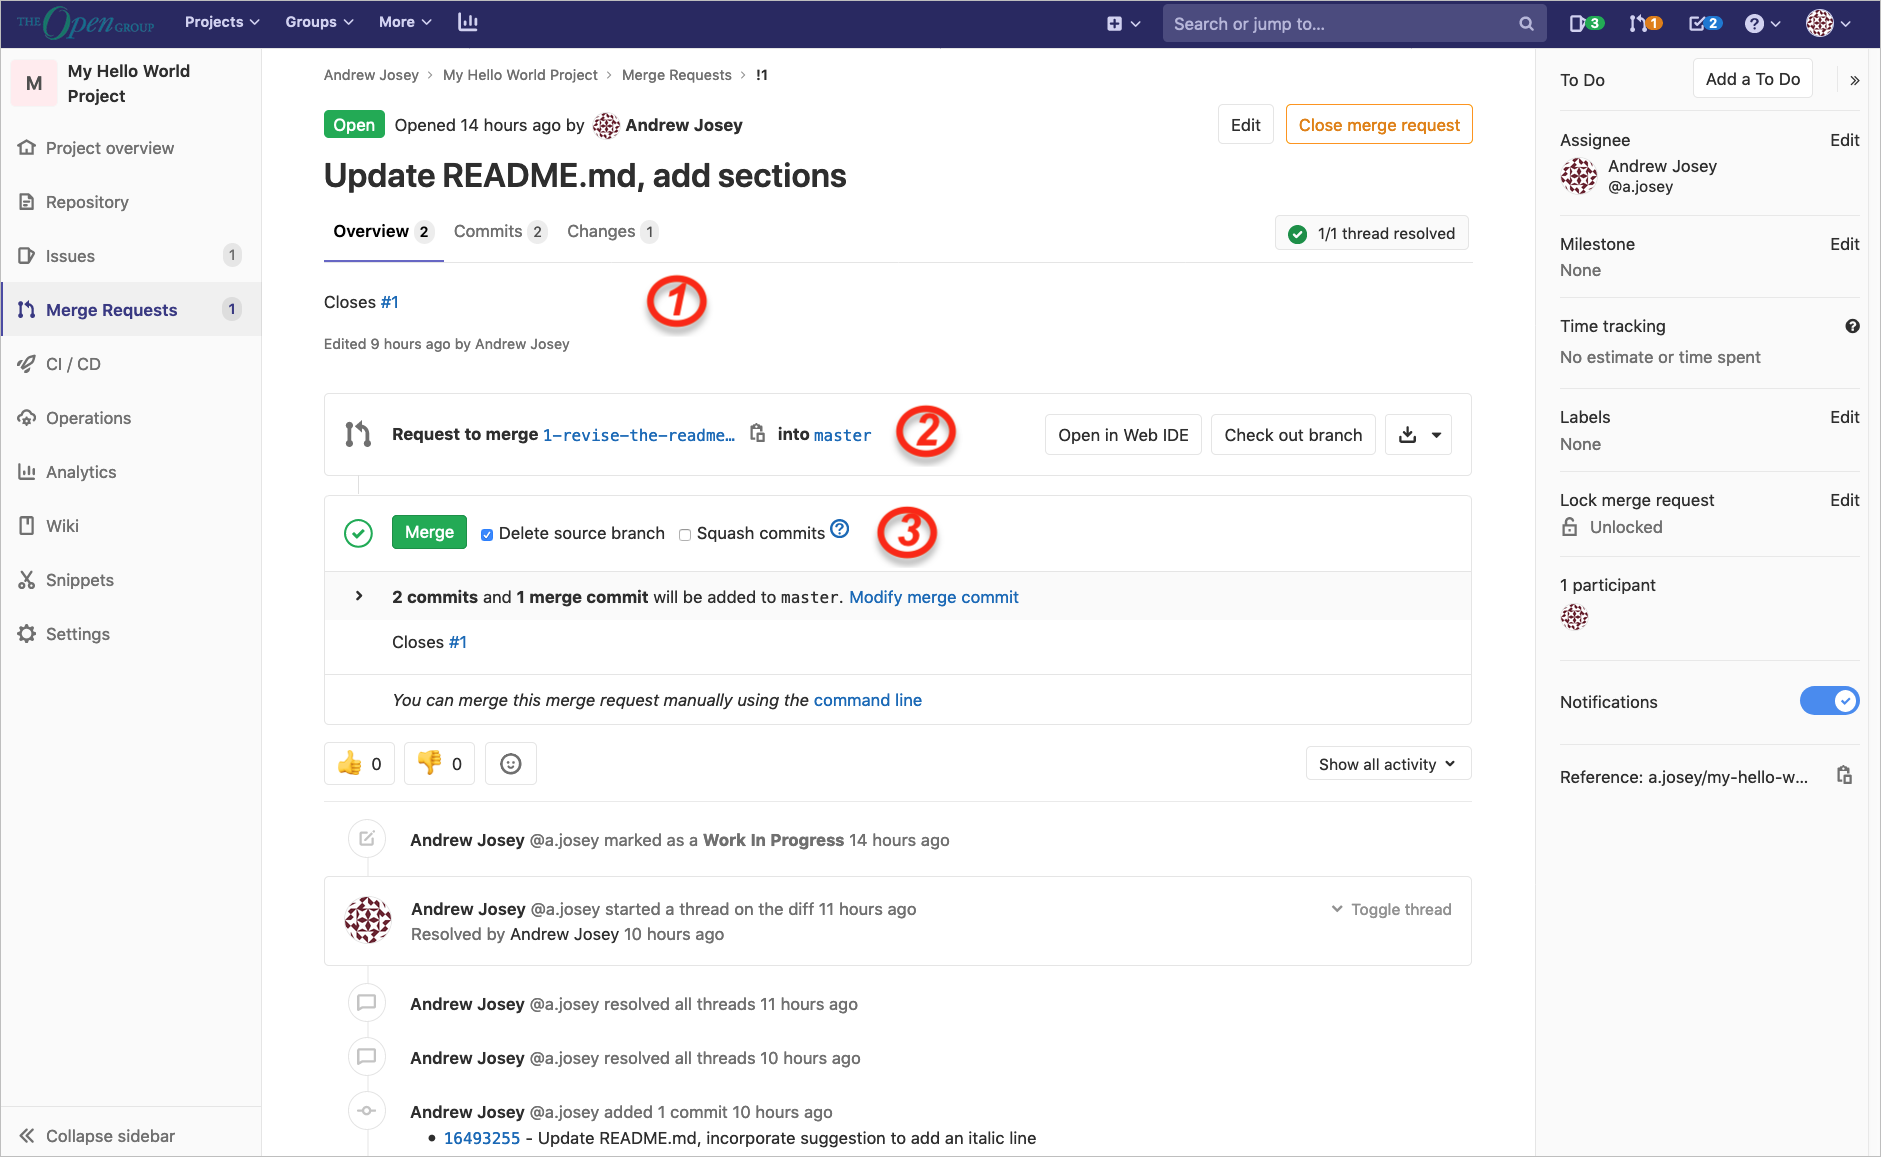
Figure 32 shows:
| 1 | The merge will close issue #1 |
| 2 | It will merge the branch into main |
| 3 | The “Merge” button is active and after the merge it will delete the source branch |
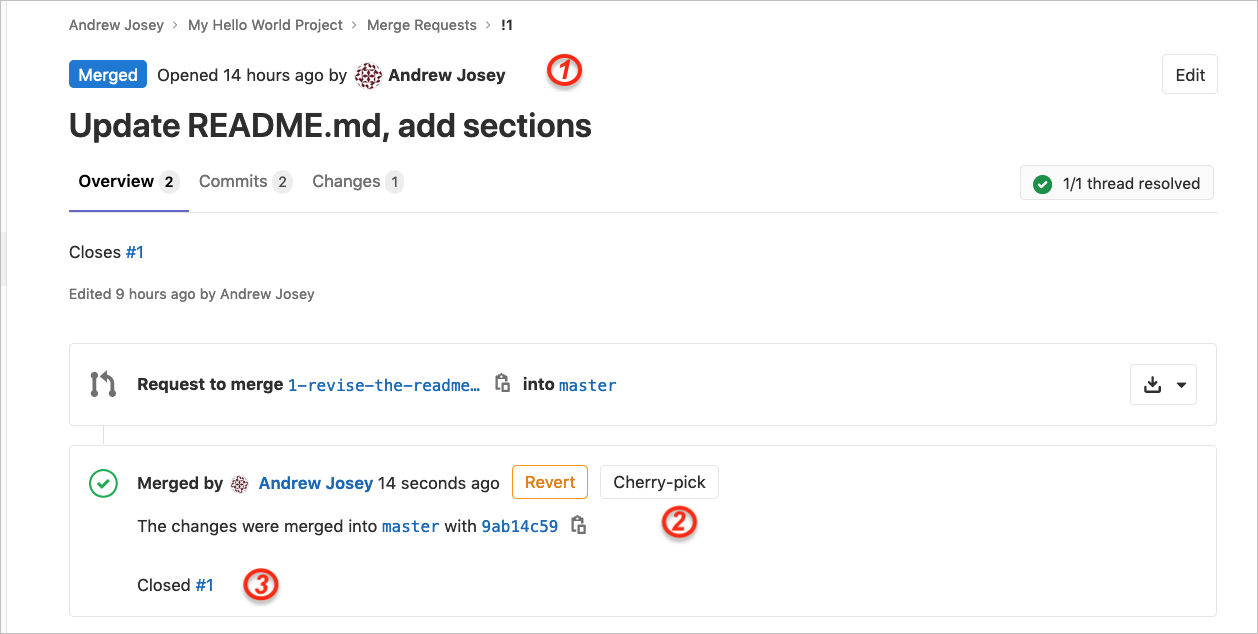
Clicking on the “Merge” button updates the view, as shown in Figure 33 confirming:
| 1 | The merge has completed |
| 2 | The changes were made into the main branch |
| 3 | Issue #1 is closed |
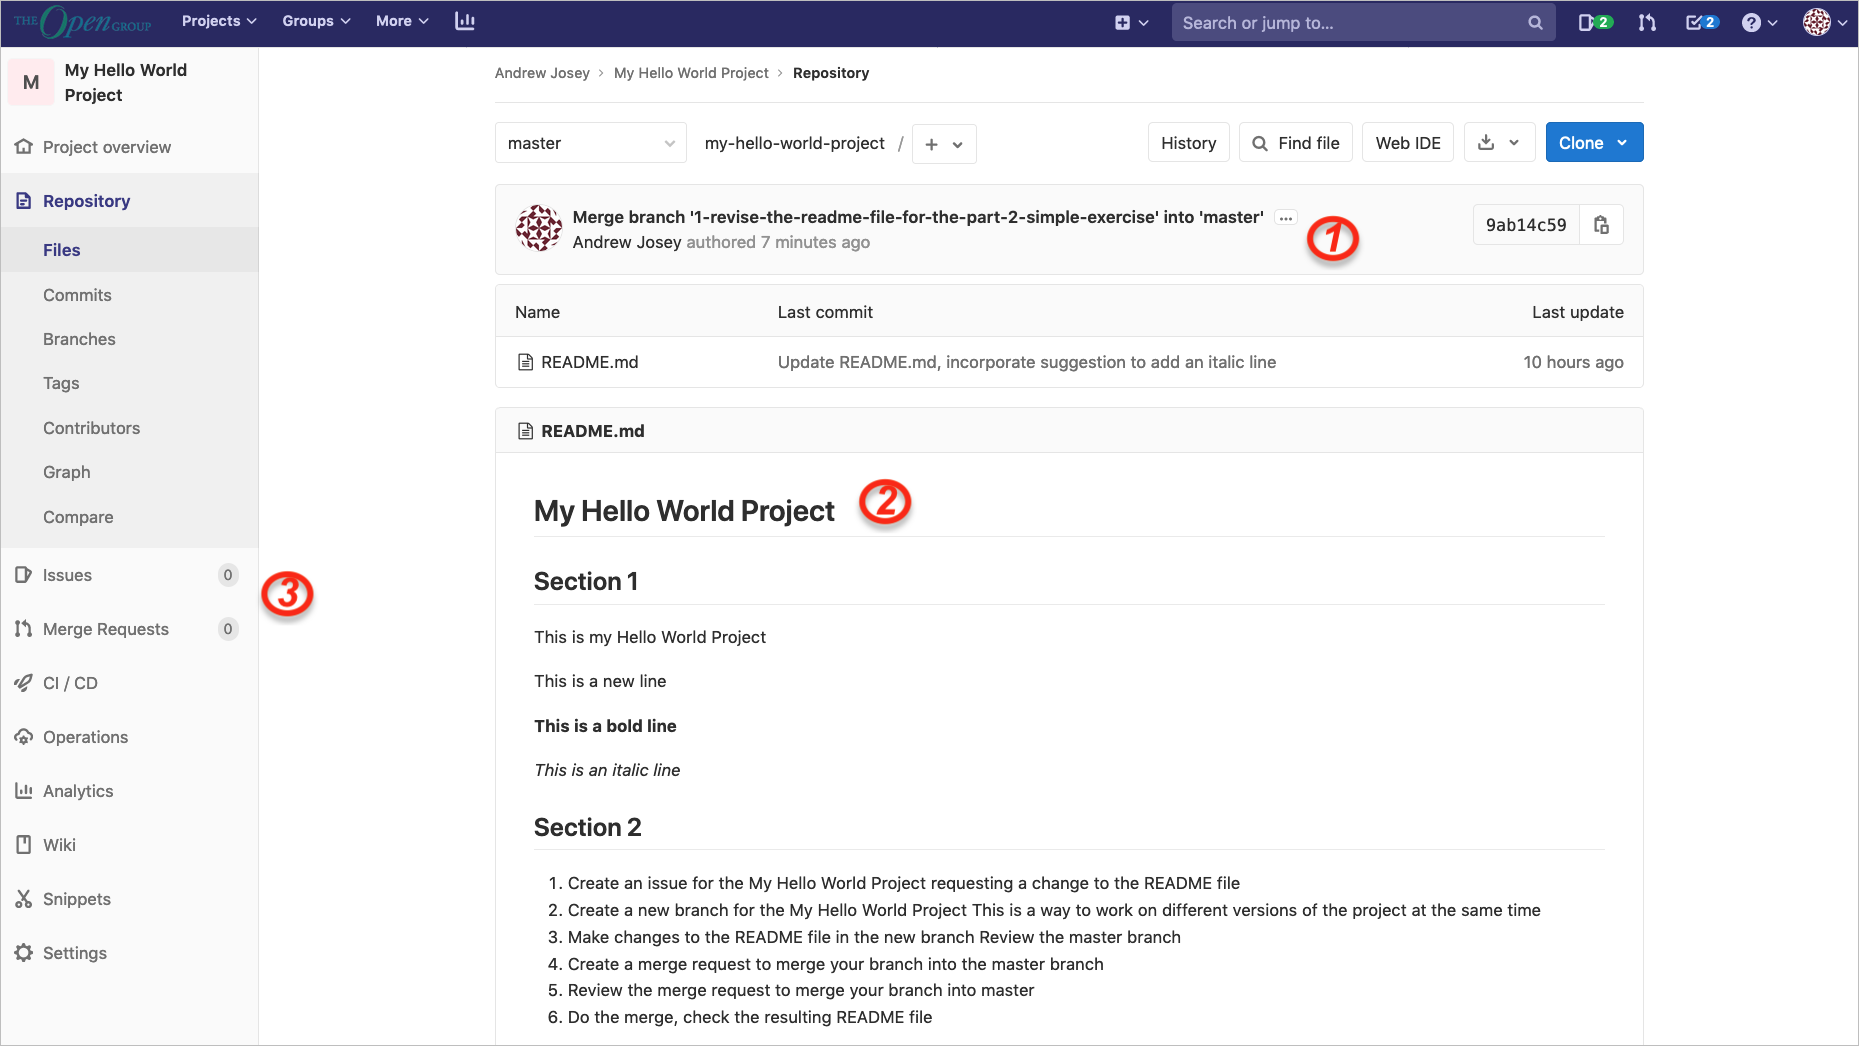
Clicking on the “main” branch link, we return to the project summary showing the main branch, as shown in Figure 34:
| 1 | The merge is shown as the last commit on the main branch |
| 2 | The README file has been updated to include the changes |
| 3 | The number of issues and merge requests is now zero |
Summary
Here is what we accomplished in this introduction to the GitLab environment using a web browser:
-
Created a GitLab project
-
Changed a file and saved (committed) those changes
-
Opened an issue to propose a change
-
Started and managed a new branch with the change
-
Marked the branch as a draft
-
Reviewed and commented on the proposed change in the branch
-
Resolved the comment on the proposed change
-
Updated the changes on the branch as a result of the review
-
Updated the issue to note the tasks were complete
-
Merged the branch, deleting the source branch, and automatically closing the issue
-
Confirmed the change had been merged into the main branch