Using GitLab for a Company Review
In this chapter we describe a way of working using GitLab for issue resolution in The Open Group Company Review process. This is primarily for advanced users, usually the Forum Director managing the review and the editorial team.
The advantage of this approach is that the changes can be applied to the document with increased traceability and accuracy.
It is assumed that the Company Review Change Requests have been collected in the Plato document review system. This chapter describes an approach for issue resolution and production of the Sanity draft with all proposed changes applied.
NOTE: An alternative toolchain for collecting and resolving Company Review Change Requests is under development. This will enable a Company Review to take place solely within the GitLab environment rather than the Plato document review system.
General Approach
The changes for proposed resolutions should be applied to the document draft in the GitLab project on a separate branch, with project issues used to track the Change Request status and the resulting applied changes.
An export of the issues from the GitLab project will be used to generate the ballot table.
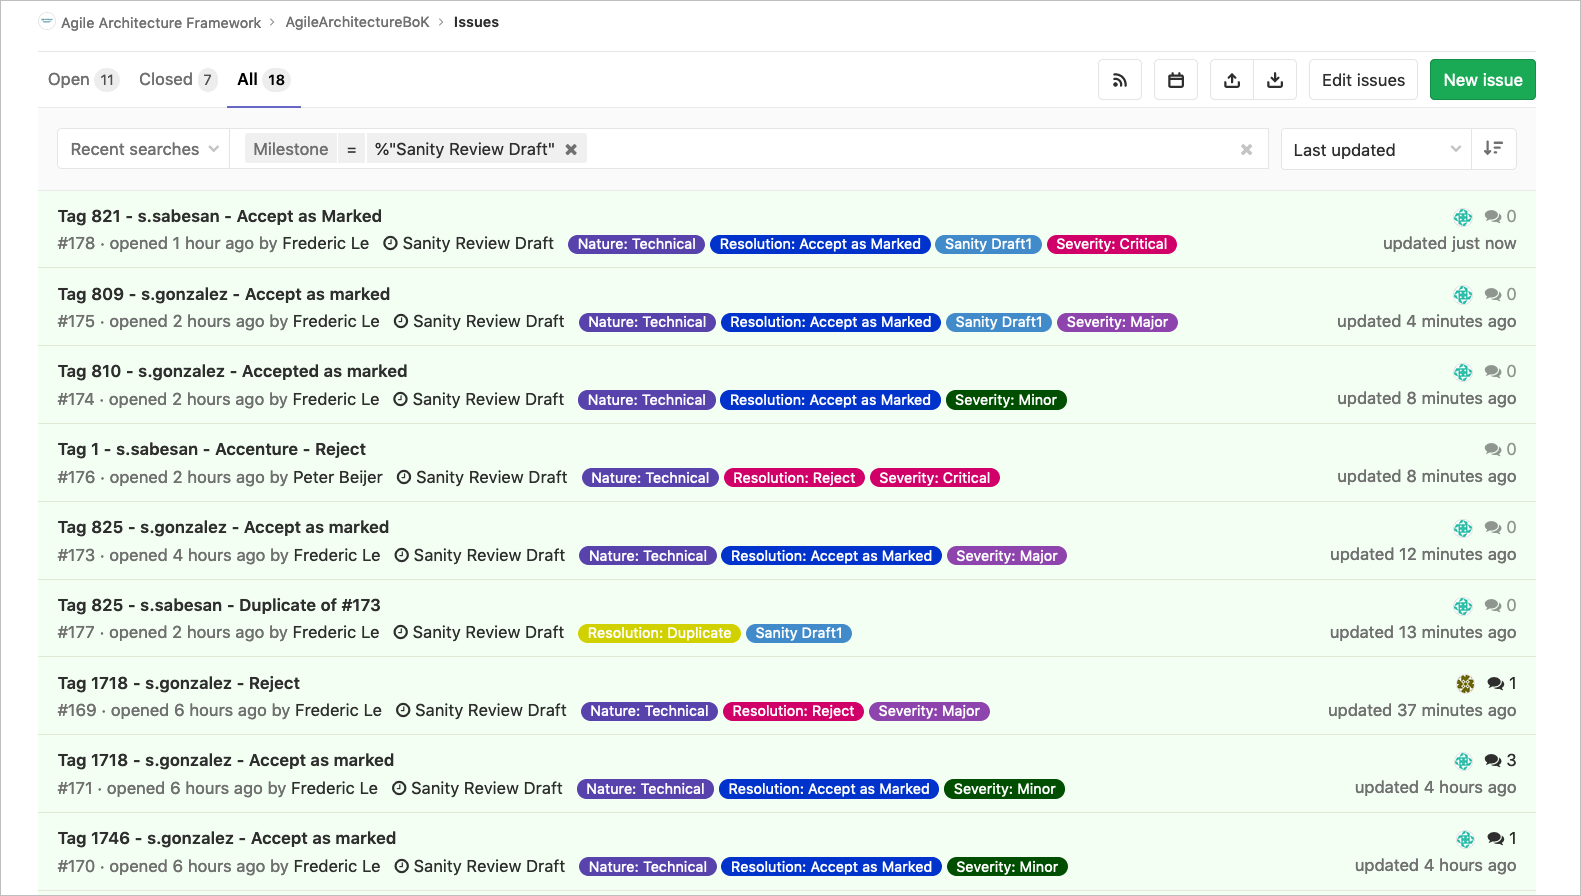
Each Change Request from the Company Review is recorded in the Title field of an issue for traceability (see later).
Issue numbers are referenced in the Commit message for changes made on the new branch.
A redline listing to view the detailed changes can be created by comparing the new branch against the main branch (or other branch, if applicable, on which the draft is based).
Target Branch
A new branch should be created for the update to the Company Review draft.
For example, Sanity-Draft-1.
All the proposed changes should be applied on this branch, and upon completion this will be merged back into the main branch.
Raising Issues for Change Requests
For each Change Request a corresponding issue will be raised. A standard format is used for the issue, so it can be traced back to the Change Request.
Title
The Title of the issue should take the form:
Tag xxx - author - resolution
where:
-
xxx is the tag number in the online review document
-
author is the short name of the person submitting the Change Request; for example, a.josey
-
resolution is one of:
-
Accept
-
Accept as Marked
-
Duplicate
-
Reject
-
For example:
Tag 1871 - my.name.company - Accept as Marked
Description
In the issue description we should record the final change with context for reviewers to understand the change.
When an item is a Reject we need to include rationale for why.
When an item is a Duplicate we need to reference the issue that is duplicated with #nnnn in the description.
Committing a Change
When a change is proposed to the new branch to resolve an issue, the commit message should include:
Fixes #nnnn
where nnnn is the bug number.
Updating a Change
Where the editors need to revise the change, they will record the update in the issue – reopening the issue if necessary – and then when they commit will reference the issue # in the commit message.
Managing Issues
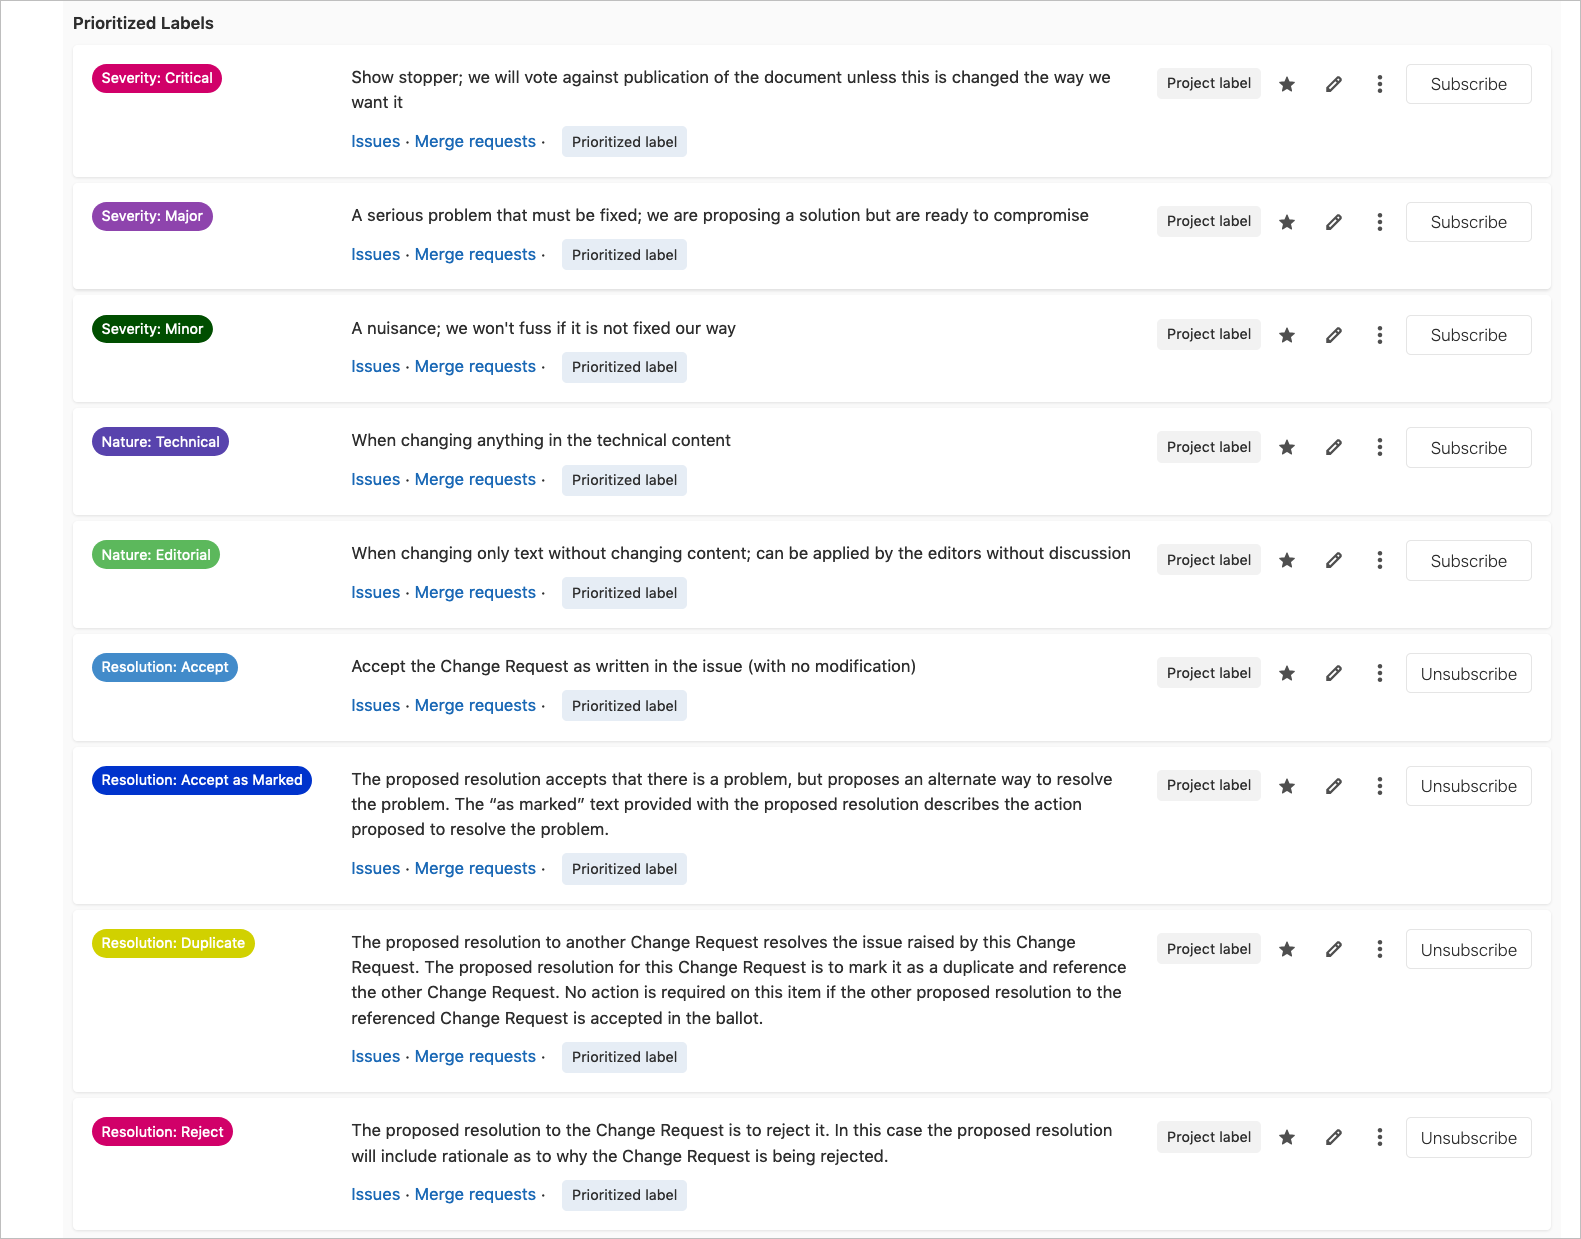
The editors will use milestones and labels for the issues, and these have been set up in the GitLab project.
For example, we might use the milestone: Sanity Review Draft.
Labels have been set up as follows:

Resolution: Accept
Accept the Change Request as written in the issue (with no modification).
Resolution: Accept as Marked
The proposed resolution accepts that there is a problem, but proposes an alternate way to resolve the problem. The “as marked” text provided with the proposed resolution (and recorded in the issue) describes the action proposed to resolve the problem.
Resolution: Duplicate
The proposed resolution to another Change Request resolves the issue raised by this Change Request. The proposed resolution for this Change Request is to mark it as a duplicate and reference the other Change Request (in the issue description). No action is required on this item if the other proposed resolution to the referenced Change Request is accepted in the ballot.
Resolution: Reject
The proposed resolution to the Change Request is to reject it. In this case the proposed resolution will include rationale as to why the Change Request is being rejected.


