6. Enabling Local Working
If you plan to become an advanced user – for example, working offline, or editing a large amount of content – you should follow the steps in this chapter so that you are set up to have a full copy of the project files synced on your local machine.
6.1. Check that you have Git Installed Locally
Instructions for MacOS:
-
Open up a terminal window
-
In the window enter:
git —-version
This should produce something like:
$ git --version
git version 2.37.1 (Apple Git-137.1)
If Git is not installed, instructions for how to install it will be displayed.
6.2. Configure Git Username and Email Address
It is important to configure your Git username and email address, since every Git commit will use this information to identify you as the author.
In your terminal window, type the following command to add your username, replacing YOUR_USERNAME with your full name:
git config --global user.name "YOUR_USERNAME"
To check that you have the correct username, type:
git config --global user.name
To set your email address, type the following command, replacing your_email_address with your email address:
git config --global user.email "your_email_address@opengroup.org"
To check that you entered your email correctly, type:
git config --global user.email
You’ll need to do this only once, since you are using the --global option. It tells Git to always use this information for anything you do on your local system.
6.3. Installing a Secure Socket Shell (SSH) Key
If you are going to install a client to enable you to work locally, you will also need to take one additional step, which is to create and install an SSH key to identify your computer to The Open Group GitLab server.
Instructions for MacOS:
-
Open up a terminal window.
-
Generate a new SSH key pair, replacing your-email-address with your own email address:
ssh-keygen -t rsa -b 4096 -C "your-email-address@opengroup.org"
-
Next, you will be prompted to input a file path to save your SSH key pair to. If you do not already have an SSH key pair, use the suggested path by pressing “Enter”. Using the suggested path will normally allow your SSH client to automatically use the SSH key pair with no additional configuration.
-
Once the path is decided, you will be prompted to input a password to secure your new SSH key pair. It is best practice to use a password, but it is not required and you can skip creating it by pressing “Enter” twice.
6.3.1. Installing the SSH Key to your Account
Instructions for MacOS:
-
Copy your public SSH key to the clipboard:
pbcopy < ~/.ssh/id_rsa.pub
-
Add your public SSH key to your GitLab account by:
-
Clicking your avatar in the upper right corner and selecting “Settings”
-
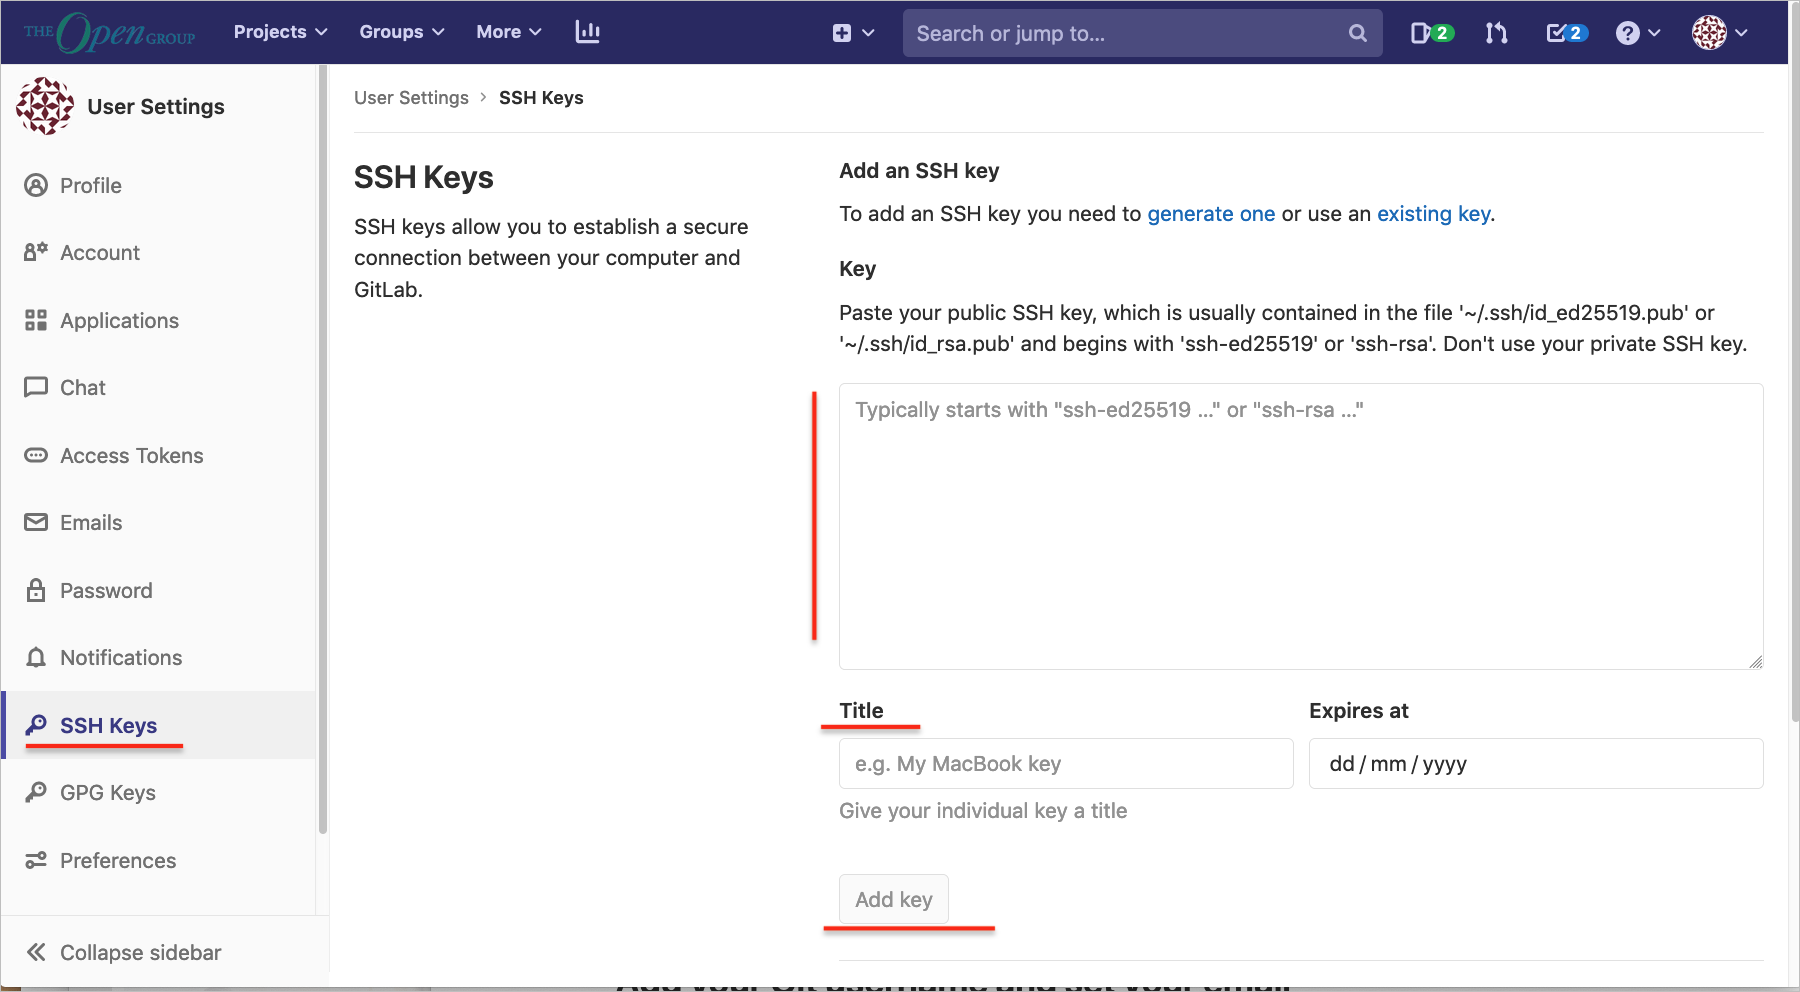
Navigating to “SSH Keys” and pasting your public key from the clipboard into the “Key” field
-
Your email address will appear in the “Title” field
-
It is optional whether you set the “Expires at” field
-
-
6.4. Checking the SSH Setup
To check that the SSH key was added successfully, run the following command in a terminal window:
ssh -T git@gitlab.opengroup.org
The first time you run this you will be asked to verify the host you are connecting to (gitlab.opengroup.org). You should answer yes to add it to the list of trusted hosts.
If you run the same command again you won’t be asked to verify the host, and should only receive a welcome message; for example:
ssh -T git@gitlab.opengroup.org
Welcome to GitLab, @a.josey!
If the welcome message does not appear, run ssh in verbose mode by replacing -T with -vvvT to help understand the problem.
6.5. Adding a Project Locally
To start working locally on an existing project, you have to download a copy of its files to your local computer, automatically preserving the Git connection with the remote repository. This operation is known as a clone operation.
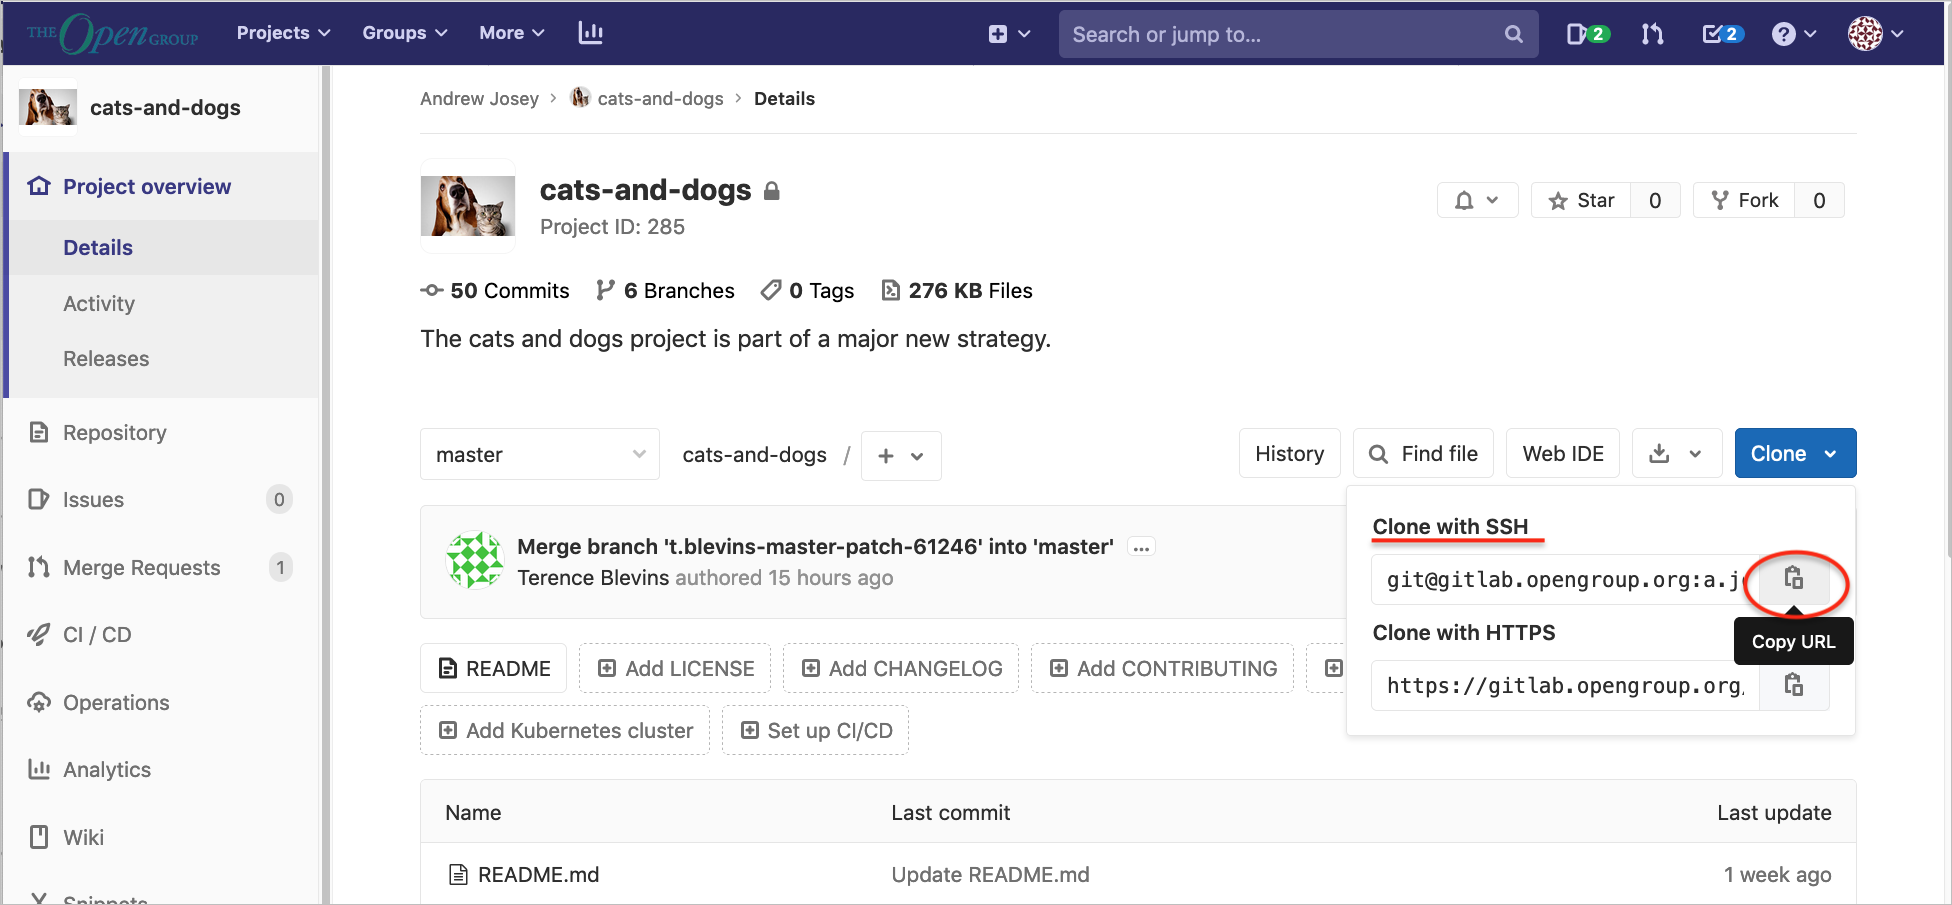
As we have set up the connection to the gitlab.opengroup.org site using SSH, we will clone via SSH. You should see a screen with the Clone icon on it, similar to Figure 37. Copy the first URL by clicking on the Clone icon.
In a terminal window, navigate to the place on your local machine where you want to keep your local copy (creating a folder if needed.) It is suggested that this be located on a local drive, not in cloud storage:
git clone <paste copied URL here>
For example:
$ mkdir -p work/git
$ cd work/git
$ git clone git@gitlab.opengroup.org:a.josey/cats-and-dogs.git
Cloning into 'cats-and-dogs'...
remote: Enumerating objects: 32, done.
remote: Counting objects: 100% (32/32), done.
remote: Compressing objects: 100% (23/23), done.
remote: Total 119 (delta 10), reused 29 (delta 8), pack-reused 87
Receiving objects: 100% (119/119), 13.77 KiB | 1.72 MiB/s, done.
Resolving deltas: 100% (36/36), done.
This will set the directory up to connect to GitLab, download a copy, and set up the necessary metadata to keep the versions in sync. If you receive an error then it is likely the SSH key setup in an earlier step was incorrect.
You would need to do this step each time you want to add a project that you want to work on locally.
6.6. Editing a Local Project
There are a various tools for editing projects locally; for example:
-
Brackets (desktop platforms including Microsoft® Windows, and MacOS®) – support for Git and AsciiDoc – make sure to install the extension packages: Asciidoc Preview, Brackets Git, Markdown Preview
-
Textastic (iOS)
-
Markdown Plus – an online Markdown Editor (local versions for OS X and Windows as well)
-
mermaid – a simple online markdown-like script language for generating charts from text
6.6.1. Using the Brackets Editor
To open a local project using the Brackets editor, select “File” → “Open Folder”, then navigate to the local folder where the project is located, and select open.
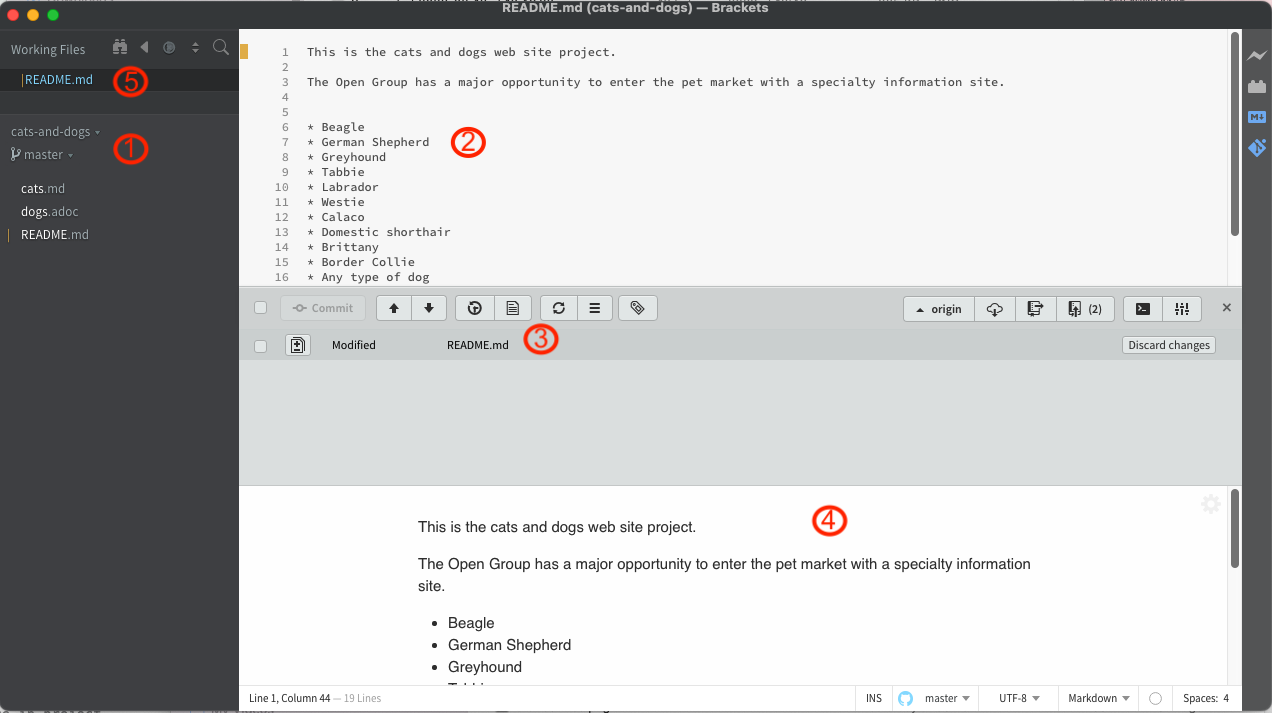
Brackets is a free text editor and development environment for use with Git-based projects. Figure 38 shows a typical screen layout with panes as follows:
| 1 | The project files pane |
| 2 | Open project files that are being edited, in this case the file has been modified |
| 3 | A git pane showing Changed files, that are Modified (in this case not ready to commit) |
| 4 | A preview pane showing the formatted output of the file being edited |
| 5 | A Working Files section showing the files that have been modified |