7. Using an Editor
In this chapter we look at the Brackets Editor and provide basic guidance on configuring and using it.
7.1. Why Brackets?
There are many editors available; we show the use of the Brackets editor since it is designed for use with Git, and can be configured to support AsciiDoc development. It is a lightweight, yet powerful, modern text editor, developed and supported as an open source project.
7.2. Installing the Brackets Editor
To install the Brackets editor, go to https://brackets.io and you should see a Download button.
On MacOS it follows the standard Mac package installation process. You download the .dmg package file. Once you have that file, you can click on it to extract the application and then drag the new application into your “Applications” folder.
7.3. Brackets Settings
You should adjust the settings as follows to support AsciiDoc development with the GitLab platform.
7.3.1. Choosing a Theme
To change the theme, go to “Brackets” → “View”, then select “Themes”.
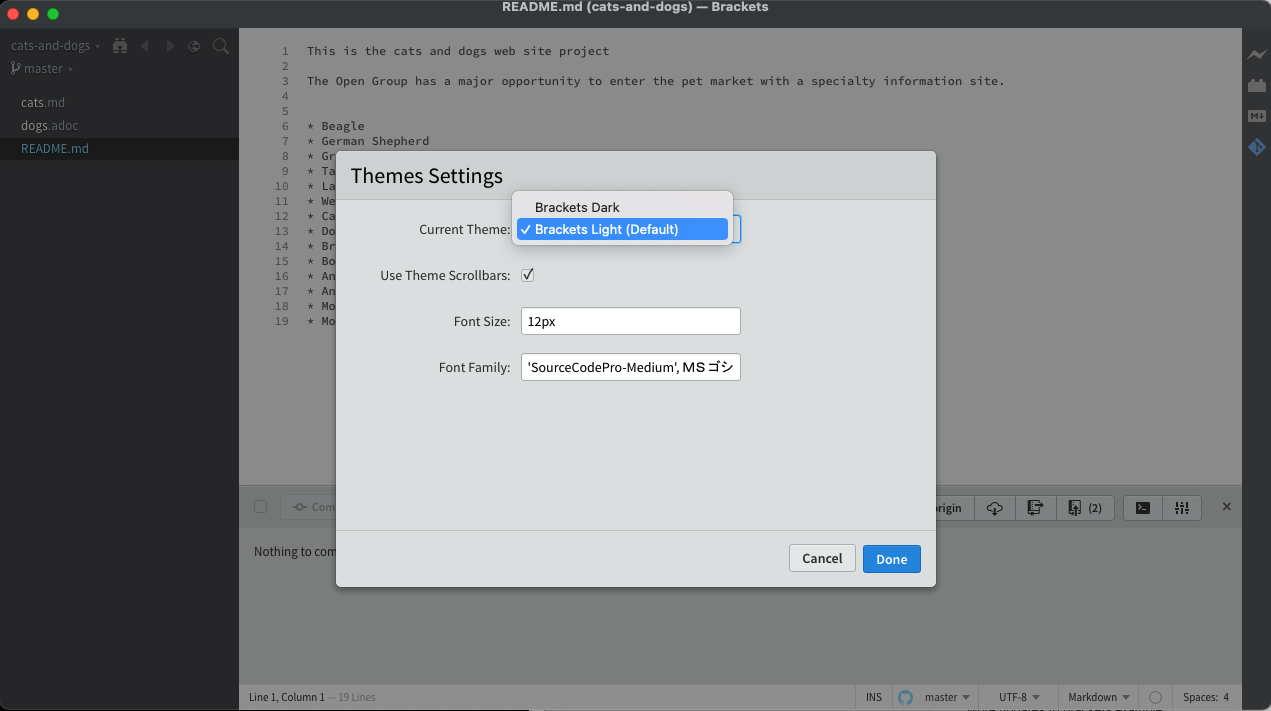
This allows you to toggle between “Brackets Light” and a “Brackets Dark” style of User Interface (UI) elements. It is also possible to install additional themes.
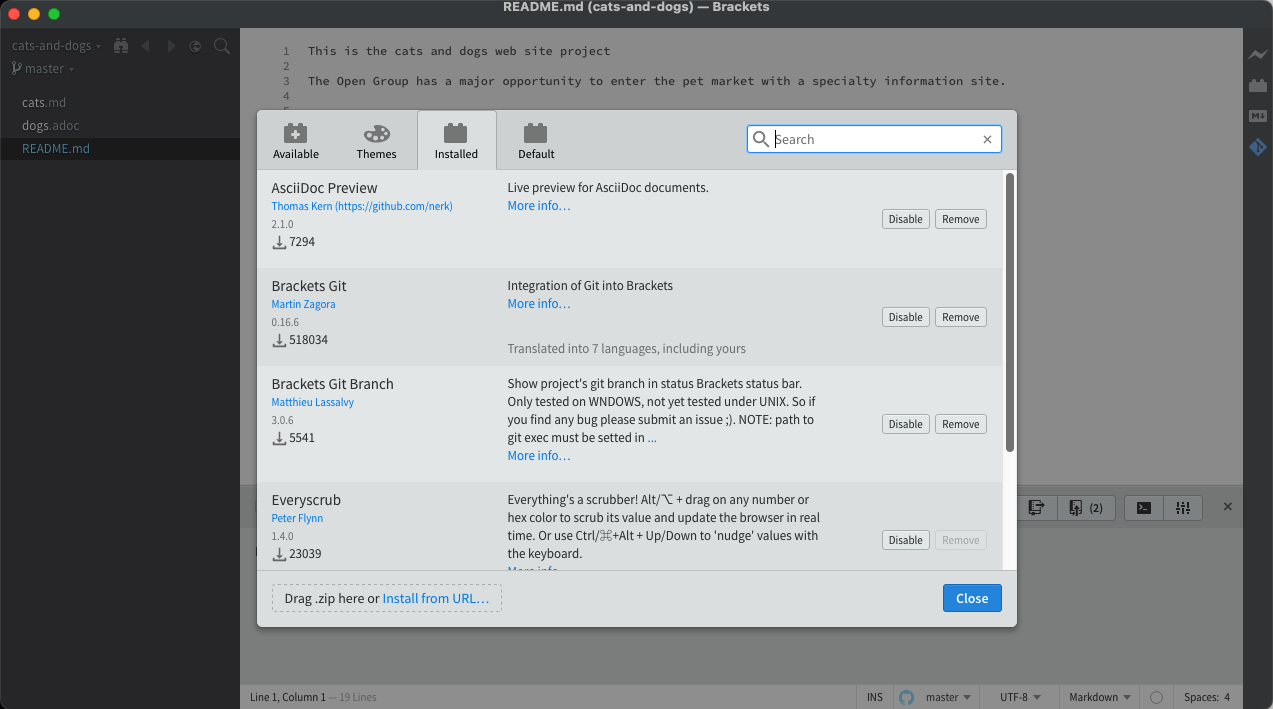
7.3.2. Installing Extensions
The final stage with the Brackets editor setup is to install some extensions to support the use of git and the AsciiDoc markup language.
Go to “Brackets” → “File” and select on the “Extension Manager…”:
| 1 | Type “asciidoc” into the search box |
| 2 | Click on “Install” for the Asciidoc Preview package; this will allow you to preview the rendered HTML of the AsciiDoc content |

Repeat to install the "Markdown Preview", "Brackets Git", and "Brackets Git Branch" extensions. Select the "Installed" tab in the Extensions Manager to view and manage installed extensions.
7.4. Working with a Project
In the previous chapter we had our first look at the Cats and Dogs project. We cloned the project so we could work on it locally (see Adding a Project Locally) and we opened it with the Brackets editor (see Using the Brackets Editor).
In this final section of this chapter we will make some changes to the project and commit them back to the repository.
7.4.1. Modifying the Cats and Dogs Project
Our task is to modify the dogs.adoc file to insert a descriptive lead-in sentence to the file, and also to add some more dogs. We have also to add a new file, with a list of other pets besides cats and dogs.
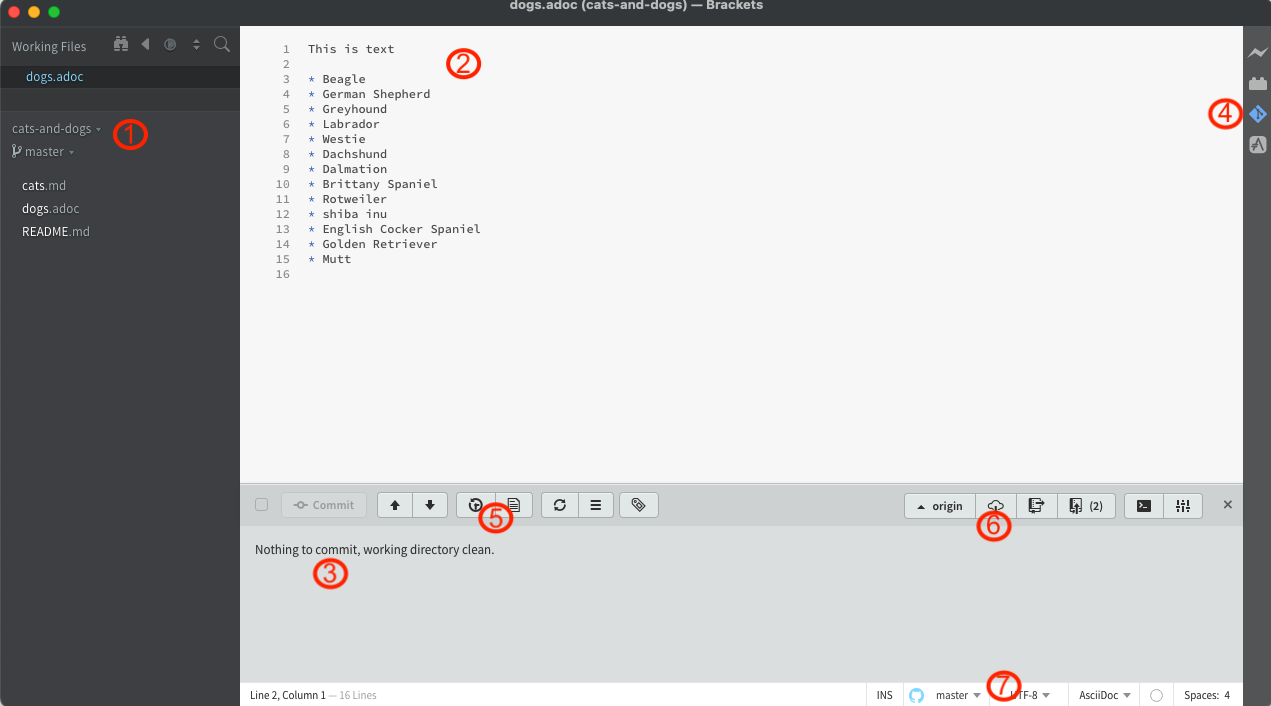
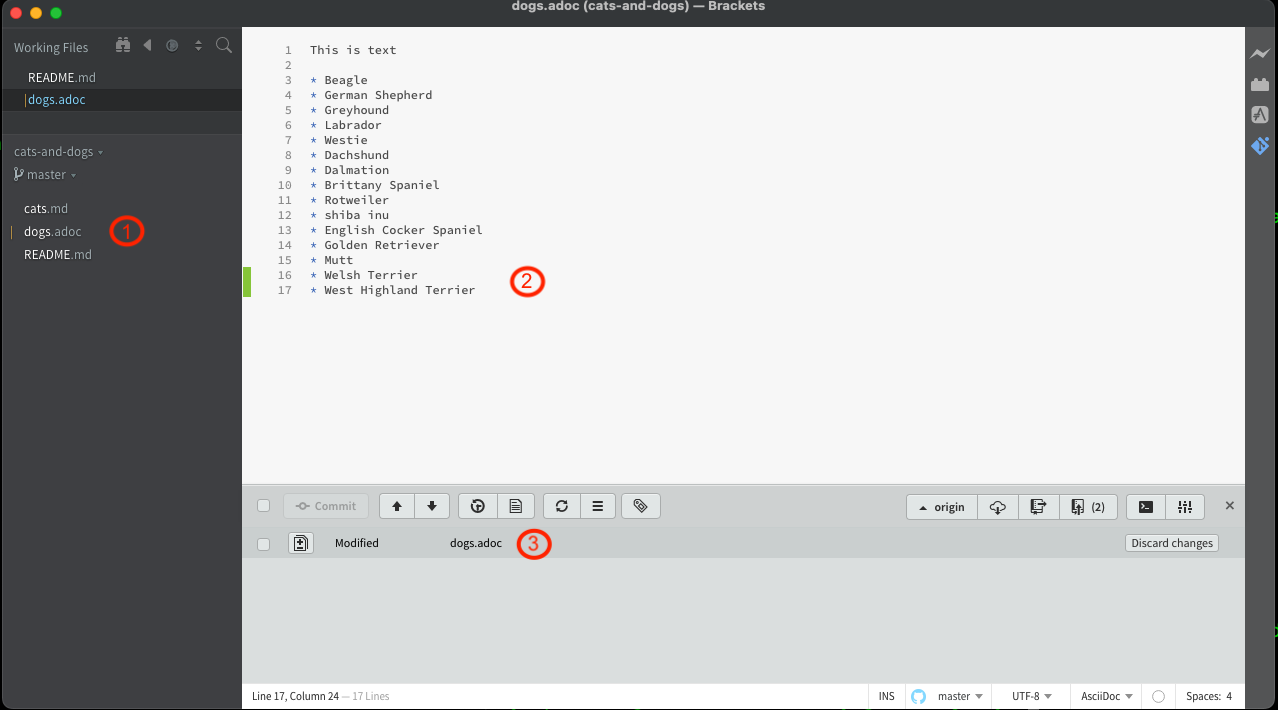
In Figure 42 showing the Cats and Dogs project:
| 1 | We have opened the project and clicked on the file dogs.adoc, the file is listed in Working Files |
| 2 | The file is opened in the editing pane |
| 3 | We have not yet modified the file so there is "Nothing to commit" in the Git pane; when files are modified they are listed in this panel, and if you click on a modified file you can see the changes in a popup, you can then choose to commit the file or discard the changes |
| 4 | The right panel has a number of links to bring up the Extensions Manager, toggle the git panel, also the AsciiDoc Preview panel. |
| 5 | The Git panel has a number of options, the most useful being able to show commit history for the project and the file |
| 6 | The Git panel has an icon to fetch updates from the repository ensuring your local copy is up to date |
| 7 | The bottom bar shows the branch and the file type |
We can then modify the dogs.adoc file by typing in the editing pane and then, by typing cmd followed by s (assuming we are on MacOS), saving the file. At that point we can then see in Figure 43:
| 1 | The “Project” pane highlights that the dogs.adoc file has been modified within the cats-and-dogs folder, and also lists it in the working files that have changed locally |
| 2 | We edited in the central pane to insert two additional dog breeds on Lines 16 and 17 |
| 3 | The file dogs.adoc is listed in the git panel as Modified |
At this time all the changes are local.
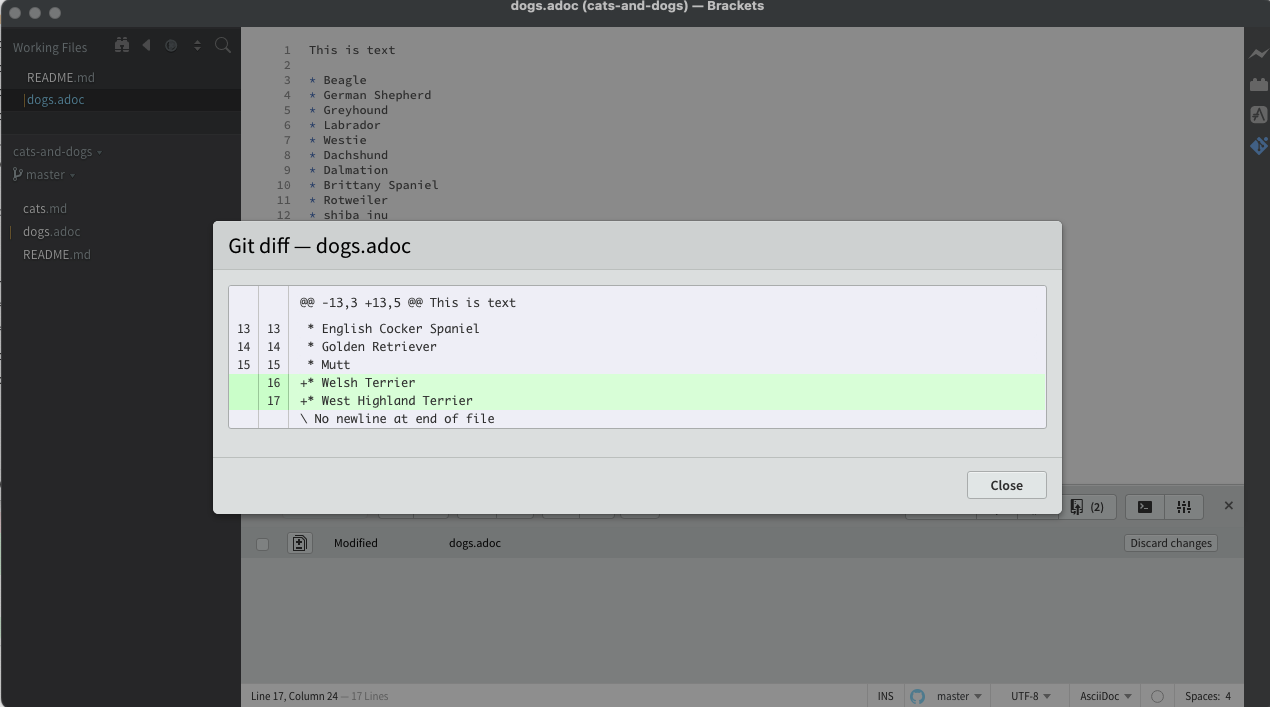
If we click on the +- icon in the Git panel, the popup will show the differences as shown in Figure 44. This is a way to review changes before staging and committing.
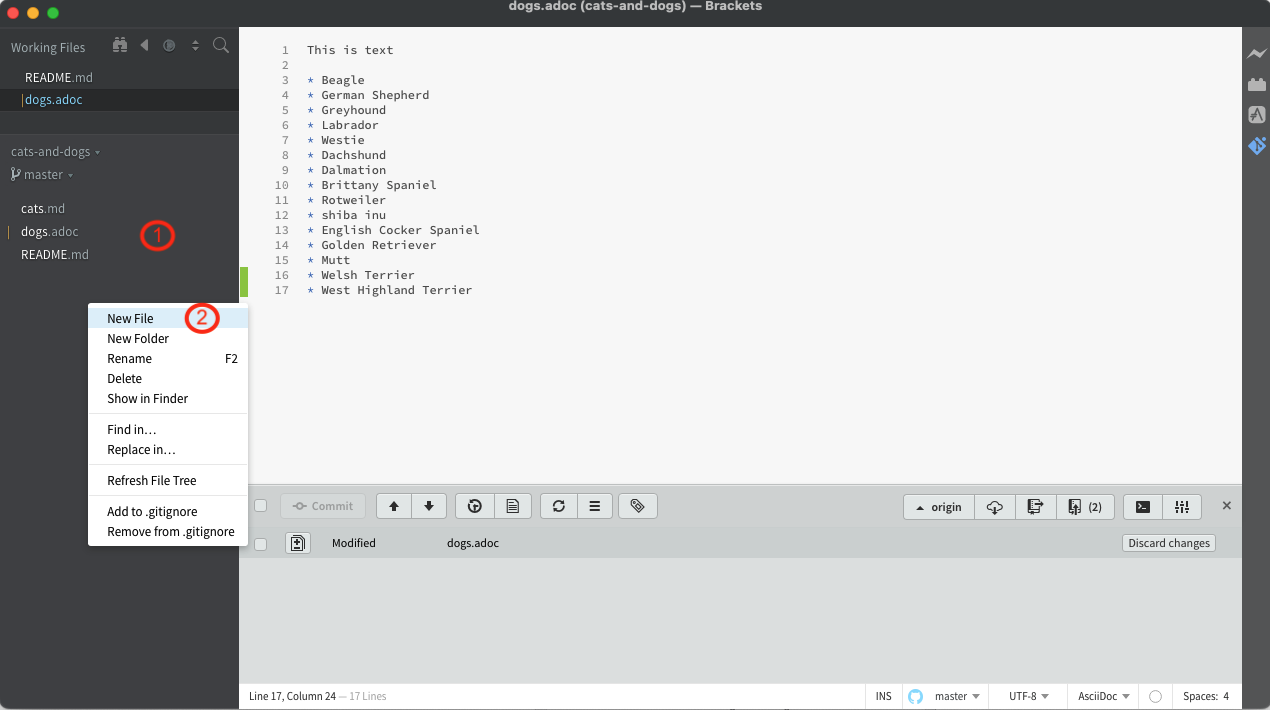
Now we will add a new file containing a list of pets other than cats and dogs.
To do this:
| 1 | Right click in the “Project” pane; this will bring up a menu of options |
| 2 | Select the “New File” option |
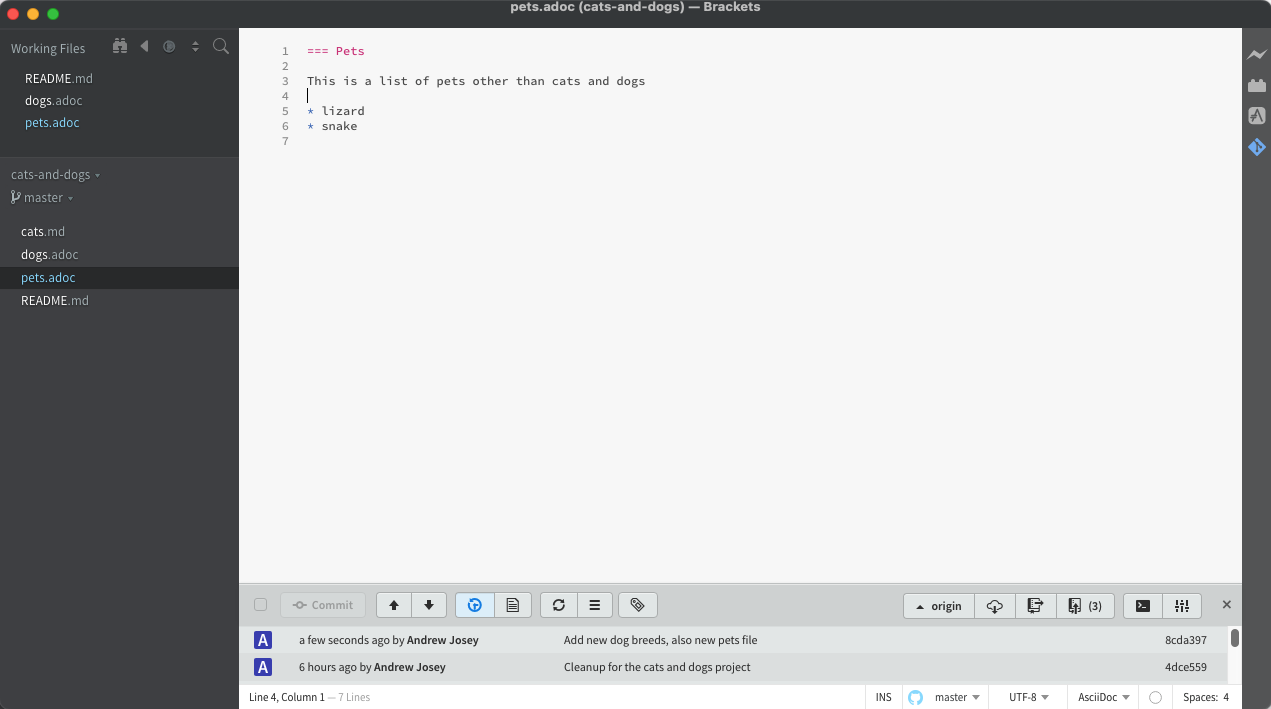
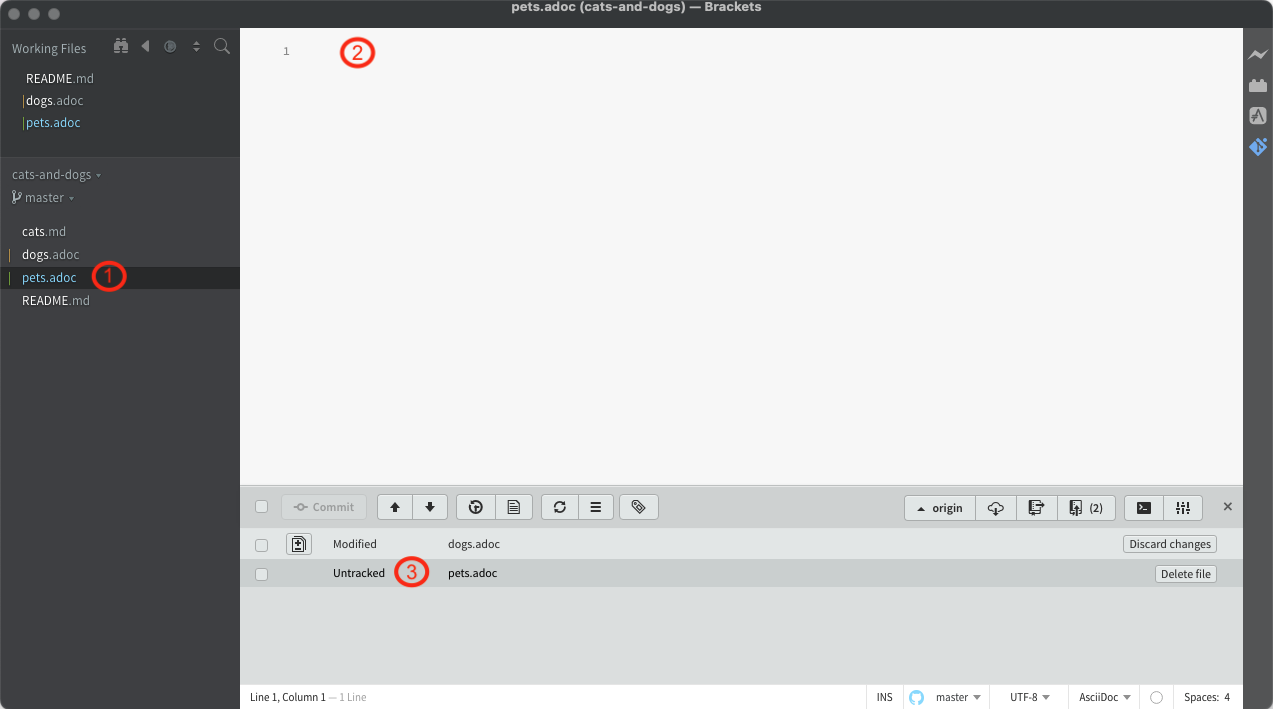
A file entry appears in the left panel (initially Untitled-1 in this example) where you name the file pets.adoc, as shown in Figure 46.
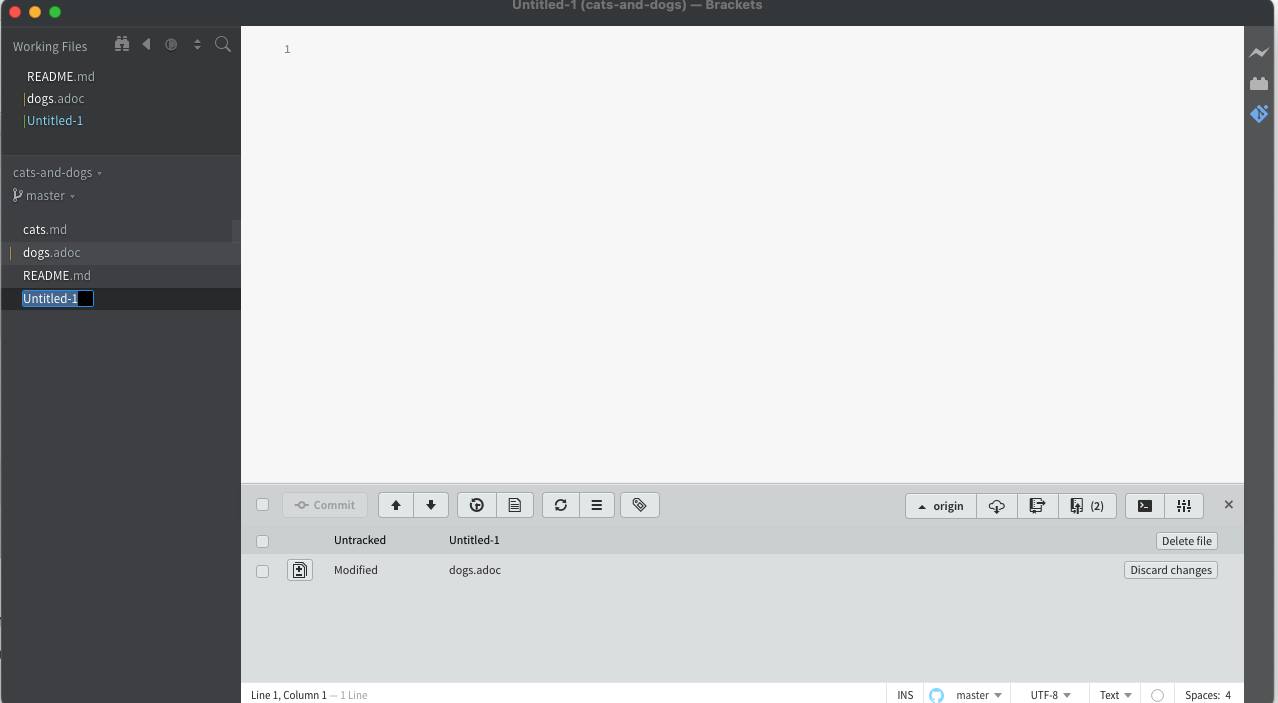
Hit return and then the file is added and opened in the central pane:
| 1 | The new file is highlighted in a different color to a modified file |
| 2 | The new file is opened for editing |
| 3 | The new file is added to the Git panel and listed as "Untracked" |
We then make the changes to the new file. We also toggle on the AsciiDoc Preview option in the right panel, as shown in Figure 48:
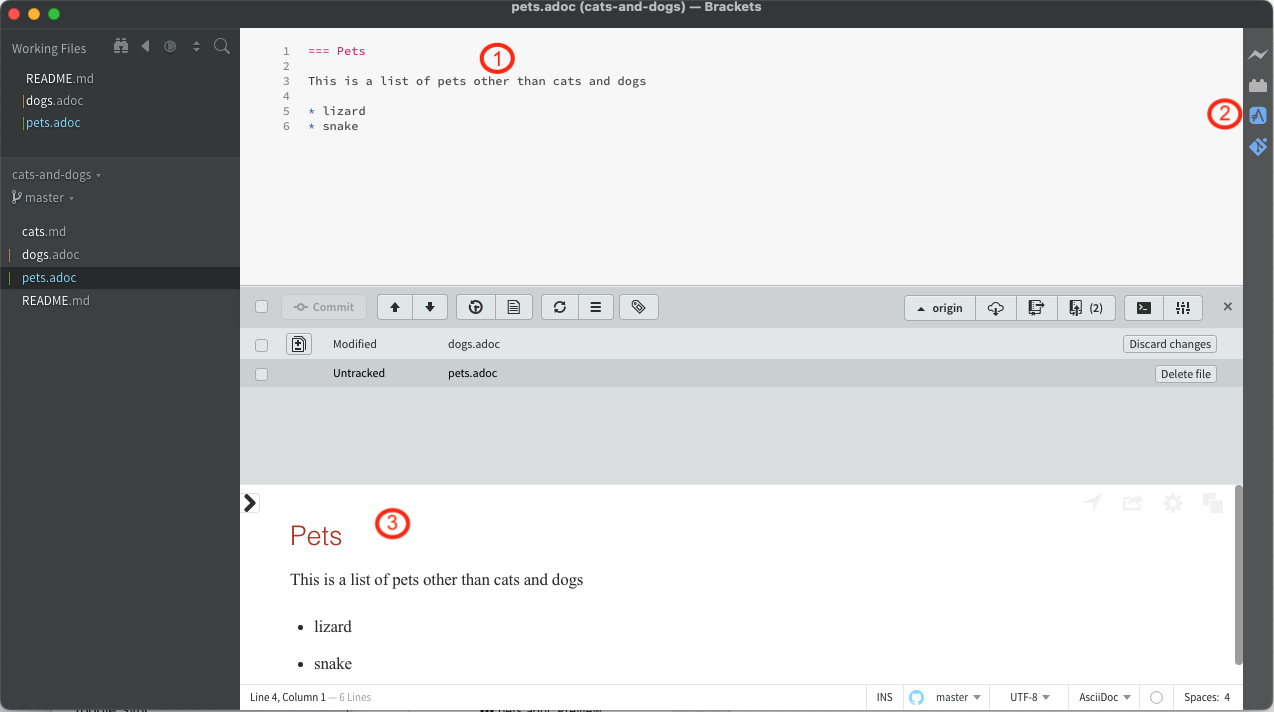
| 1 | We input content and save the file |
| 2 | We toggle on the preview pane, which appears at the bottom of the Brackets window |
| 3 | We review the output in the preview pane |
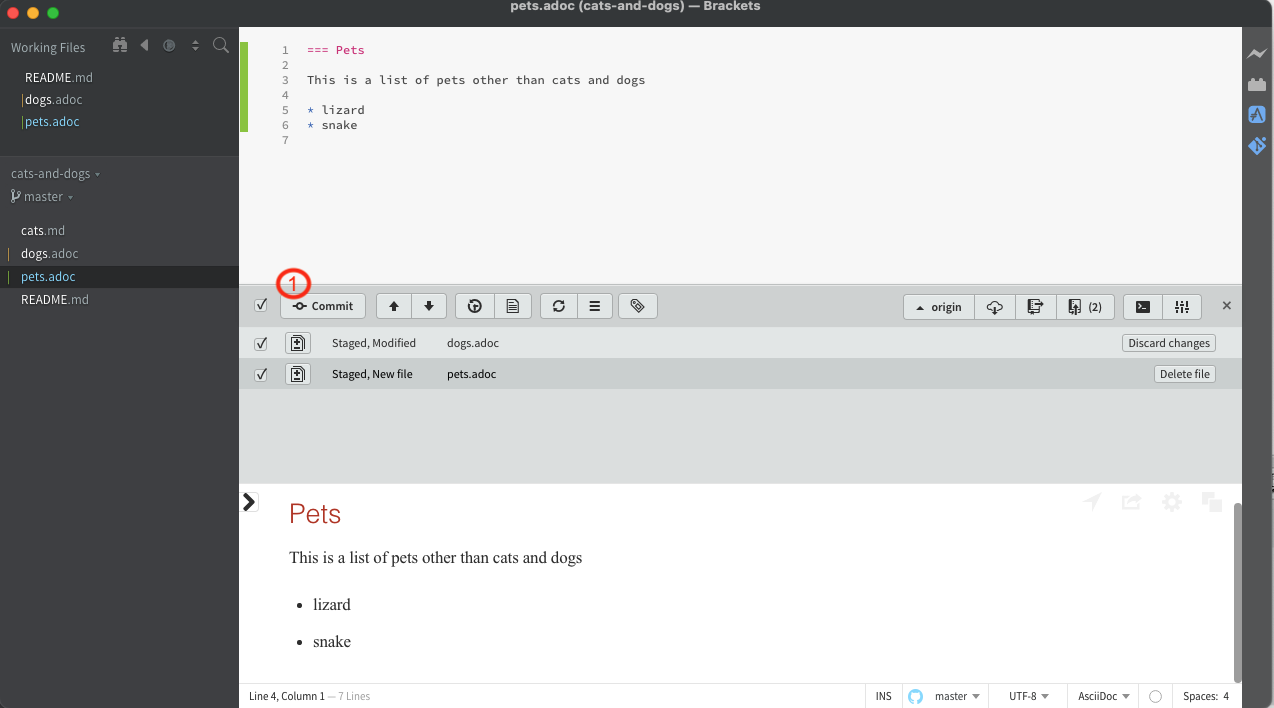
We then prepare to commit all the changes to the repository
| 1 | We select the tick next to "Commit" in the Git panel to denote we are ready to commit them back to the repository. The screen shows these are now Staged, which means ready to be committed to the repository. |
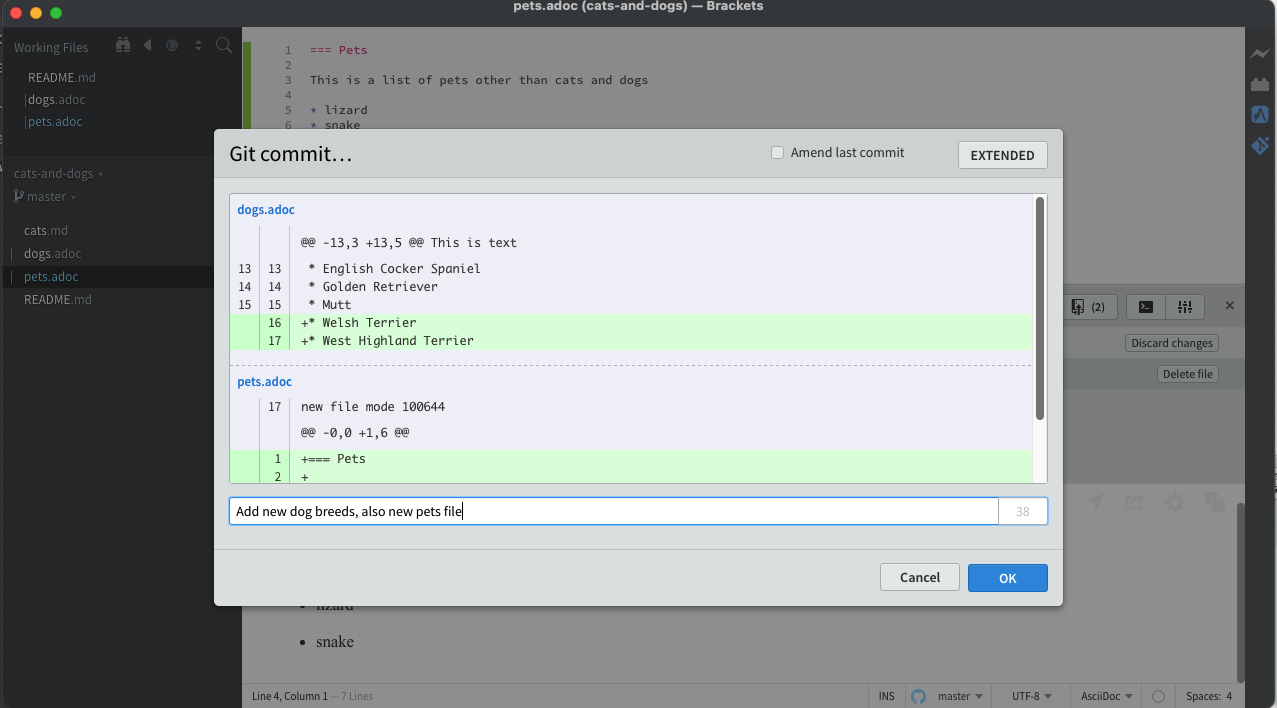
We then click the Commit button and a popup appears that allows you to preview the changes, and enter summary text for the commit. You then select OK to commit from the local copy to the repository.
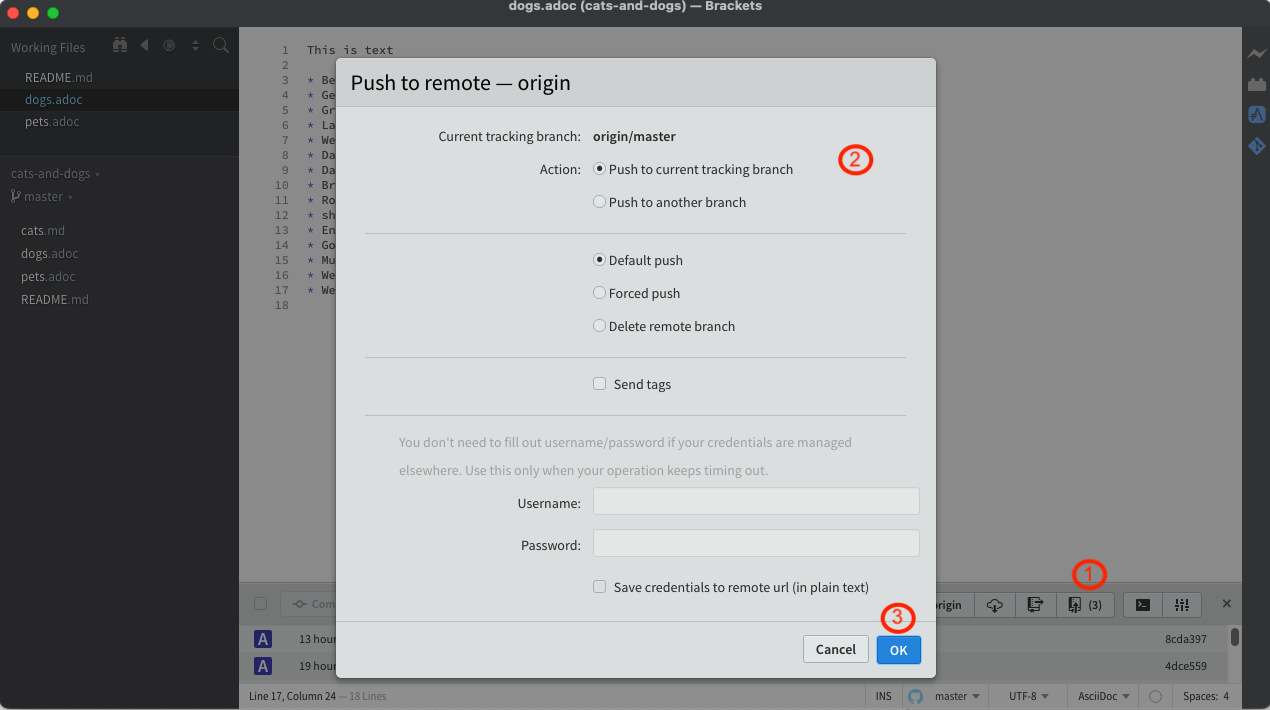
We then need to push the changes back to the repository.
| 1 | We click the Git Push button which shows the number of changes |
| 2 | A popup appears and you can review the branch for the push (this can be left as is in this example) |
| 3 | We then click OK |
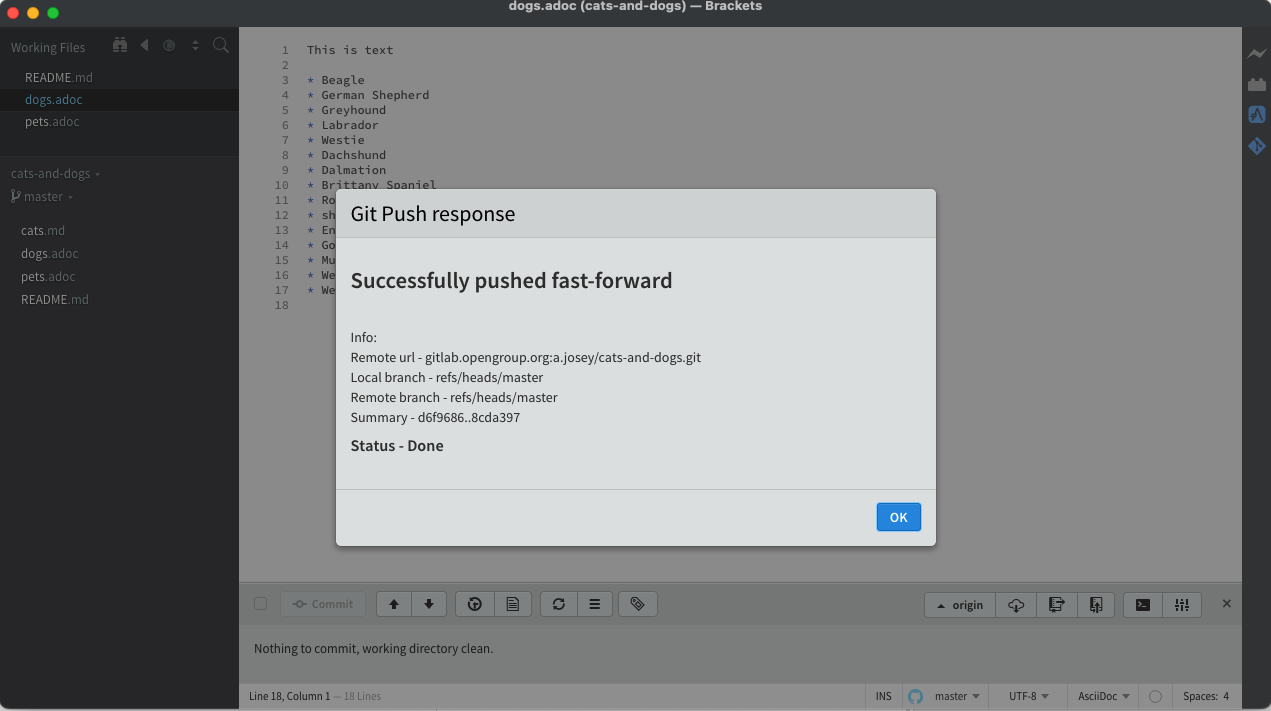
The popup will show the push in progress, then a completion message.
If you then select the Show History button in the Git panel you can see the history including the commit.