9. Collaborative Working
In this chapter we look at ways of working collaboratively in a GitLab project.
GitLab allows multiple users to be developing a document at the same time. This potentially can lead to coordination problems. There are a number of ways to manage the coordination, with different approaches depending on where you are in the document development timeline.
Document Structure
Document structure is a key factor to support distributed development. If a document is a single file, then the coordination is going to be difficult, in many cases relying on knowing who has the “editorial pen”, and application of manually-generated changes to the single source.
Splitting a document into multiple files, based on chapter divisions, with the possibility to go beyond that to sections within chapters allows for individual pieces to be edited by different users simultaneously, and largely independently of each other.
Use of Branches
Using the GitLab capability for users to create separate branches of the document, which are essentially private copies, allows for proposed changes to be created, reviewed, revised, and agreed, prior to merging back to the master source of the document.
9.1. The Document Tree
First, and most important, if you haven’t done so already, familiarize yourself with the current draft document, and the way it is organized in the repository.
You should become familiar with the Repository, Issues, and Merge request links within the web browser view.
9.1.1. The File Tree
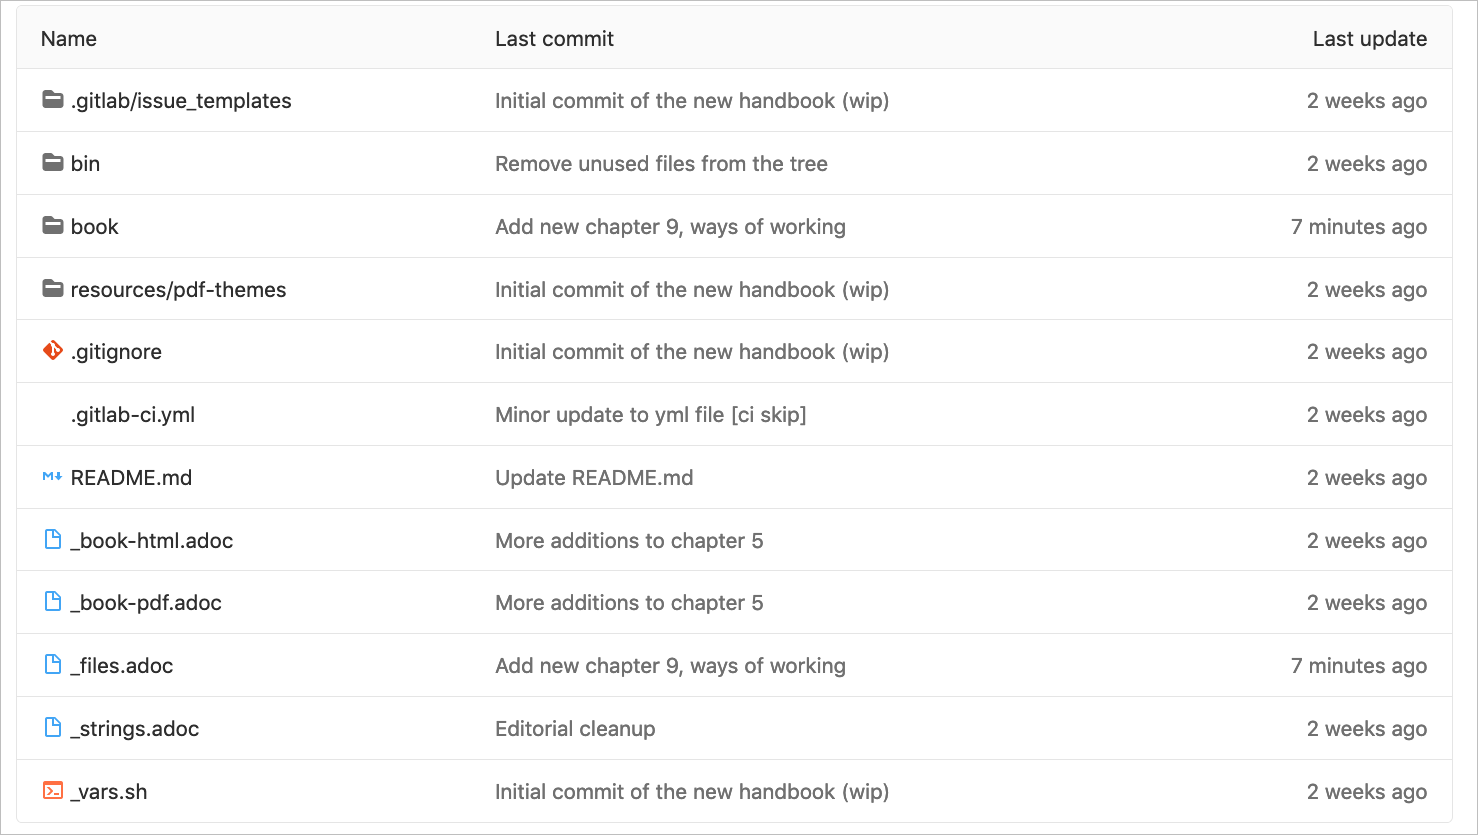
You can browse the file tree under Repository→ Files.
In general, files beginning with underscore (_) and dot (.) are configuration files. They may need to be tailored for the document. Files with suffix .sh are system scripts used by the build system. Files with suffix .adoc are AsciiDoc files.
We will only consider the manipulation of the AsciiDoc files in this document. Manipulation of shell scripts and advanced document configuration are either handled by the editorial team or the project maintainer.
The top-level file tree typically looks as shown in Figure 57:
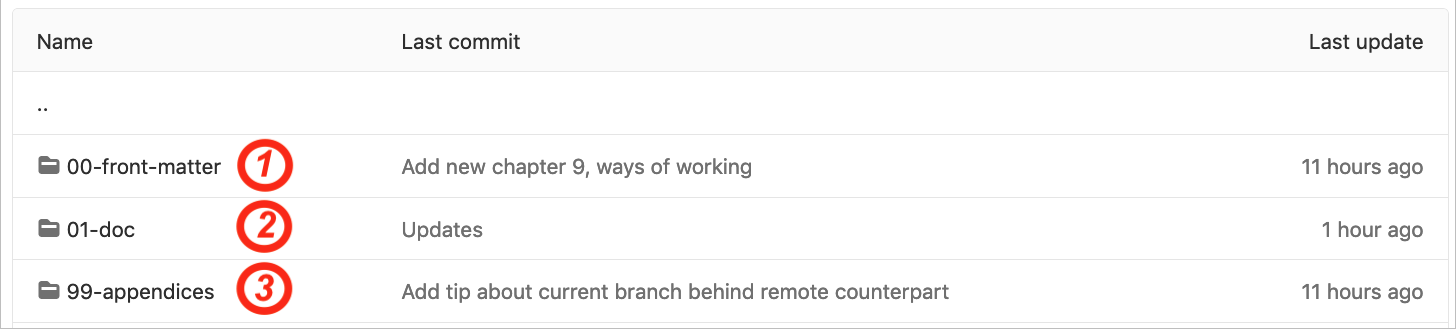
The source for the document is developed in the book directory, as shown in Figure 58.
The book directory is divided into three main directories:
| 1 | 00-front-matter: frontmatter files, such as the preface |
| 2 | 01-doc: the main document contents |
| 3 | 99-appendices: the appendices for the document |
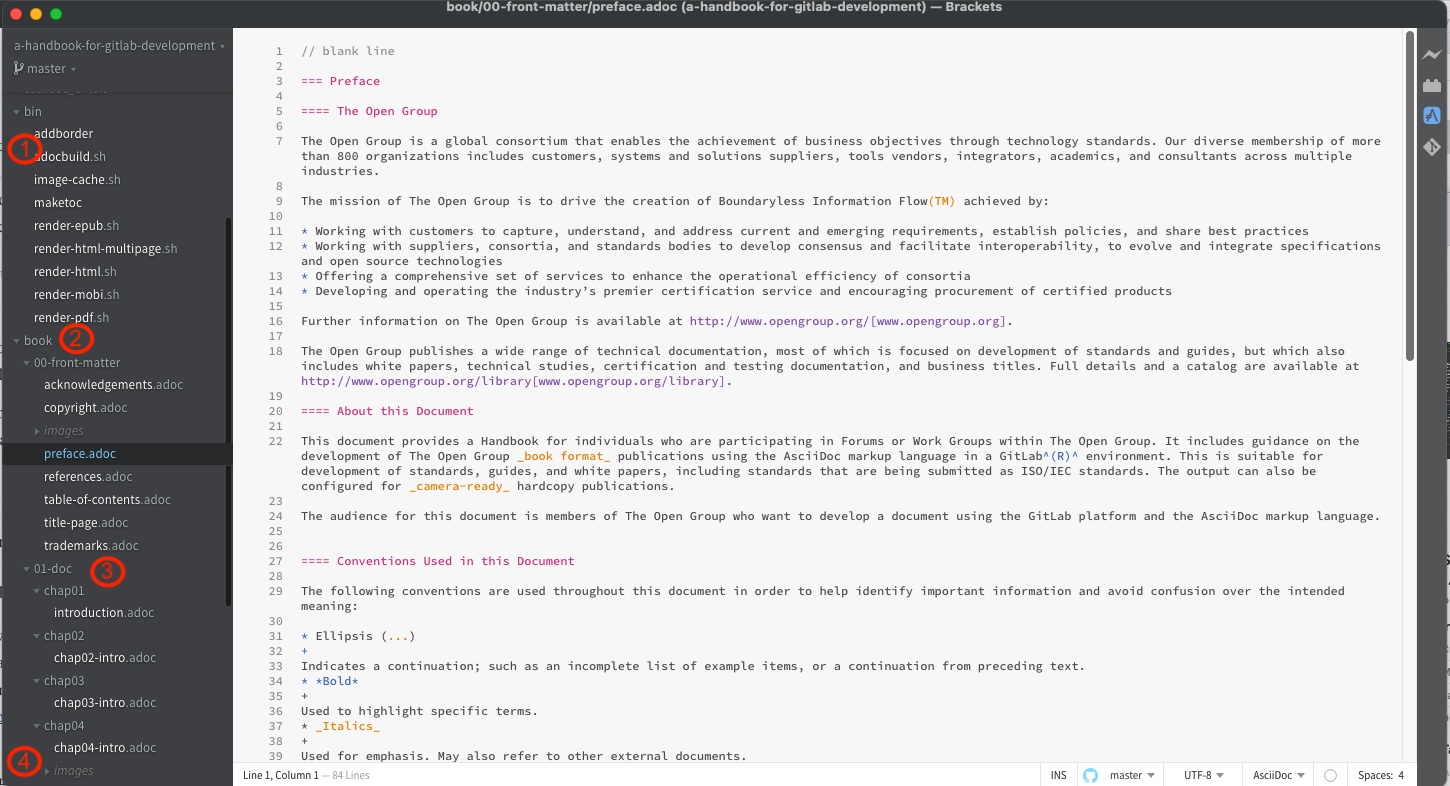
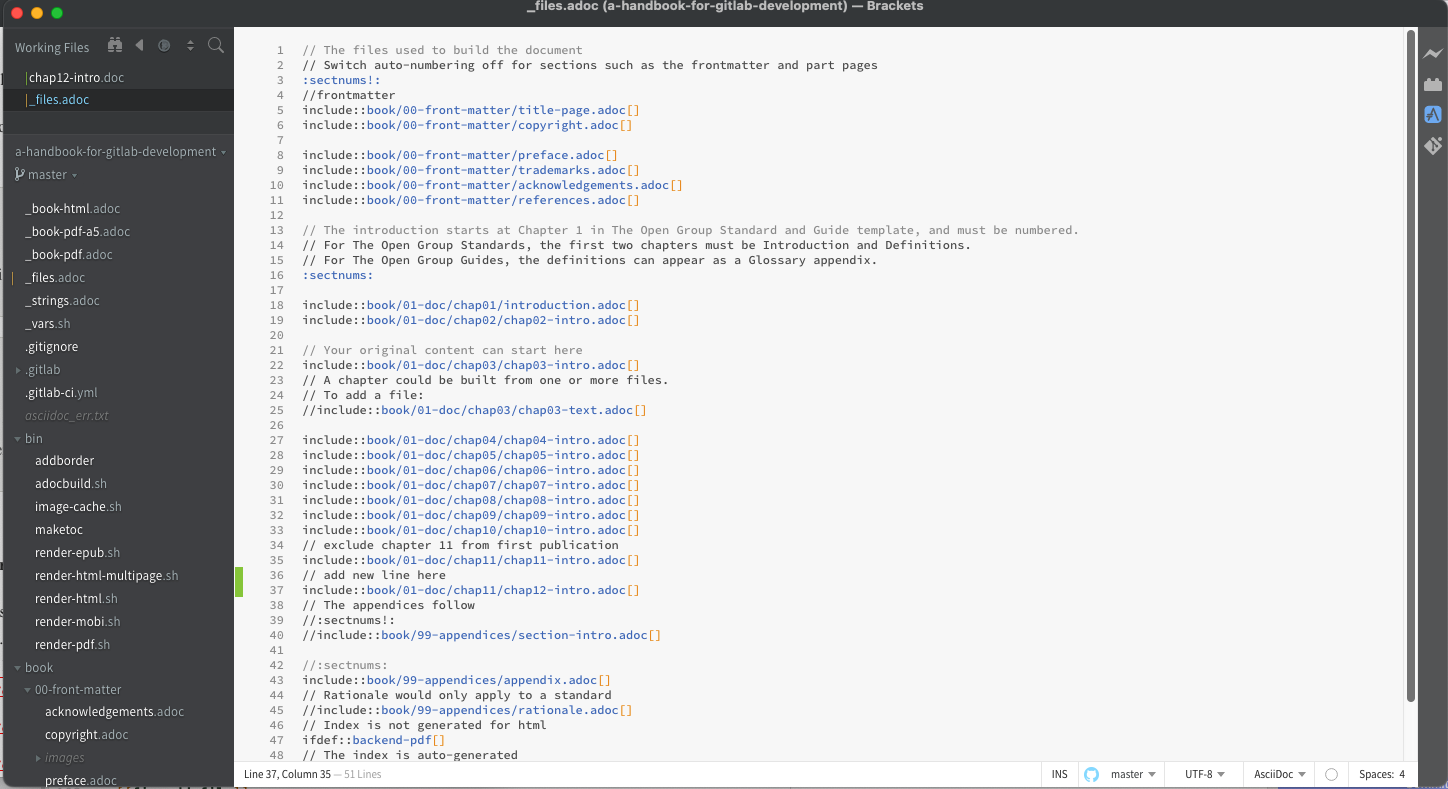
A typical file tree is shown in the left pane of the Brackets editor as seen in Figure 59.
Contents of the file tree are as follows:
| 1 | The bin directory with system scripts used to build the document |
| 2 | The book directory containing the document sources, a series of directories for sections, and chapters of the document
The frontmatter of the document is in the 00-front-matter directory; files that need updating here are the acknowledgements, preface, and references. |
| 3 | The main body of the document is in the 01-doc folder, with a subdirectory per chapter
Chapter directories are named chap01, chap02, …, chapNN. |
| 4 | For each chapter of the document, if there are images they are placed into an images directory within the directory |
9.1.2. Adding a New Chapter
To insert a new chapter, either enter the “Web IDE” or use Brackets to add a new folder and files within the 01-doc directory.
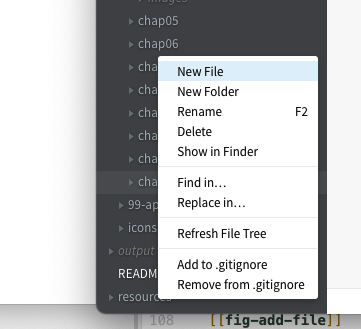
In Brackets, right click on the 01-doc directory, and select “New folder”.
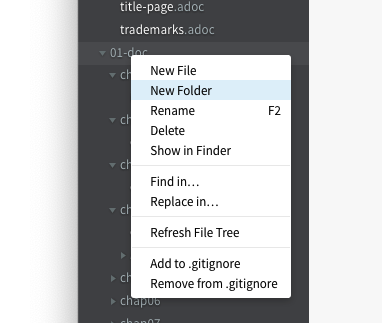
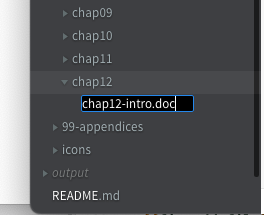
An untitled folder appears, where you can overtype the folder name to be added, in this example chap12.
Next we add the file within the new folder.
In Brackets, right click on the chap12 directory, and select “New File”.
An untitled file appears and in this example we overtype with chap12-intro.adoc, following the naming convention.
To have this new chapter appear in the document we would then also edit the top-level file _files.adoc and add it after chap08-intro.adoc.
If the chapter includes images, then they should be placed in a local images subdirectory within the chapter directory. A convention is to initialize the images subdirectory with an empty file x, otherwise Git will not commit an empty directory (it only commits files).
9.2. The Collaborative Work Flow
It is recommended to adopt a standard work flow for collaboration (which was shown in Chapter 5).
We recommend the work flow: issue → branch → merge request.
Raise or Assign the Issue, Create Branch
-
If there is already an issue that covers your idea, then assign it to yourself and start a branch with your document edits; if not, create an issue, then continue as before with a branch; for example, see Section 5.4.1 and Section 5.4.2
Make Propose Changes on the Branch
-
Make your edits in your branch in the AsciiDoc source files
Create a Merge Request
-
Once you have finished your proposed new content in your branch, you can do an initial check of the build, and then create a merge request; for an example, see Section 5.4.4
Small editorial changes (non-technical issues), such as correcting a spelling mistake, punctuation, and grammar can be done simply as an edit to the master branch.
Review the Merge Request and Obtain Consensus
A review should then be held on the merge request to achieve consensus on whether to apply the merge; for example, see Section 5.4.5.